Copper hair [1] is nothing new, but it's certainly caught the attention of everyone in Hollywood and has since trickled its way into almost every Instagram hair account as well as everyday life [2]. After seeing Julianne Hough debut the hue [3] last year, I pledged I'd follow suit and give it a go myself.
I did my research, which consisted of creating a hair inspiration board on Instagram, and called in the professional I truly trusted with such a major hair makeover, Jack Howard [4], colourist and balayage expert at London Paul Edmonds Salon [5]. And boy, was it a transformation. Going copper is no easy feat: it requires time, skill, and money. It's not a quick colour you can box dye at home, and you need to be prepared for upkeep, but more on that later. I'm here to convince you why you should go for it if you're considering the copper hue.
Ahead, get a step-by-step look at how Howard transformed me into a fiery copper-haired superhero in all the best ways.
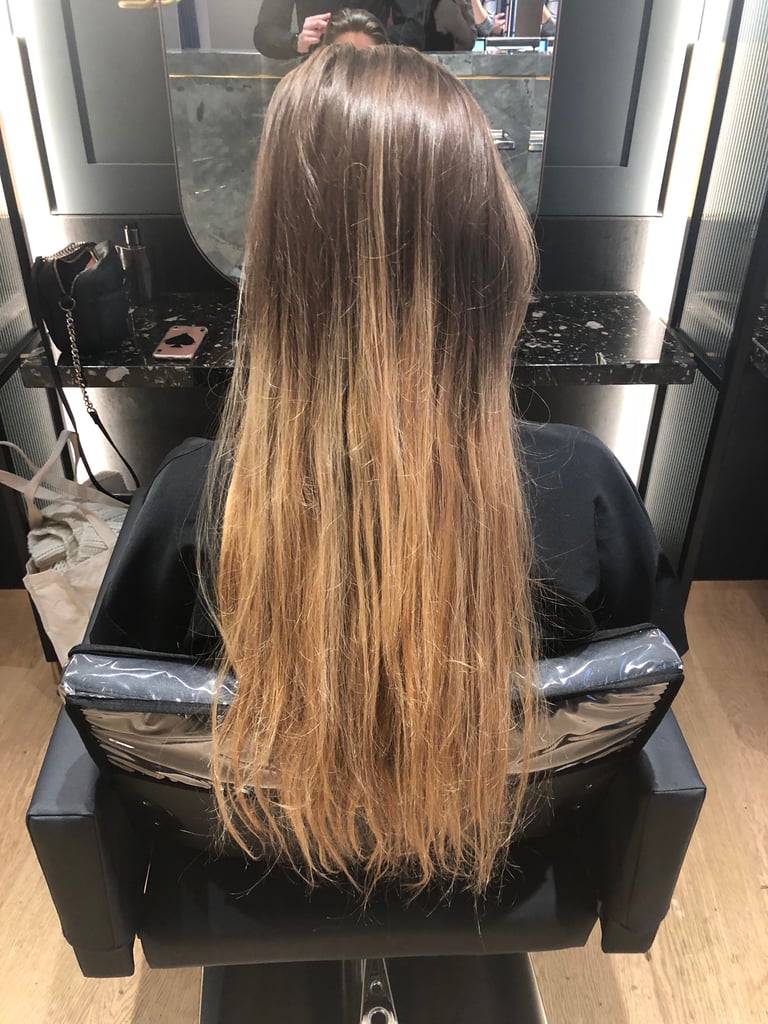
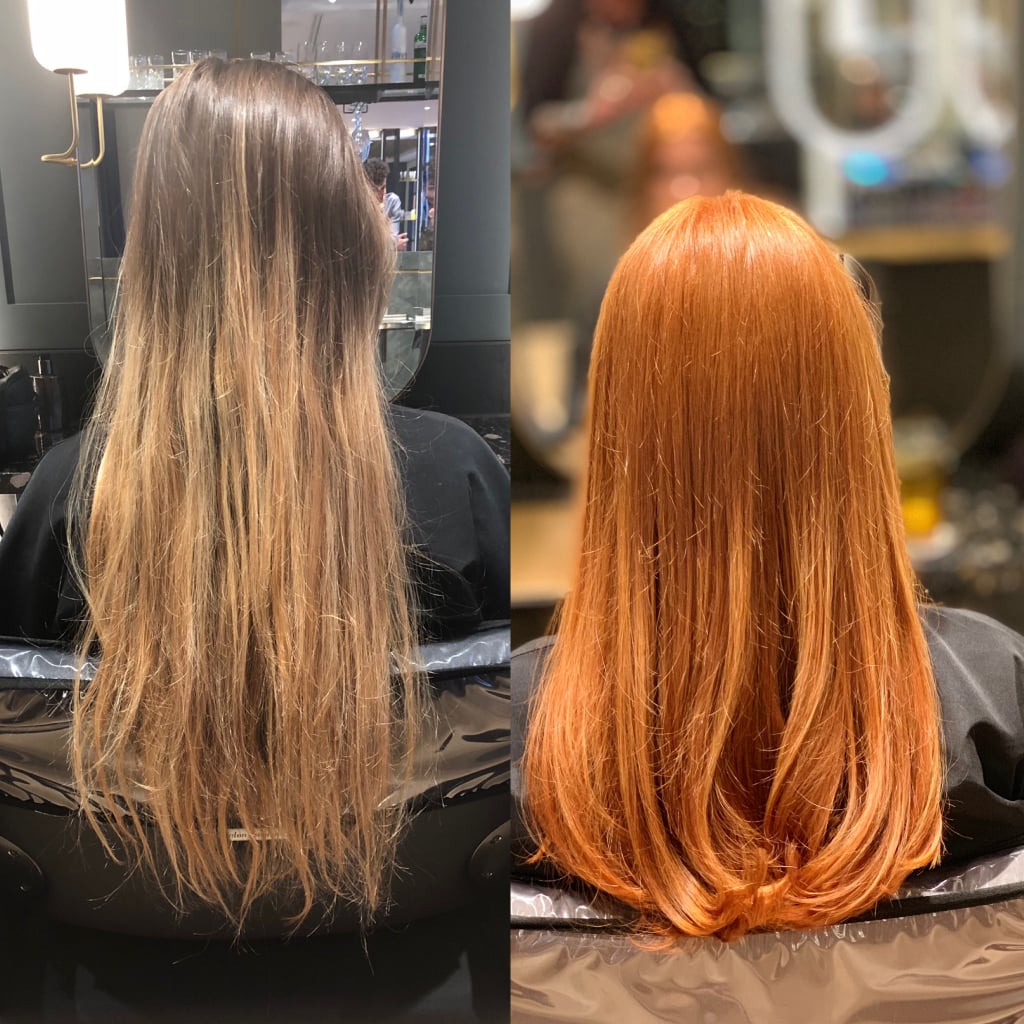
Before
I went into the salon knowing my hair wasn't in the best condition, but I thought, "how bad can it be?" Then, I saw my before photo. I hadn't dyed it in 18 months, but thanks to Howard's incredible California balayage [6], it needed little maintenance; however, I'd only gotten light dusting cuts twice in that time. It was in need of a colour refresh and major chop.
Step 1: Precolour Phase
Before getting into the process, Howard insists on having a consultation and patch testing before an appointment. The consultation means the colourist can assess exactly what the desired outcome is and manage a client's expectations. Patch tests avoid any allergic reactions, because that's the last thing you want to leave the salon with.
Howard explained that the condition of your hair and whether it's previously been coloured will determine how many stages it will take to get you to copper. Virgin hair (hair that has never been coloured) needs fewer stages and probably won't need the precolour stage. If you have darker dye all over, the buildup of colour will need to be removed with prelightening, which is a slightly longer process.
Step 1: Precolour Phase
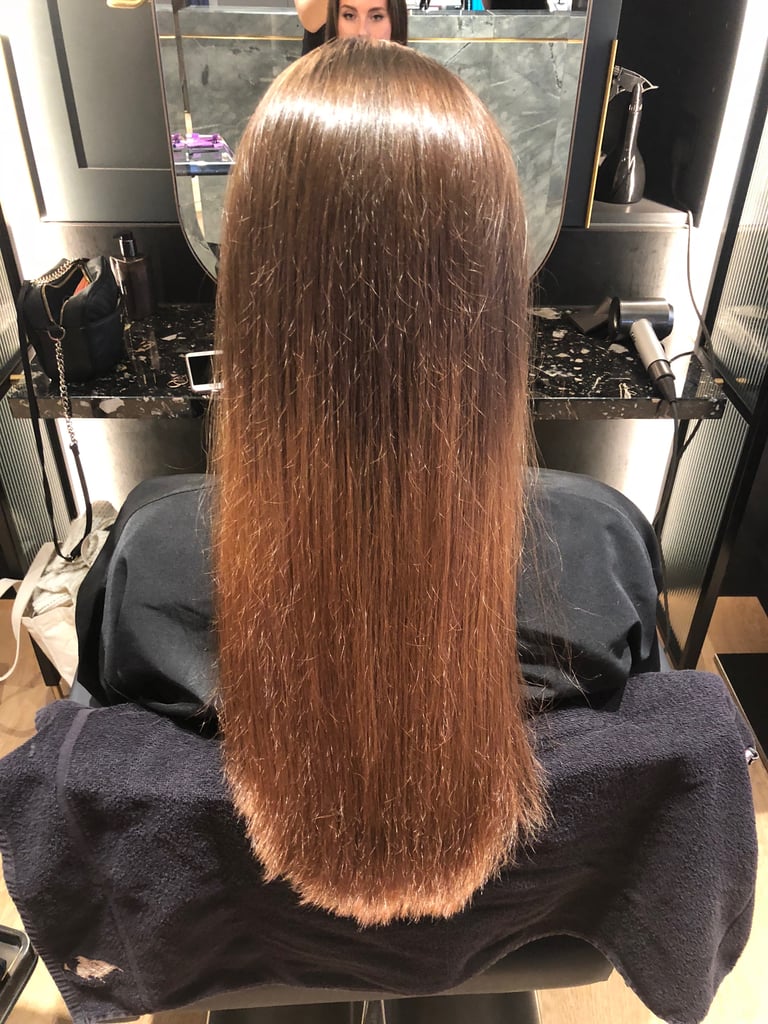
As my hair had balayage prior to colouring, Howard needed a precolour phase to get my whole head the same colour so the results look even. If you have prelightener (bleach) in your hair, this prefill work puts darker pigment back into the hair and is vital. This is the step that ensures the hair doesn't veer into a muddy colour and prevents the new colour fading. After letting it process for 20 minutes, the hair is washed and roughly dried.
Step 2: Copper Colour Process
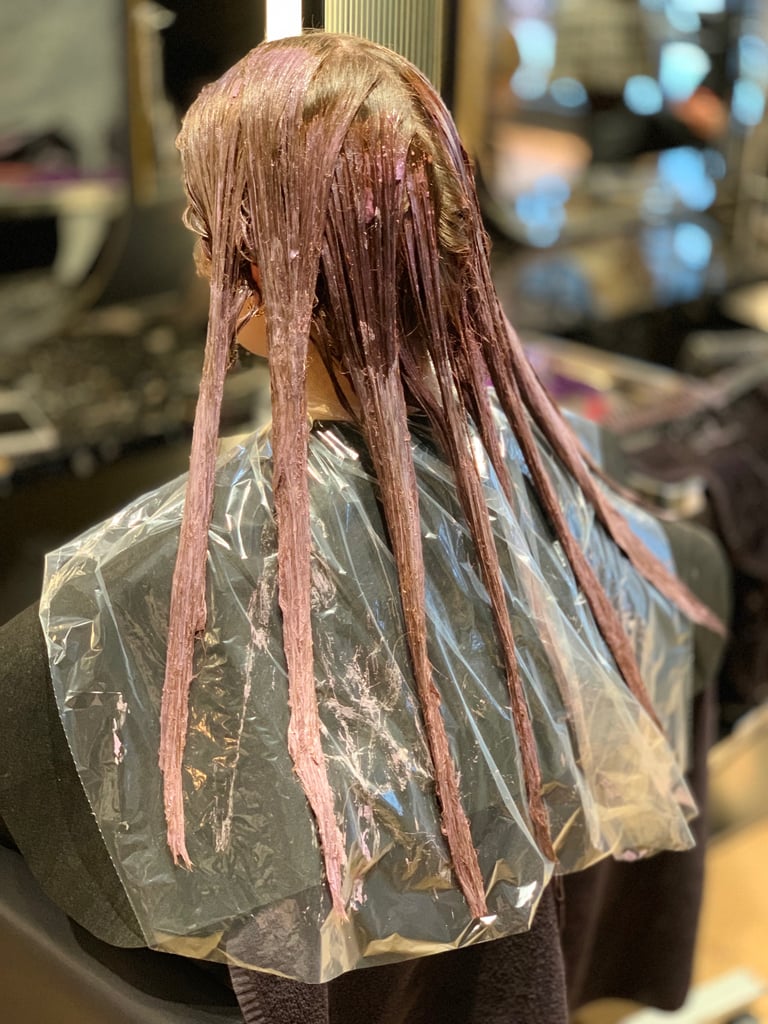
Next up is applying the copper colour. Howard added the desired hue we'd discussed in my consultation — a Julianne Hough/Madelaine Petsch [7]-inspired vibe that wasn't too vibrant for my skin tone with threads of slightly lighter balayage pieces throughout to frame my face. He applied the dye to the midshaft and the ends of my hair first, which he let process for 35 minutes.
Step 2: Copper Colour Process
Then, he coloured my roots and I was left to marinate (a nontechnical term I like to use) to let the copper colour process. Howard did the roots last to avoid "hot roots," or roots that "glow," which avoids the colour from looking unnatural.
Step 3: Admire the Vibrant Hue
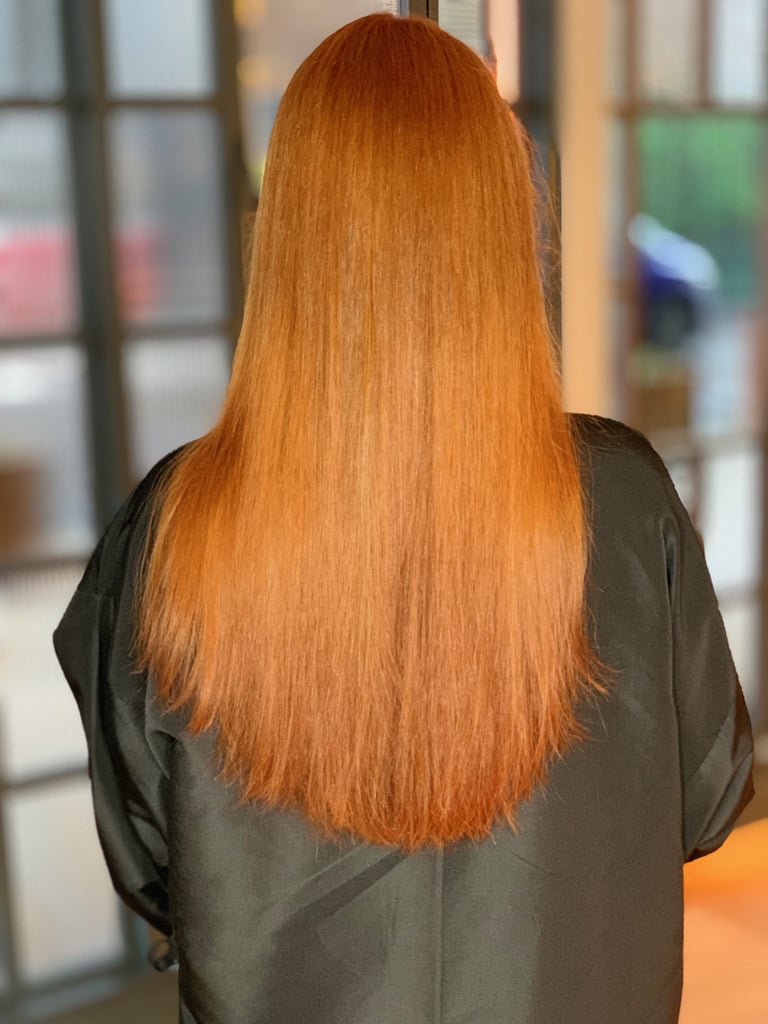
Once the colour was washed out and roughly blow-dried, we admired the vibrant hue in a ring light. But the dye job wasn't over yet . . .
Step 4: Balayage
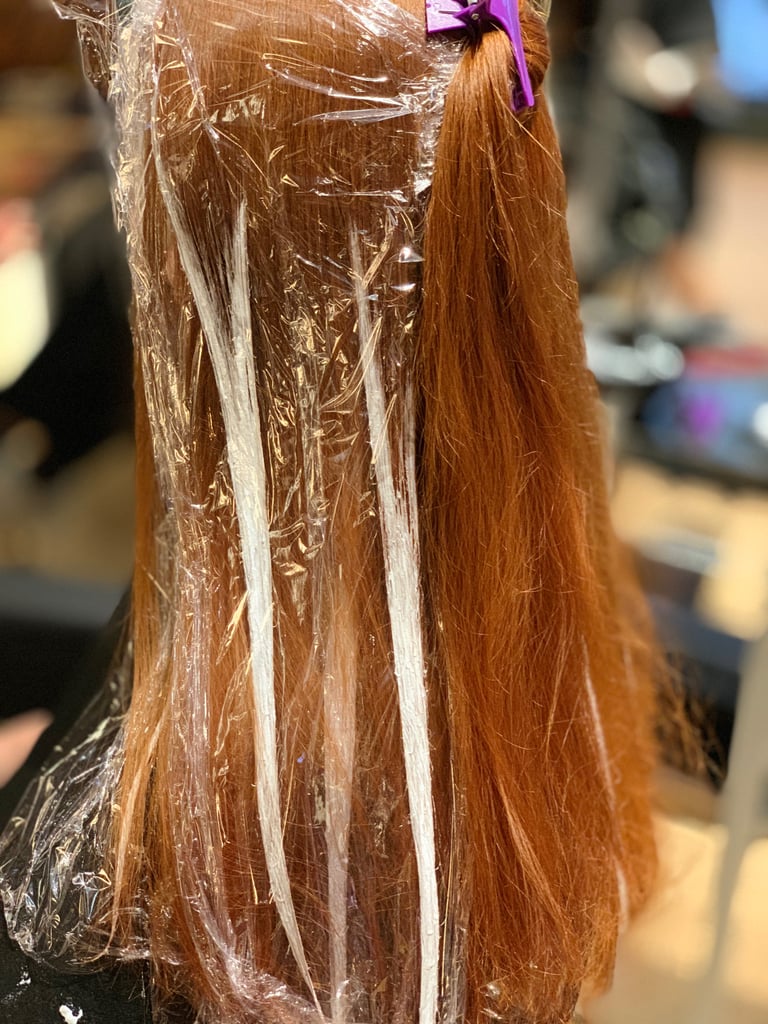
Since Howard is the king of balayage, he wanted to add some dimension to the copper colour by adding small pieces of lighter balayage throughout. He says this process is bespoke to each client — he looks at where the hair falls and adds pieces throughout the back of the head and around the face to frame it.
Step 4: Balayage
In total, he added 10 pieces of balayage colour throughout my hair.
Before and After
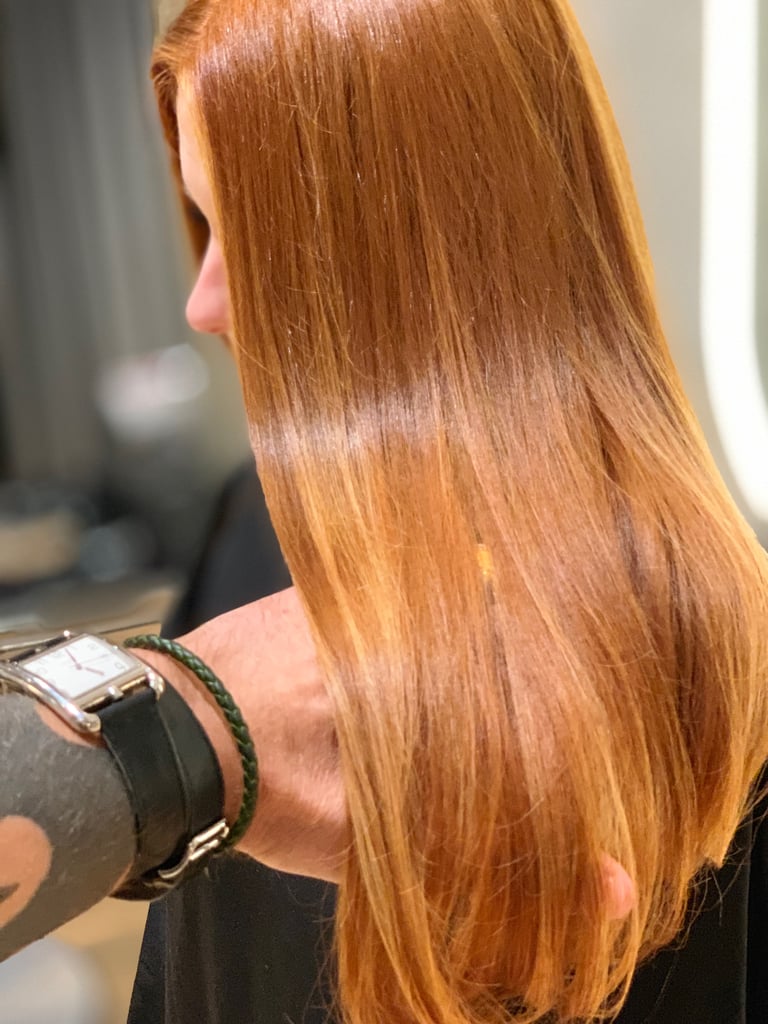
After another wash, cut, and blow-dry, my hair was finally finished, and not to be too dramatic, but the results blew my mind. Not only was it vibrant and fun, but it was also glossy as hell and suited my skin tone perfectly, thanks to the correct copper hue and cleverly placed balayage pieces. The process in total from when I sat down to blow-dry and finish took around five and a half hours, so it's definitely a job to clear your schedule for. Initially, I thought the new colour would be a total shock to the system, however, it suited my skin tone so perfectly that I kept telling Howard I didn't look that much different. The length actually was more shocking because I now have to learn how to style it (the most styling I used to do was sleep with it damp).
Howard created juuuust enough copper and vibrancy and knew exactly what I was after, which kept me at ease the entire time.
Upkeep
This colour isn't just a dye-and-go job, though. Howard warned me that there will be upkeep and I must stick to it. He suggested getting my roots touched up every four to six weeks [8] (depending on how quickly my hair grows) to keep the colour looking fresh. Leaving my roots any longer than that will require a long two-step regrowth application, meaning my entire head of hair would need to be redyed. This is due to older hair's keratin being hardened, which, in turn, affects how the colour processes. By staying on top of maintenance, it will be more affordable in the long run (roots are much cheaper than a whole head) and will ensure my hair looks fresh and glossy.
Final Result
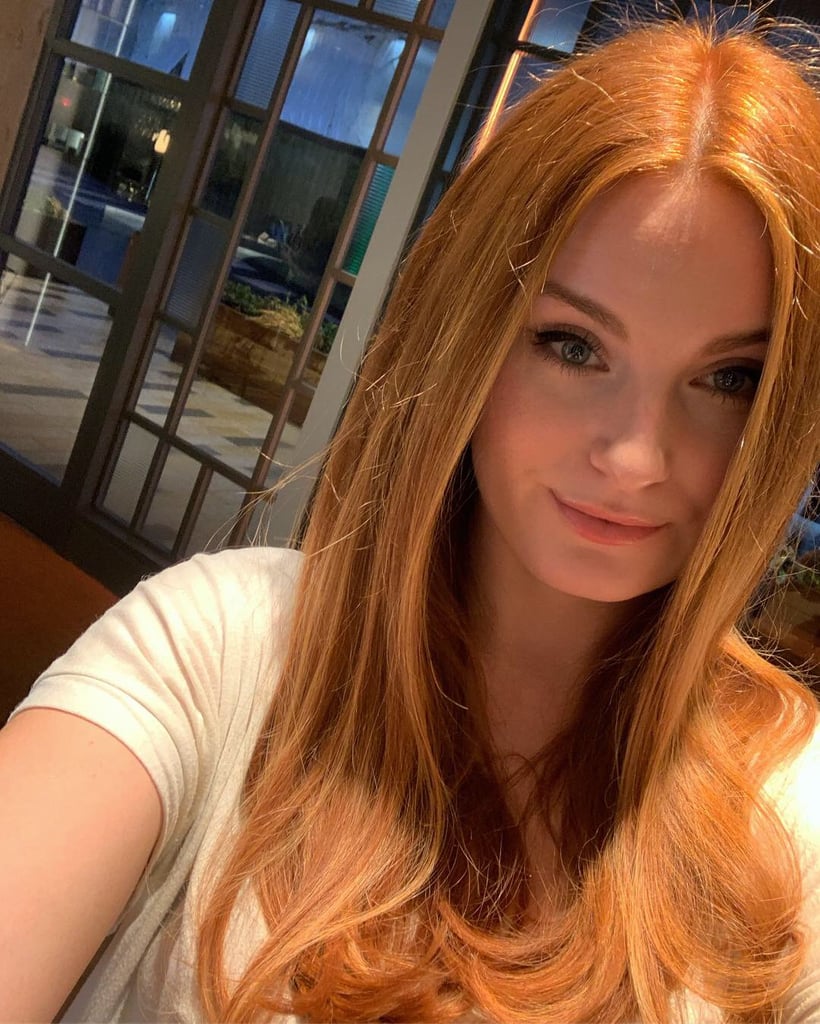
After my colour, I went home to experiment with makeup and fake tan. The verdict? A blue-toned red, no more copper eye shadow [9], and a very light faux glow rather than a golden tan. I couldn't be happier to have joined the copper hair club.
