- "Eyebrow mapping" is a brow shaping technique often performed by a pro.
- It's gaining popularity on TikTok with people trying the technique at home.
- The process is slightly challenging but helpful in achieving symmetry with your brows.
Before we begin, I feel the need to get this out of the way upfront: I have naturally thick eyebrows — I know that, and I feel very fortunate that I didn't attack them with tweezers in middle school as most of my friends did. Even though I don't necessarily need to, I still enjoy using makeup to enhance my brows and whenever I come across a hack [1] for shaping them, I have trouble resisting the urge to try it out, including the viral eyebrow mapping technique that's all over TikTok [2] right now.
In this makeup application hack [3], people are using a brow shaping technique that's typically reserved for brow specialists when you go to a salon to get threaded or waxed. It involves using your features — with or without string coated in ink as a guide — to "map" out where your eyebrows should begin and end, and where the arches should hit at. Some of the videos on TikTok look pretty intense with multiple lines of ink all over the face, but I found the DIY [4] tutorials to be a bit more approachable for my at-home tests run. Here's how it went.
Armed with two of my favourite eyebrow products, Benefit Cosmetics's Precisely, My Brow Pencil [5] (£20.50) and 24-HR Brow Setter [6] (£22.50), I followed along with one of the videos I found by Adrianna Bernard [7].
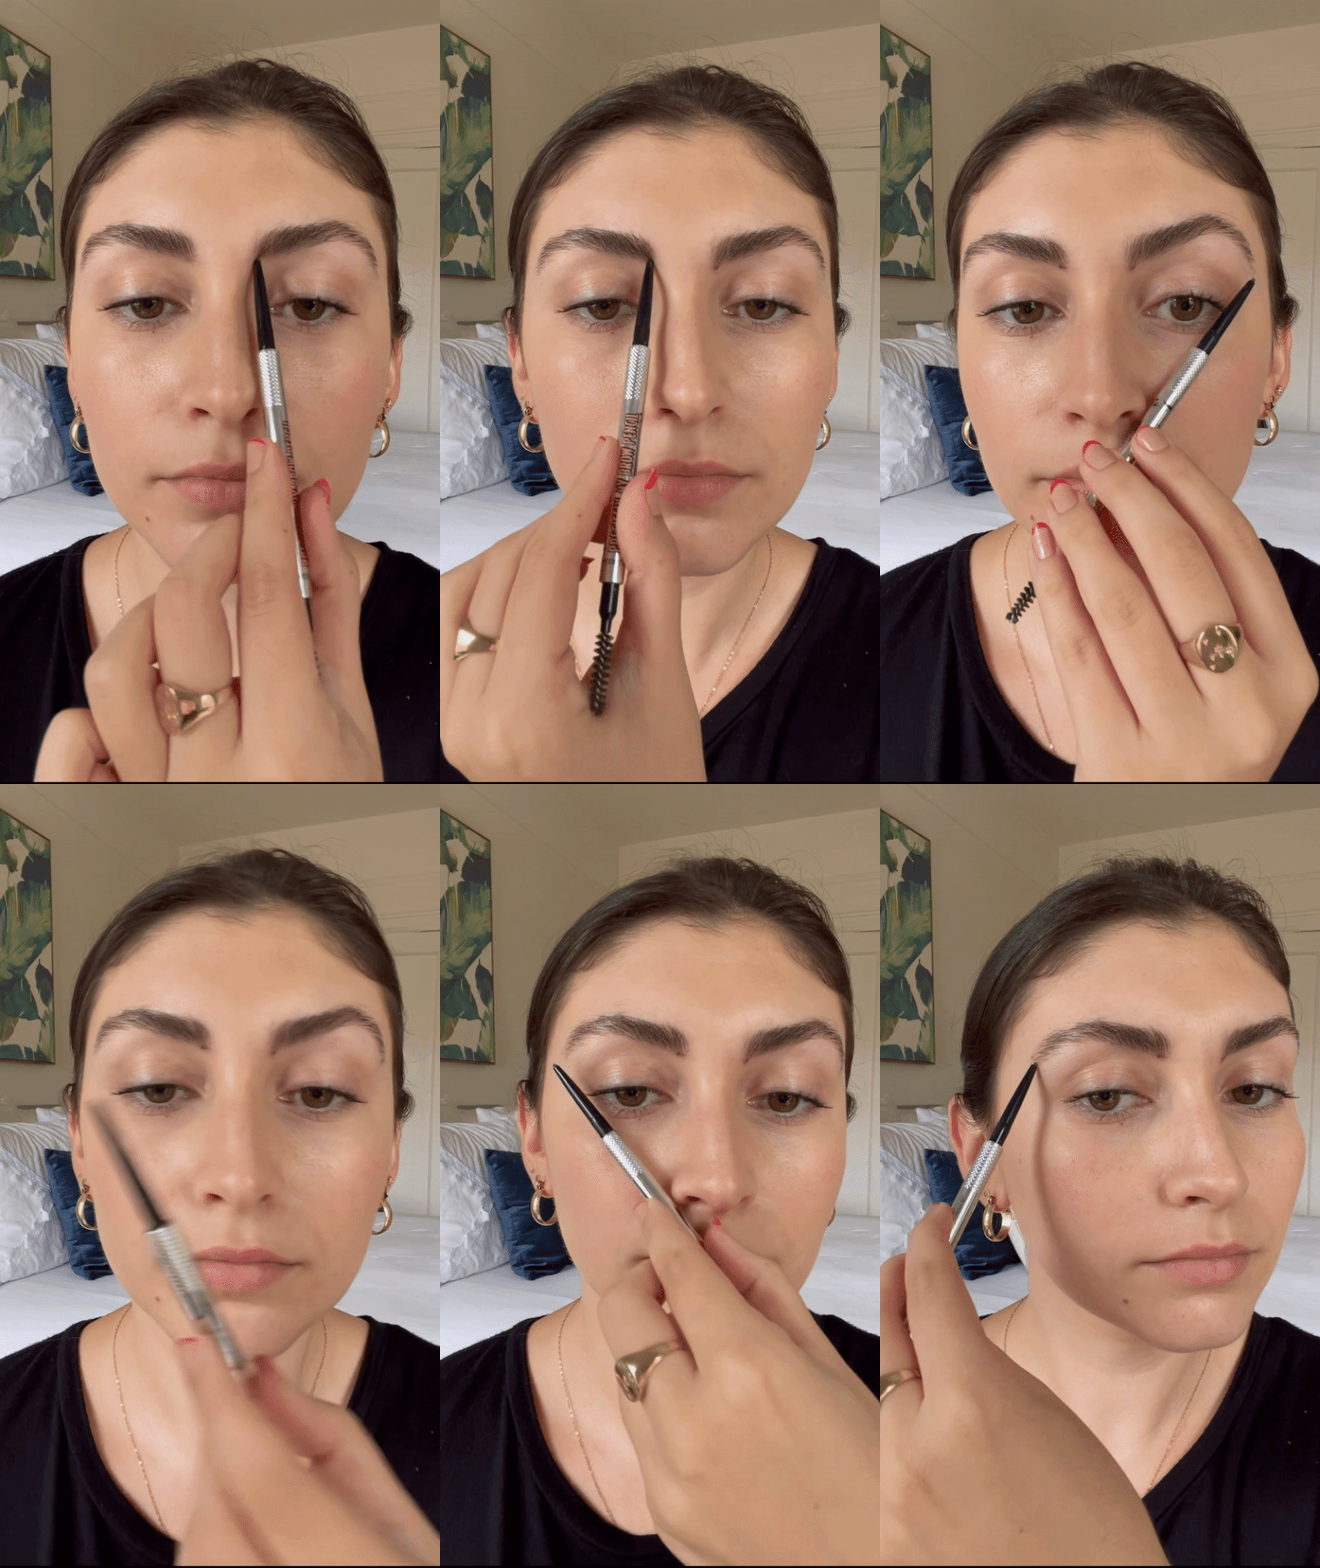
First, you brush the hair in your brows up. Then, holding the brow pencil vertically, you use the outer corner of your nose to mark the inner bottom corner of your eyebrow on each side — this marks the start of your brows. Next, you line the pencil up at an angle extending from the corner of your nose to the end of your brow and mark the placement.
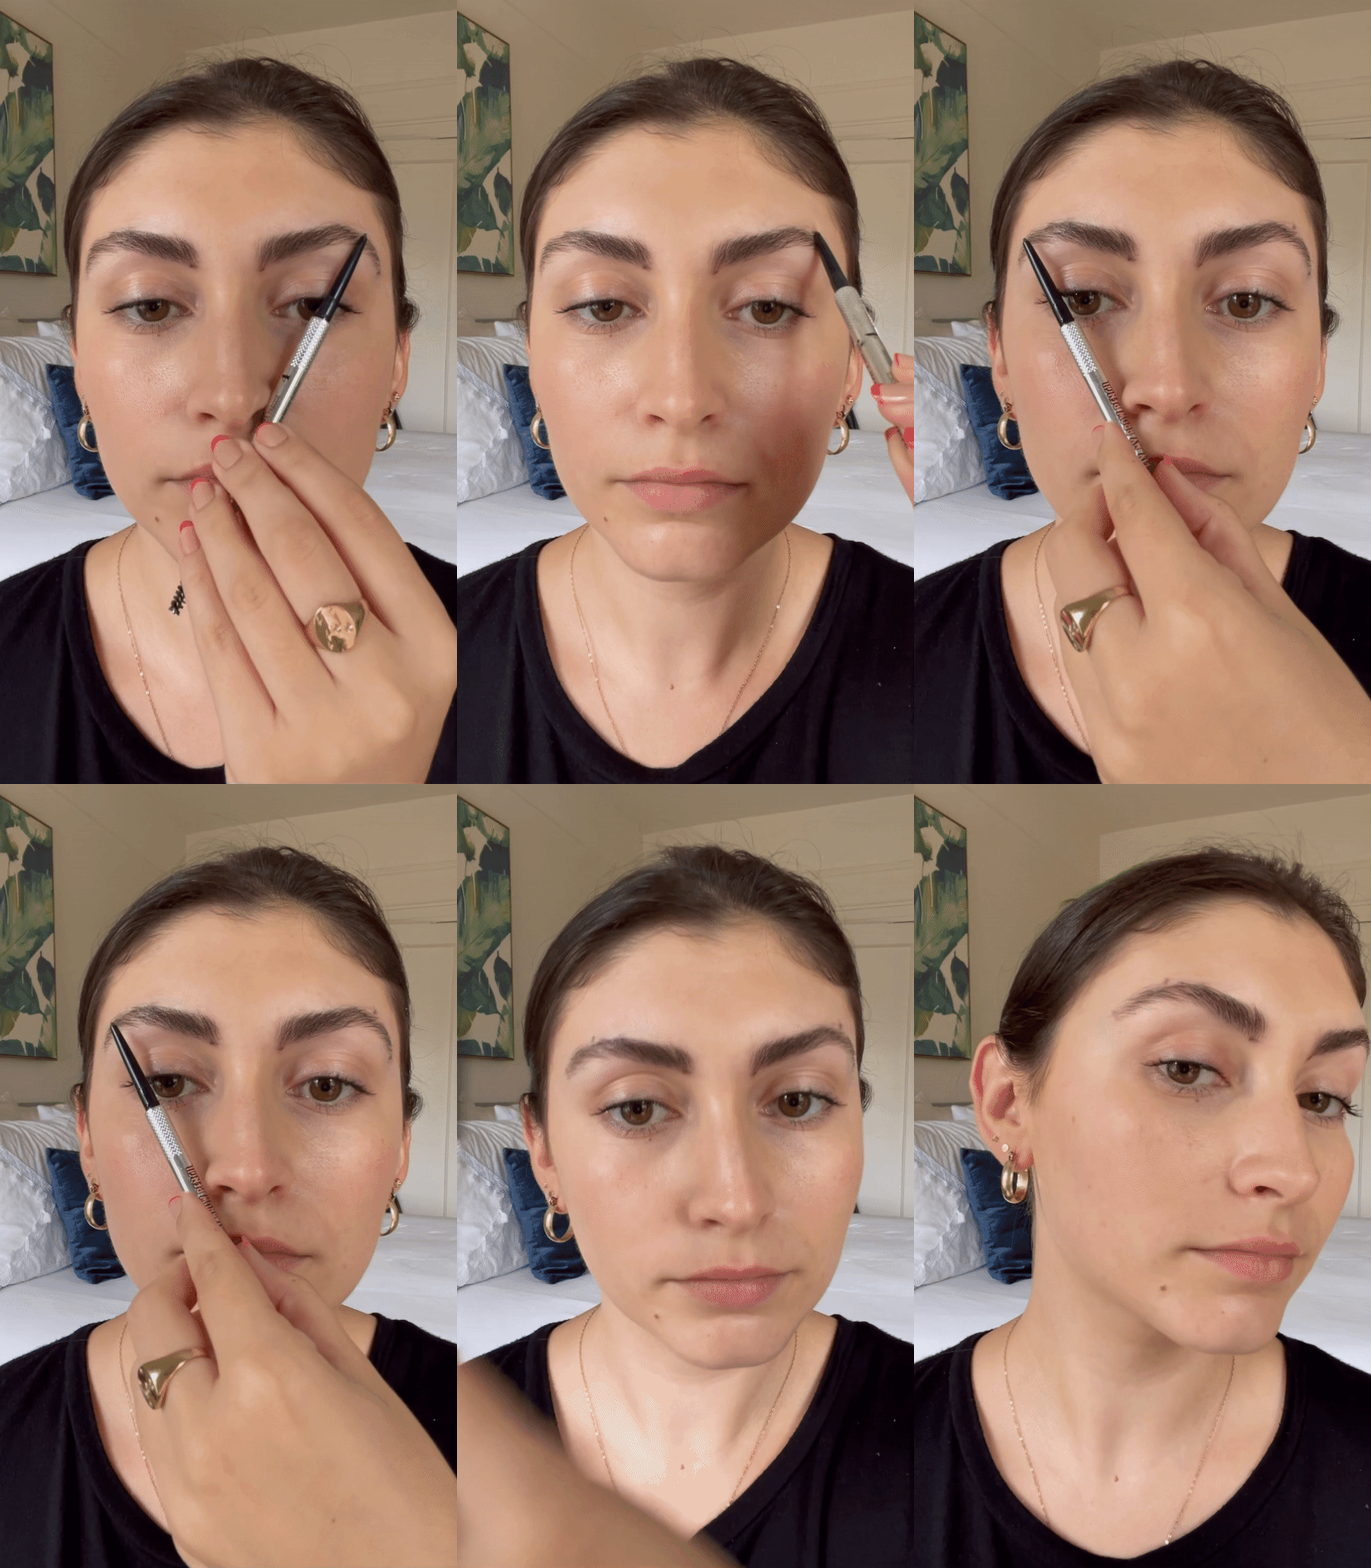
Lastly, to find the arches, you hold the pencil at an angle from the outer corner of your nose and along the outside of the iris of your eye. The location the tip of the pencil hits is where your arch should be.
I thought marking those three points on either side would be easy, but it was actually a little challenging to get the location just right.
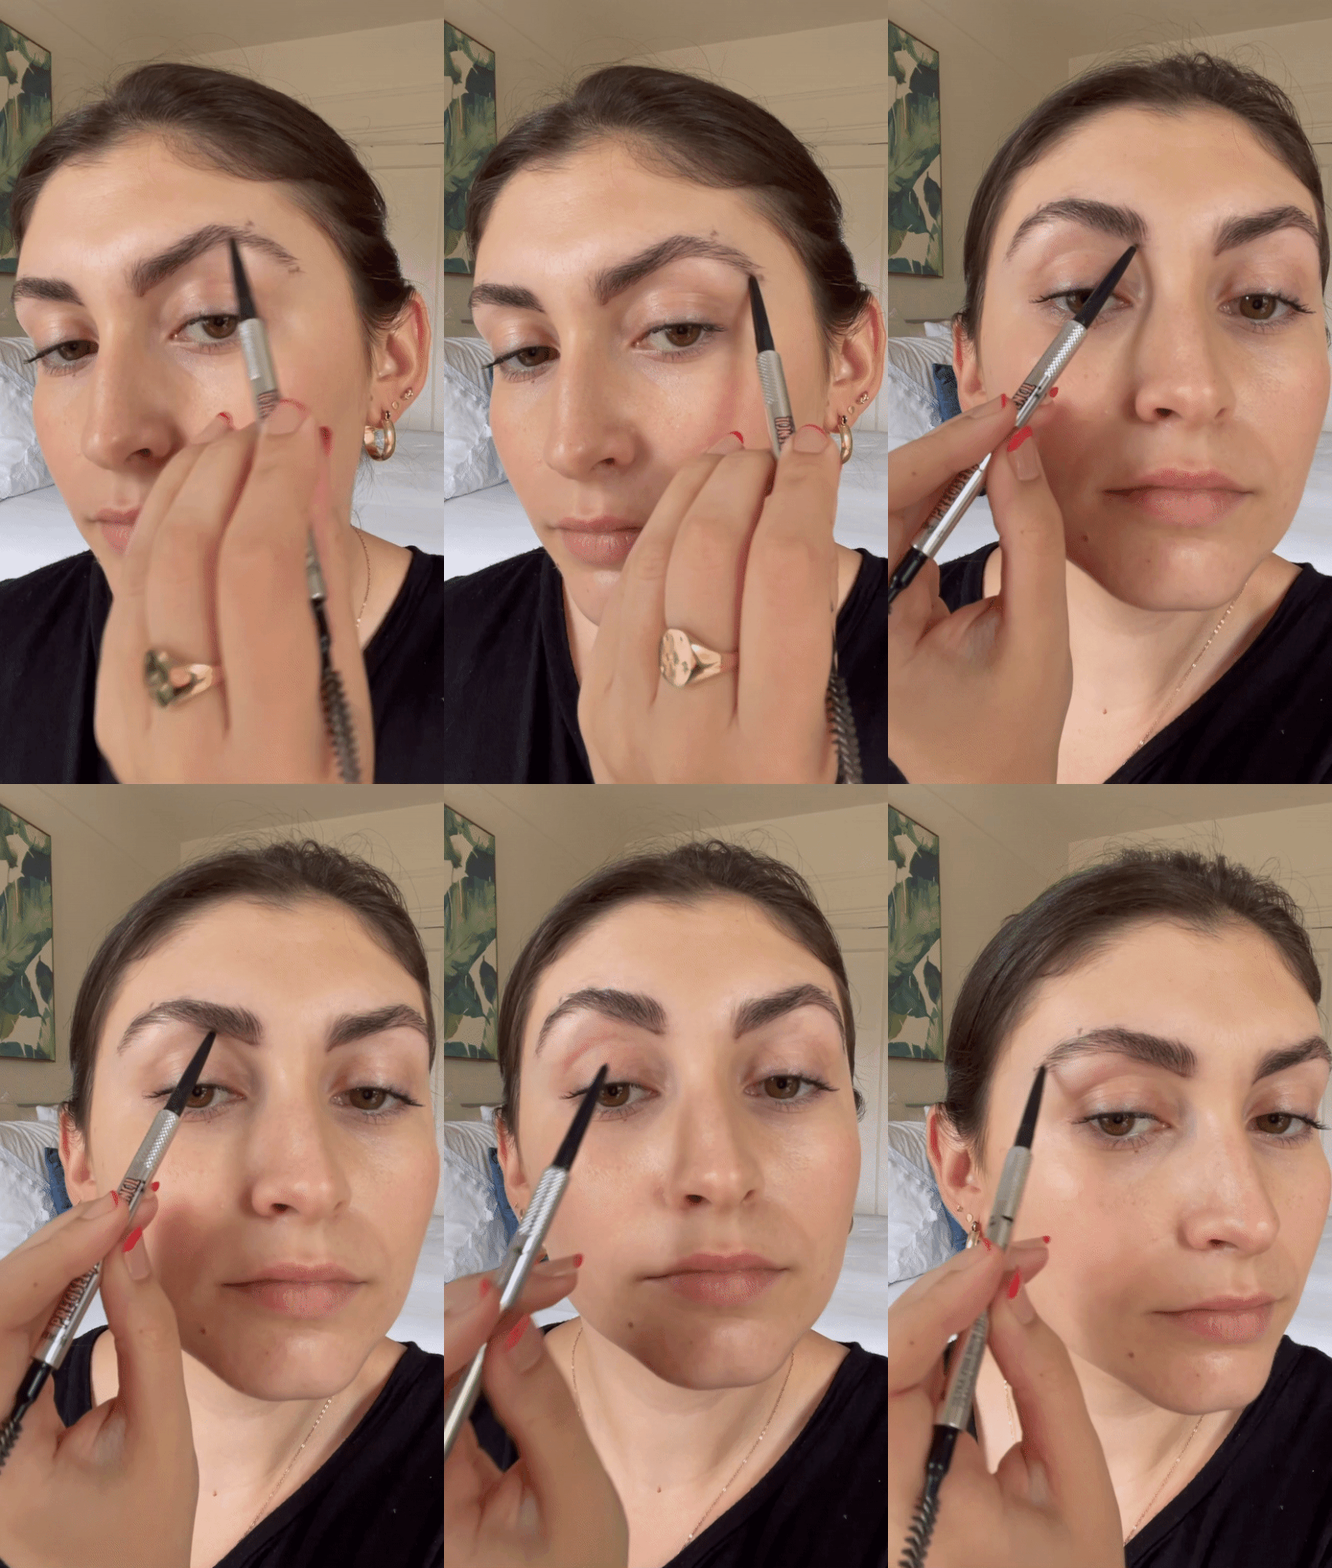
Once the beginning, arch, and end of each eyebrow is marked with a small pencil dot, you outline the bottom of your brow, connecting the first point with the very tip. The video then instructs you to brush the brow hair down — this allows you to fill in the arch better.
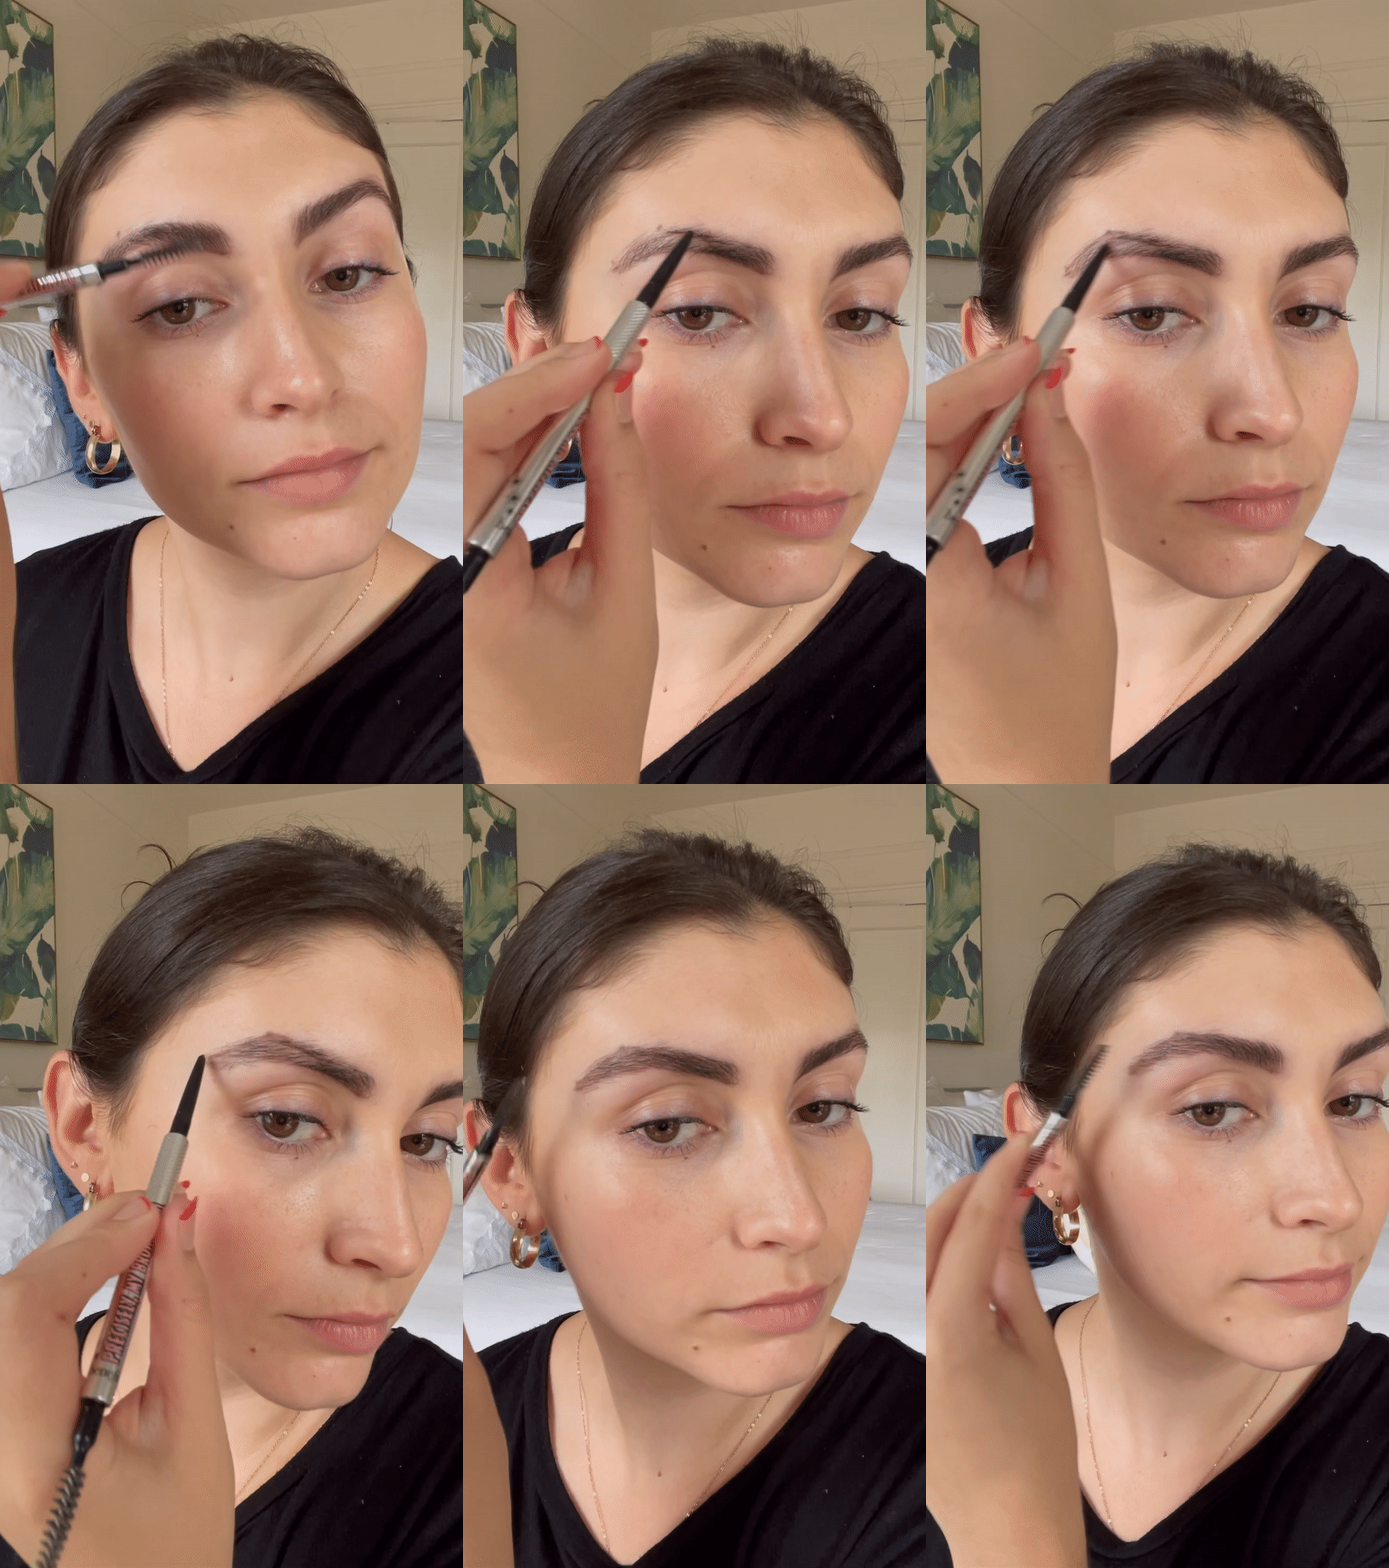
For me, on one side, the point matched with my natural arch well but on the other side, it didn't as much. I felt it looked a little off but I pushed through. That marks the end of the filling in portion — next you clean up the edges, which was a must for me (I used a reusable cotton bud and some micellar water), and then brush the hair up into place. That's when I finally used the clear brow gel.
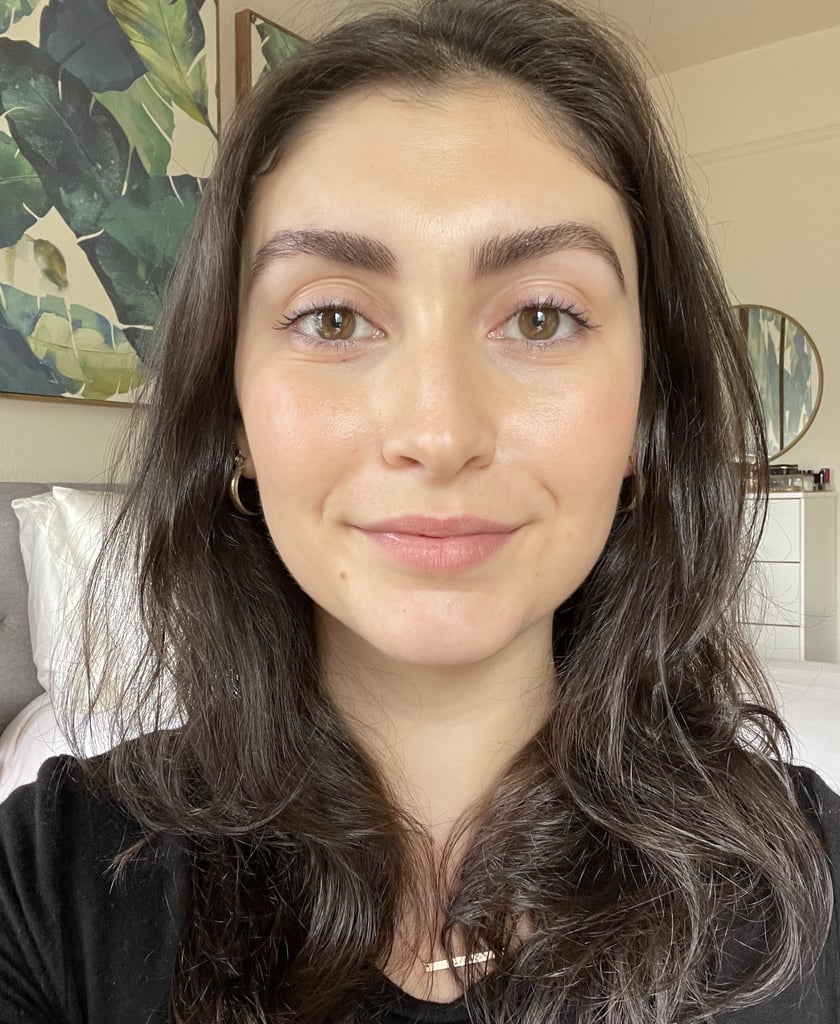
Despite looking a little messy at the halfway point in the process, the final result did not disappoint. Because my brows are naturally pretty full, this tutorial didn't completely transform them as it did for some people on TikTok, but it was still helpful. The eyebrow mapping technique allowed me to fill in my brows evenly instead of just following my natural brow growth like I usually do, which isn't always symmetrical. For example, my left brow is slightly longer than my right, and the arch on my right is a bit more prominent than the one on my left — now they matched.
Do I think I'll be using the viral TikTok brow mapping technique every time I do my makeup? Definitely not. But the next time I do a little at-home shaping with my tweezers I'll use this as a guide to help me achieve symmetry. If you have sparse brows that you have trouble filling in evenly, you need to try this.
