Over the pandemic and now during England's second lockdown, we haven't been able to see our beloved nail techs [1] as much as we'd have liked this year. It's also safe to say that our nails haven't been looking their cutest, either. But that doesn't mean we can't be inspired to save new designs for when we do visit the salon again, or even try some of them out DIY-style at home. Since we'll all have a little extra time at home this winter, what better time to get out your polishes and brushes and give some new nail art a go?
That's why we worked on creating five beautiful, winter-inspired nail art designs with London-based, eco-conscious salon, Snail and Hare [2] to get you feeling inspired and perhaps a little creative. All of the shades used are from gel nail polish brand The Gel Bottle [3] (which are all vegan and cruelty-free), meaning if you don't have access to a gel system you won't be able to try those particular products. However, the good news is, The Gel Bottle's sister company is Peacći [4], which offers traditional polish formulas so that you can try almost all of the same shades but in nail polish form instead — winning!
However, the good news is, The Gel Bottle's sister company Peacći [5] means you can try almost all of the same shades but in nail polish form instead — winning!
So, if you're looking to expand your nail skills or your mood board for the minute you get back in the salon chair, then read on to see exactly how Snail and Hare [6] created each of these pretty, winter-inspired designs.
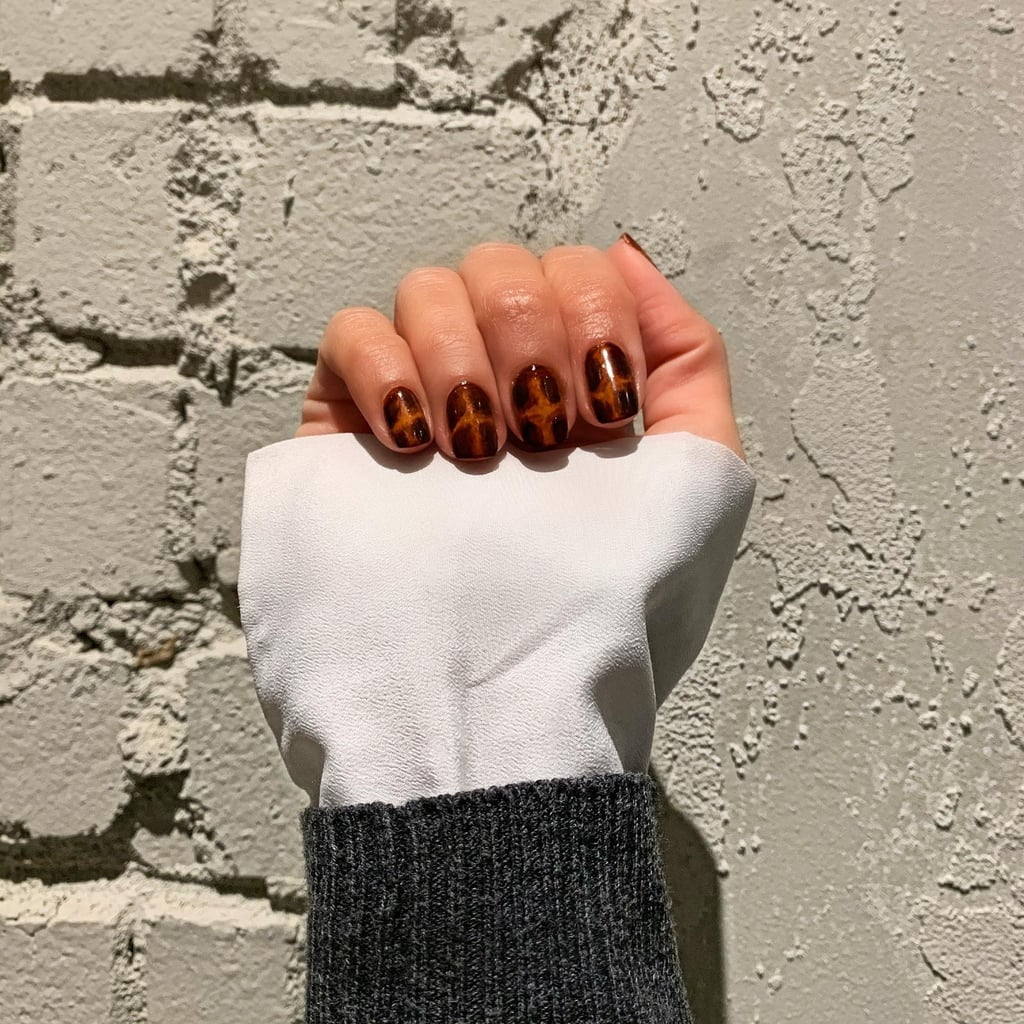
Totally Tortoise
Shades: Fall [7], Chocolate [8], Jet Black [9], and Arabian Night [10]
Steps: Apply your base coat followed by two coats of "Fall". Next, blend "Chocolate" and "Arabian Night" together and then paint spots using a synthetic fine detail brush. Cure between each layer (or, if you're using normal polish, simply wait for it to dry) then darken those layers using "Jet Black" on top. Finish the design off with one layer of top coat.
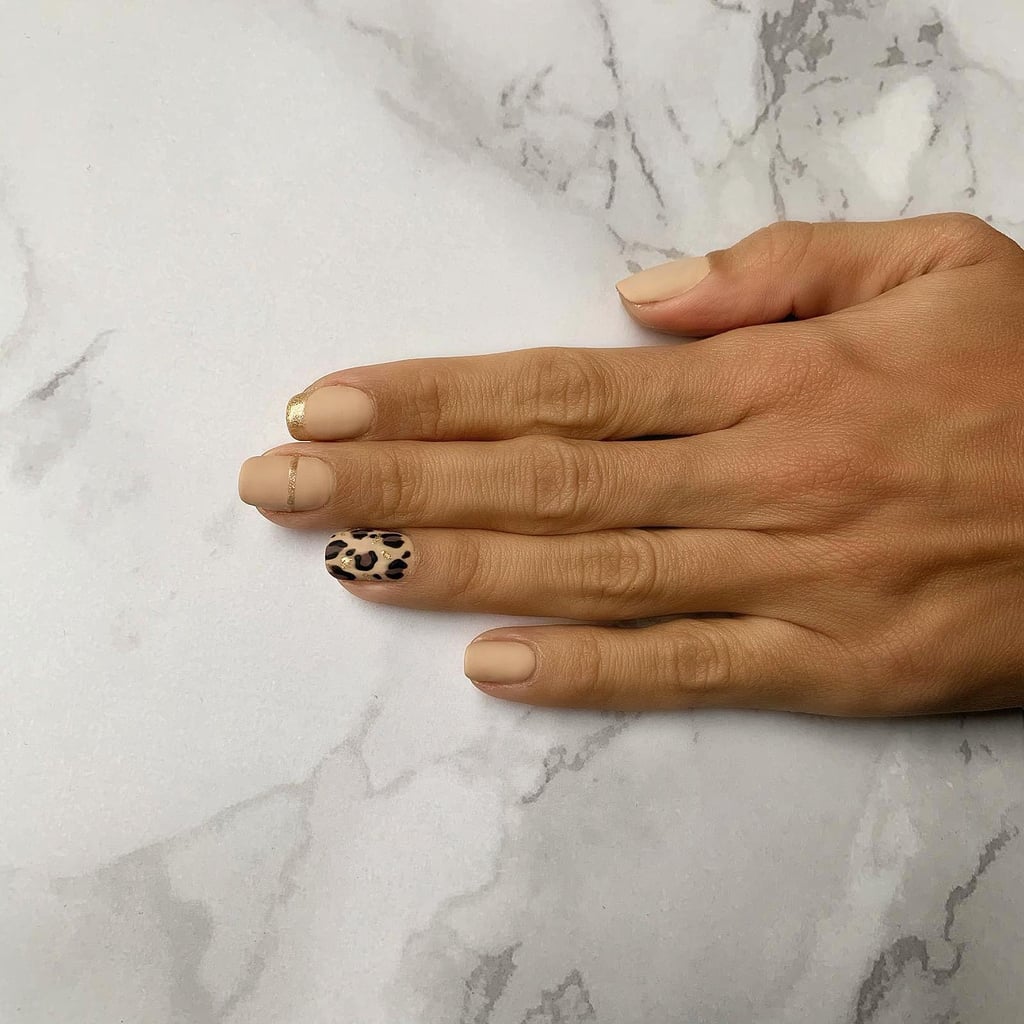
Gilded Leopard
Shades: Espresso Martini [11], Jet Black [12], Chocolate [13], and Fizz [14]
Steps: Apply your base coat followed by two layers of "Espresso Martini". Then, mix "Chocolate" and "Espresso Martini" together and paint random spots using a fine detail brush. Next, use "Jet Black" to outline the spots for more definition. To create the gilded gold effect, add dots and lines with the shade "Fizz", cure, and then for the grand finale, apply a matte topcoat for more of a contrast between the metallic gold polish.
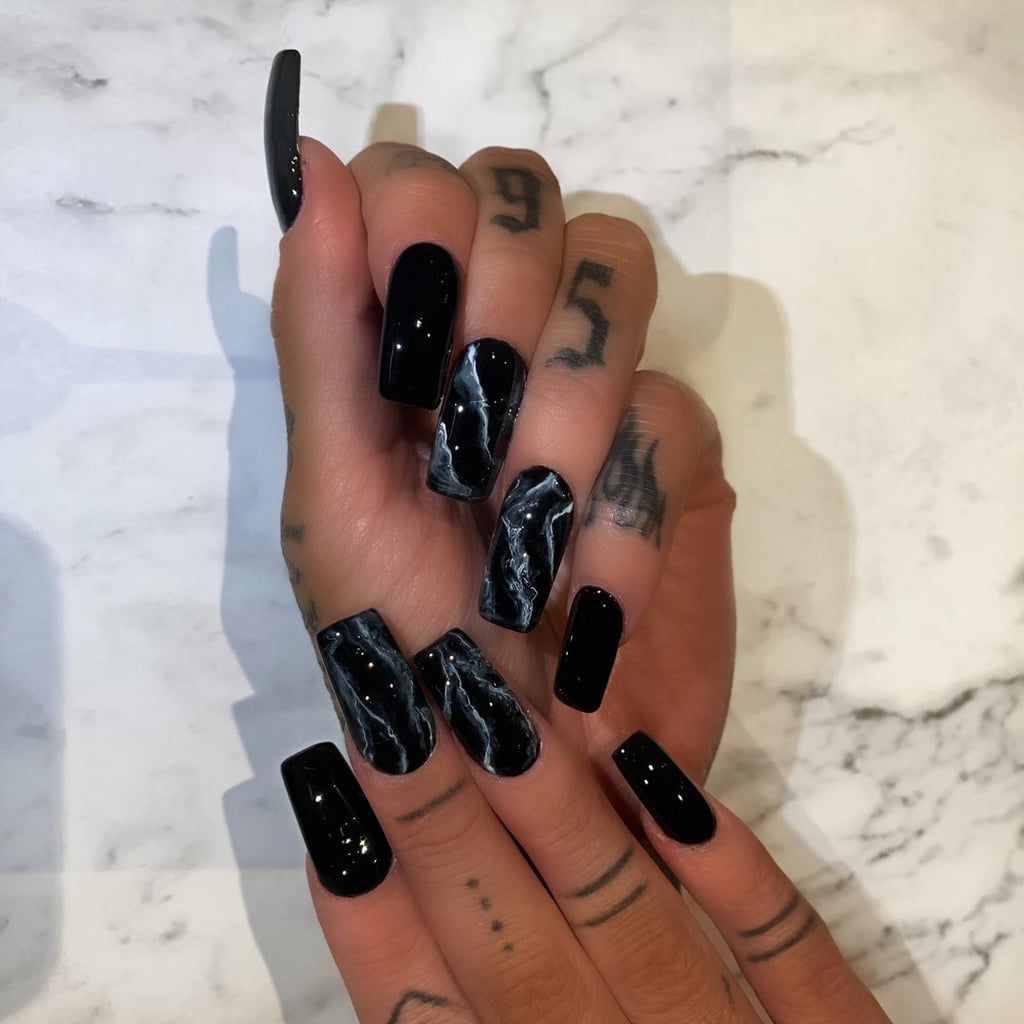
Marbled Mayhem
Shades: Jet Black [15] and Daisy [16]
Steps: Apply your base coat followed by two layers of "Jet Black" and apply the topcoat polish without curing. Next, draw some white freehand lines (remember: this doesn't have to be neat) with "Daisy" using a fine detail brush. The next step is to blend the two together with alcohol to give the marbled effect. Finally, cure the marbled effect followed by a topcoat to seal it all in.
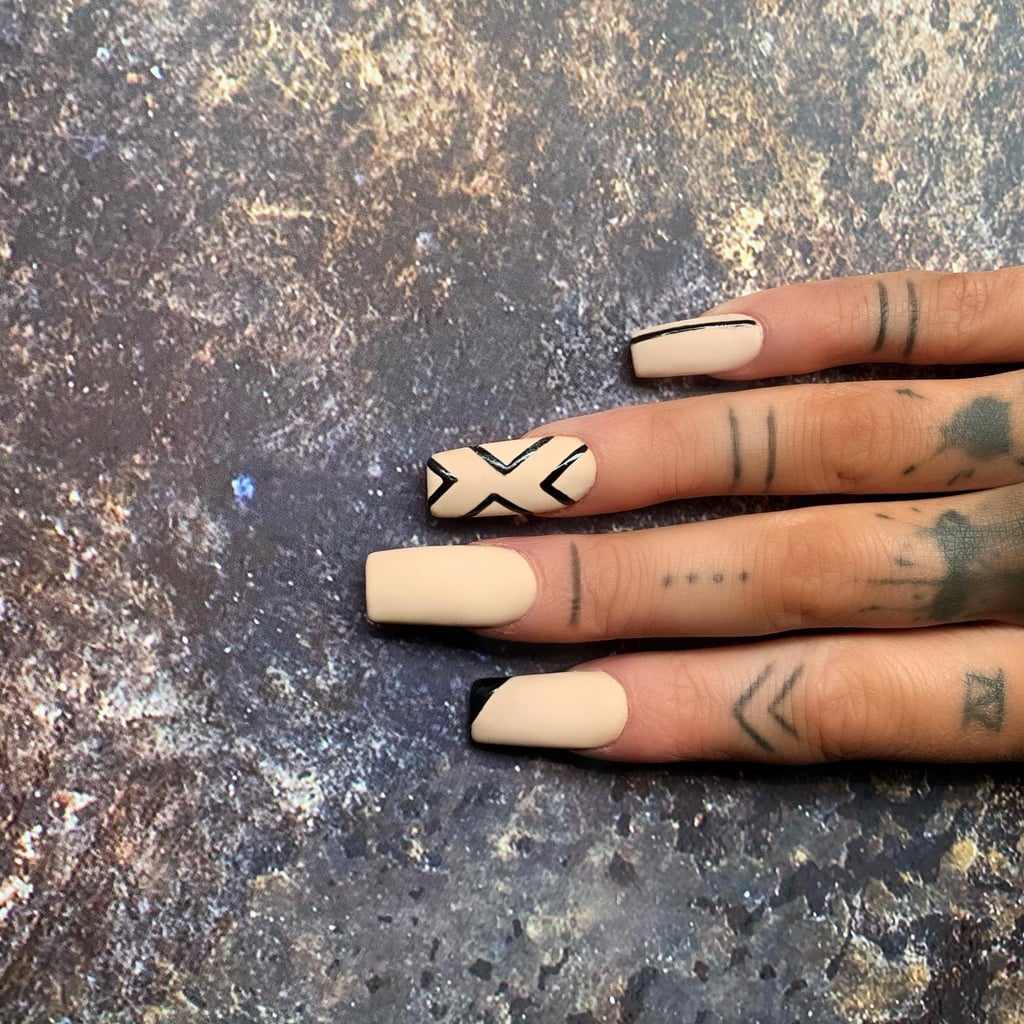
Not So Neutral
Shades: Espresso Martini [17] and Jet Black [18]
Steps: First, apply a base coat followed by two layers of the shade "Espresso Martini", then add a matte top coat to finish. Next comes the tricky bit, using a fine detail brush, create some freehand lines (or you can try striping tape if you aren't confident with freehand) in "Jet Black". To get the bold effect, apply a shiny top coat only over the black lines you created, this will give a contract between the neutral base and bold black graphics.
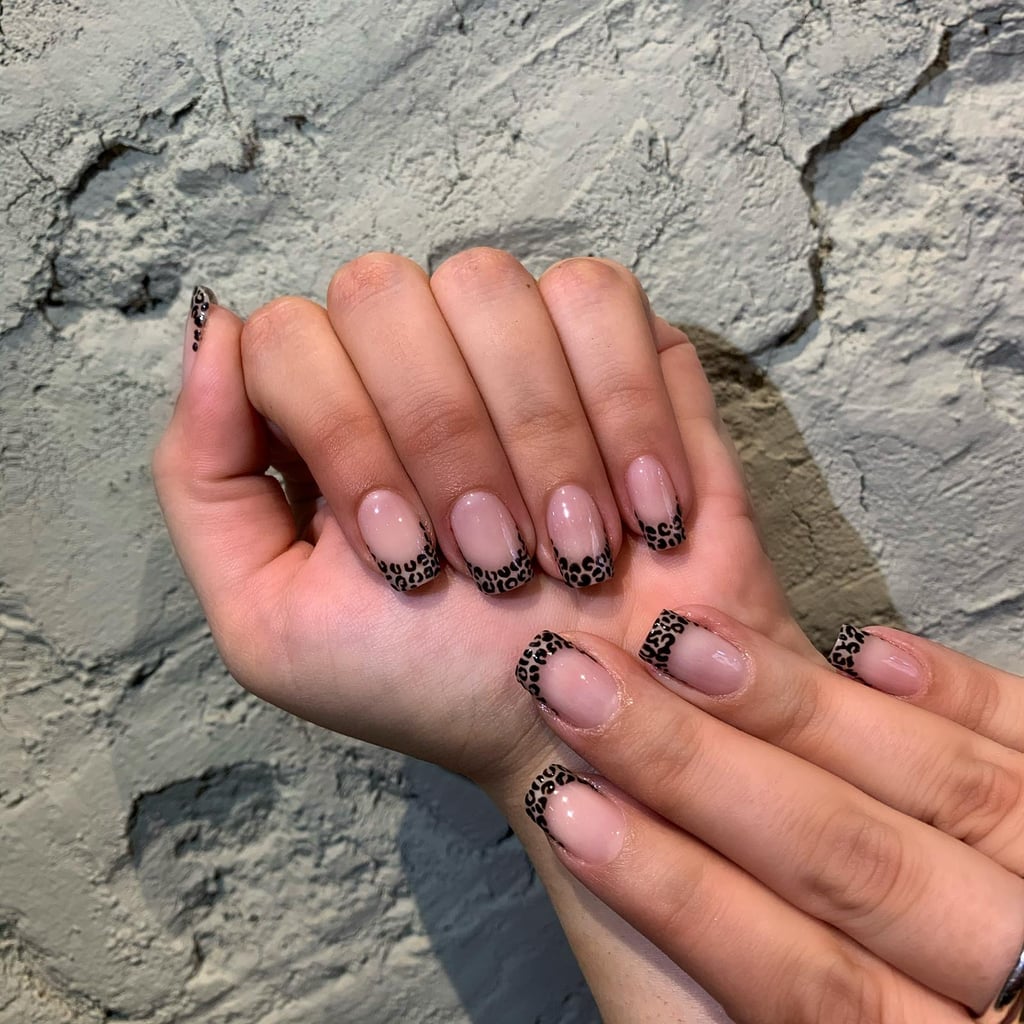
Purr-fect French Tips
Shades: Au Naturel [19], Diana [20], and Jet Black [21]
Steps: First, apply a base coat followed by one layer of the shade "Au Naturel" and a second layer of the shade "Diana". Then, using a fine brush, carefully paint leopard spots on the tips of the nails only using the shade "Jet Black", this part can be a little tricky but it doesn't have to be perfect. If you're struggling, imagine you're drawing two half circles that don't quite meet and you'll get a leopard spot-like pattern. Once you've cured the leopard spots, apply a shiny top coat to finish.
