Whole-Wheat No-Knead Bread Recipe
I've Been Baking Bread For 20 Years — This Fibre-Packed, Whole-Wheat No-Knead Recipe Is the Easiest
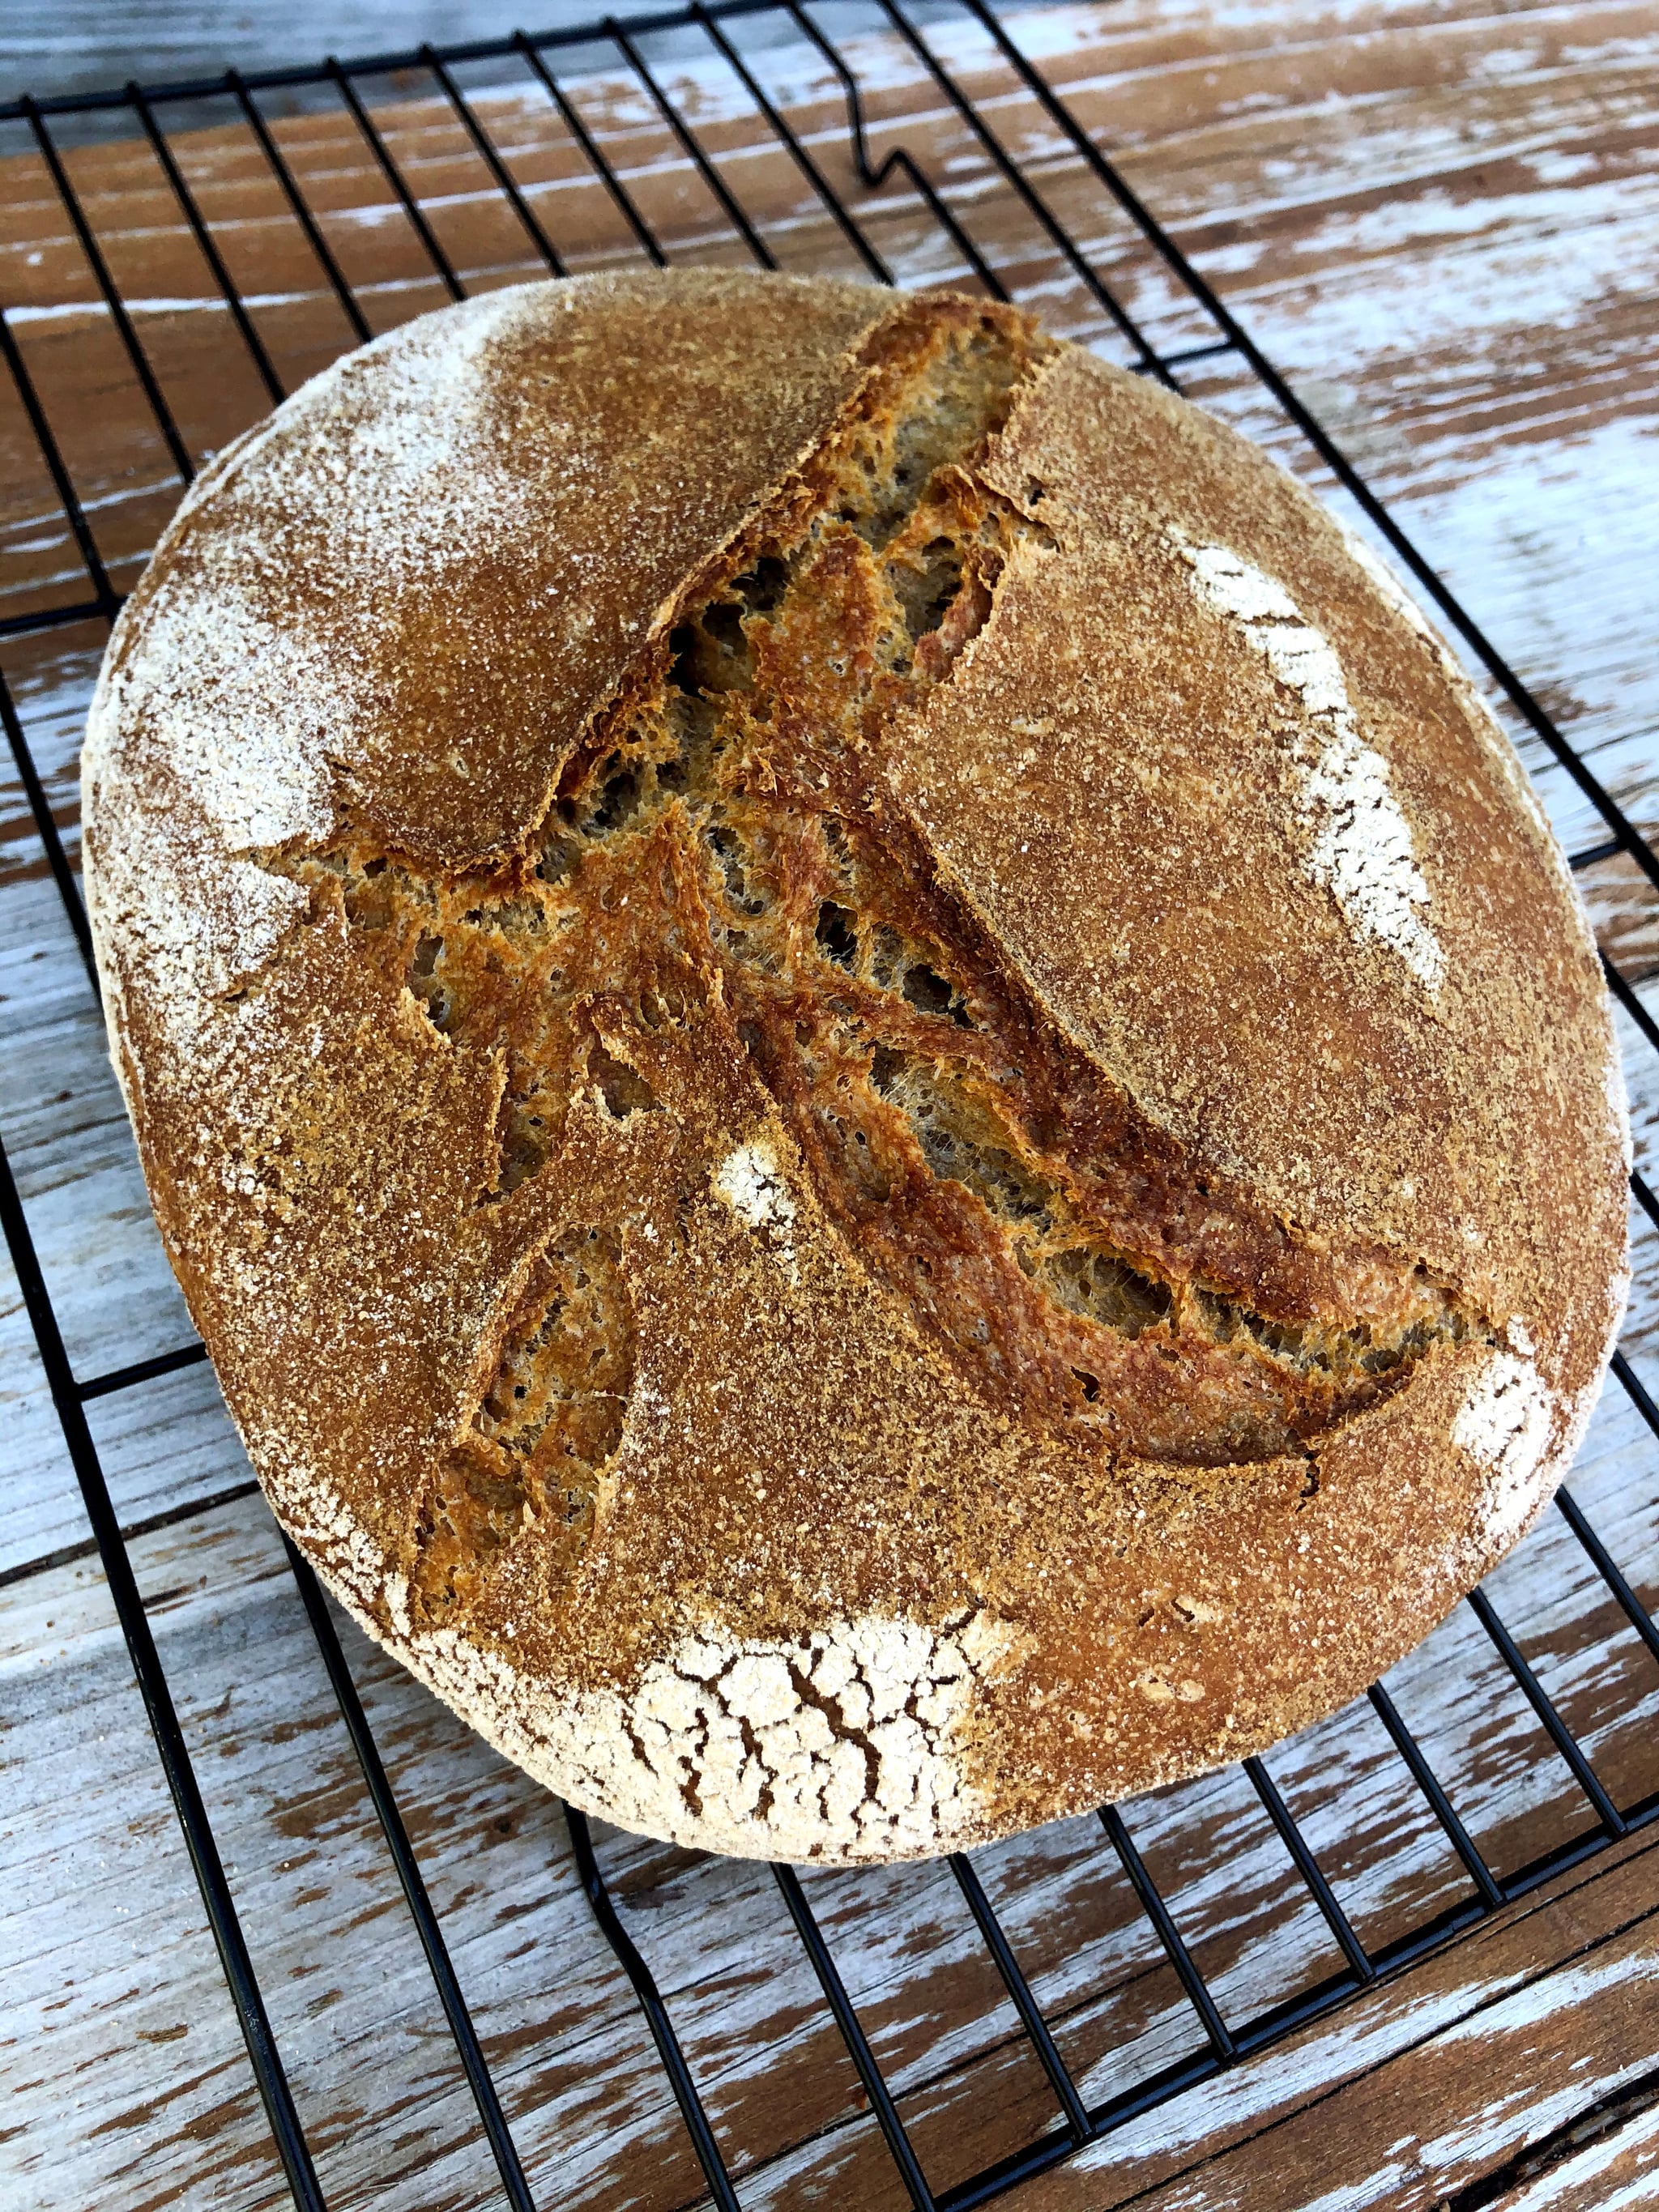
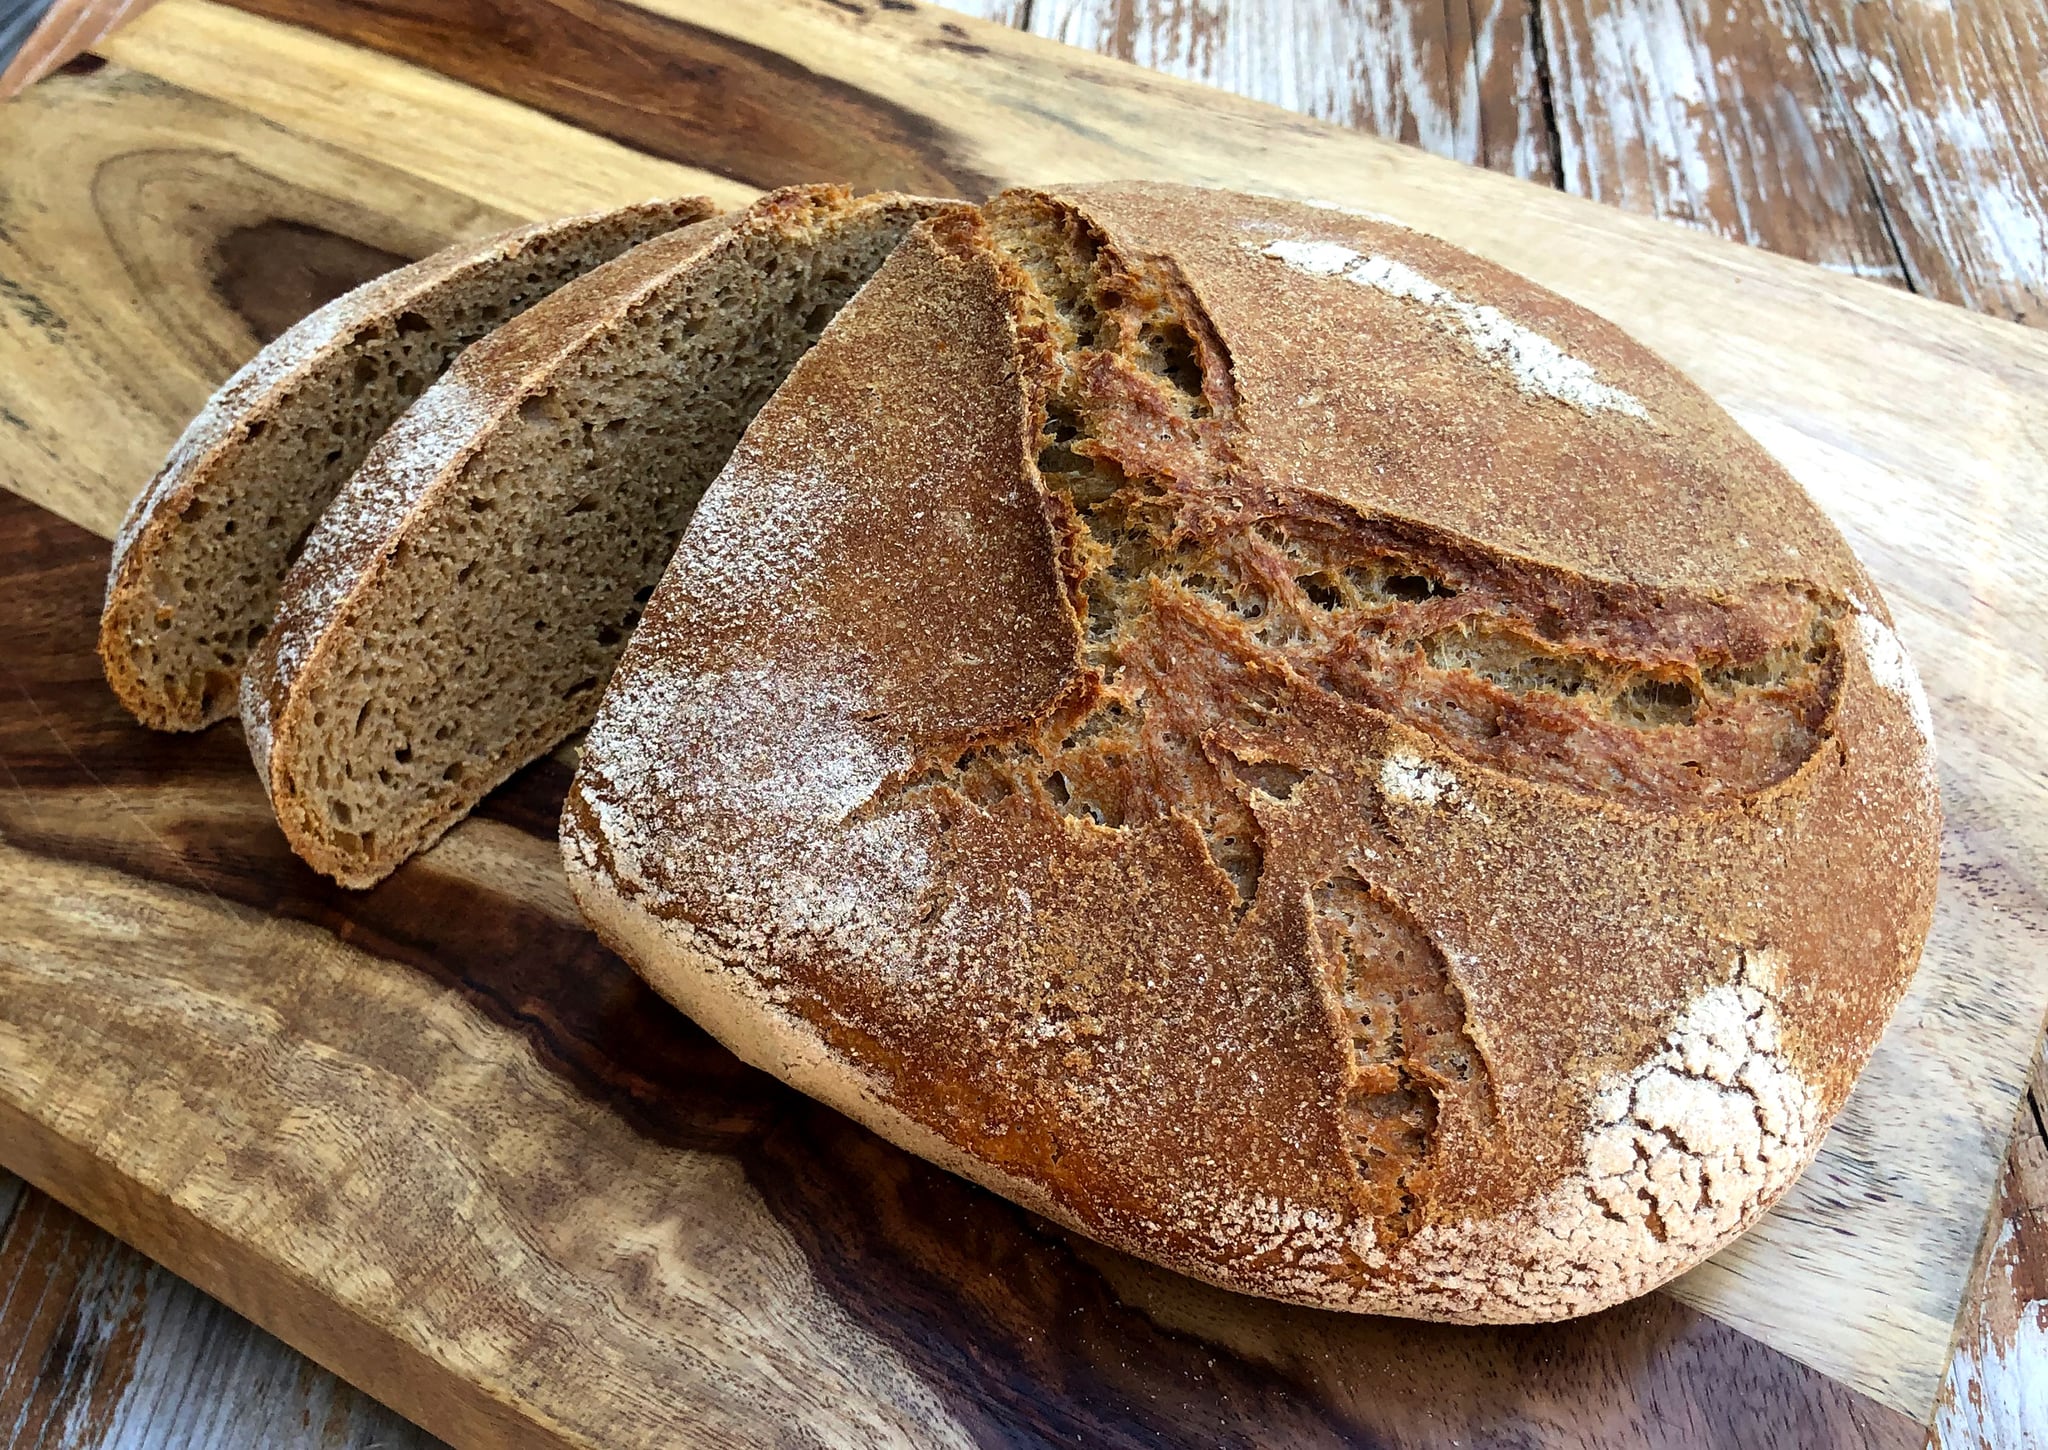
Get ready to impress even yourself! This loaf of bread is bakery worthy because it's so professional looking. If you love crusty sourdough but are intimated by the whole lengthy and complicated process, this recipe is the next best thing.
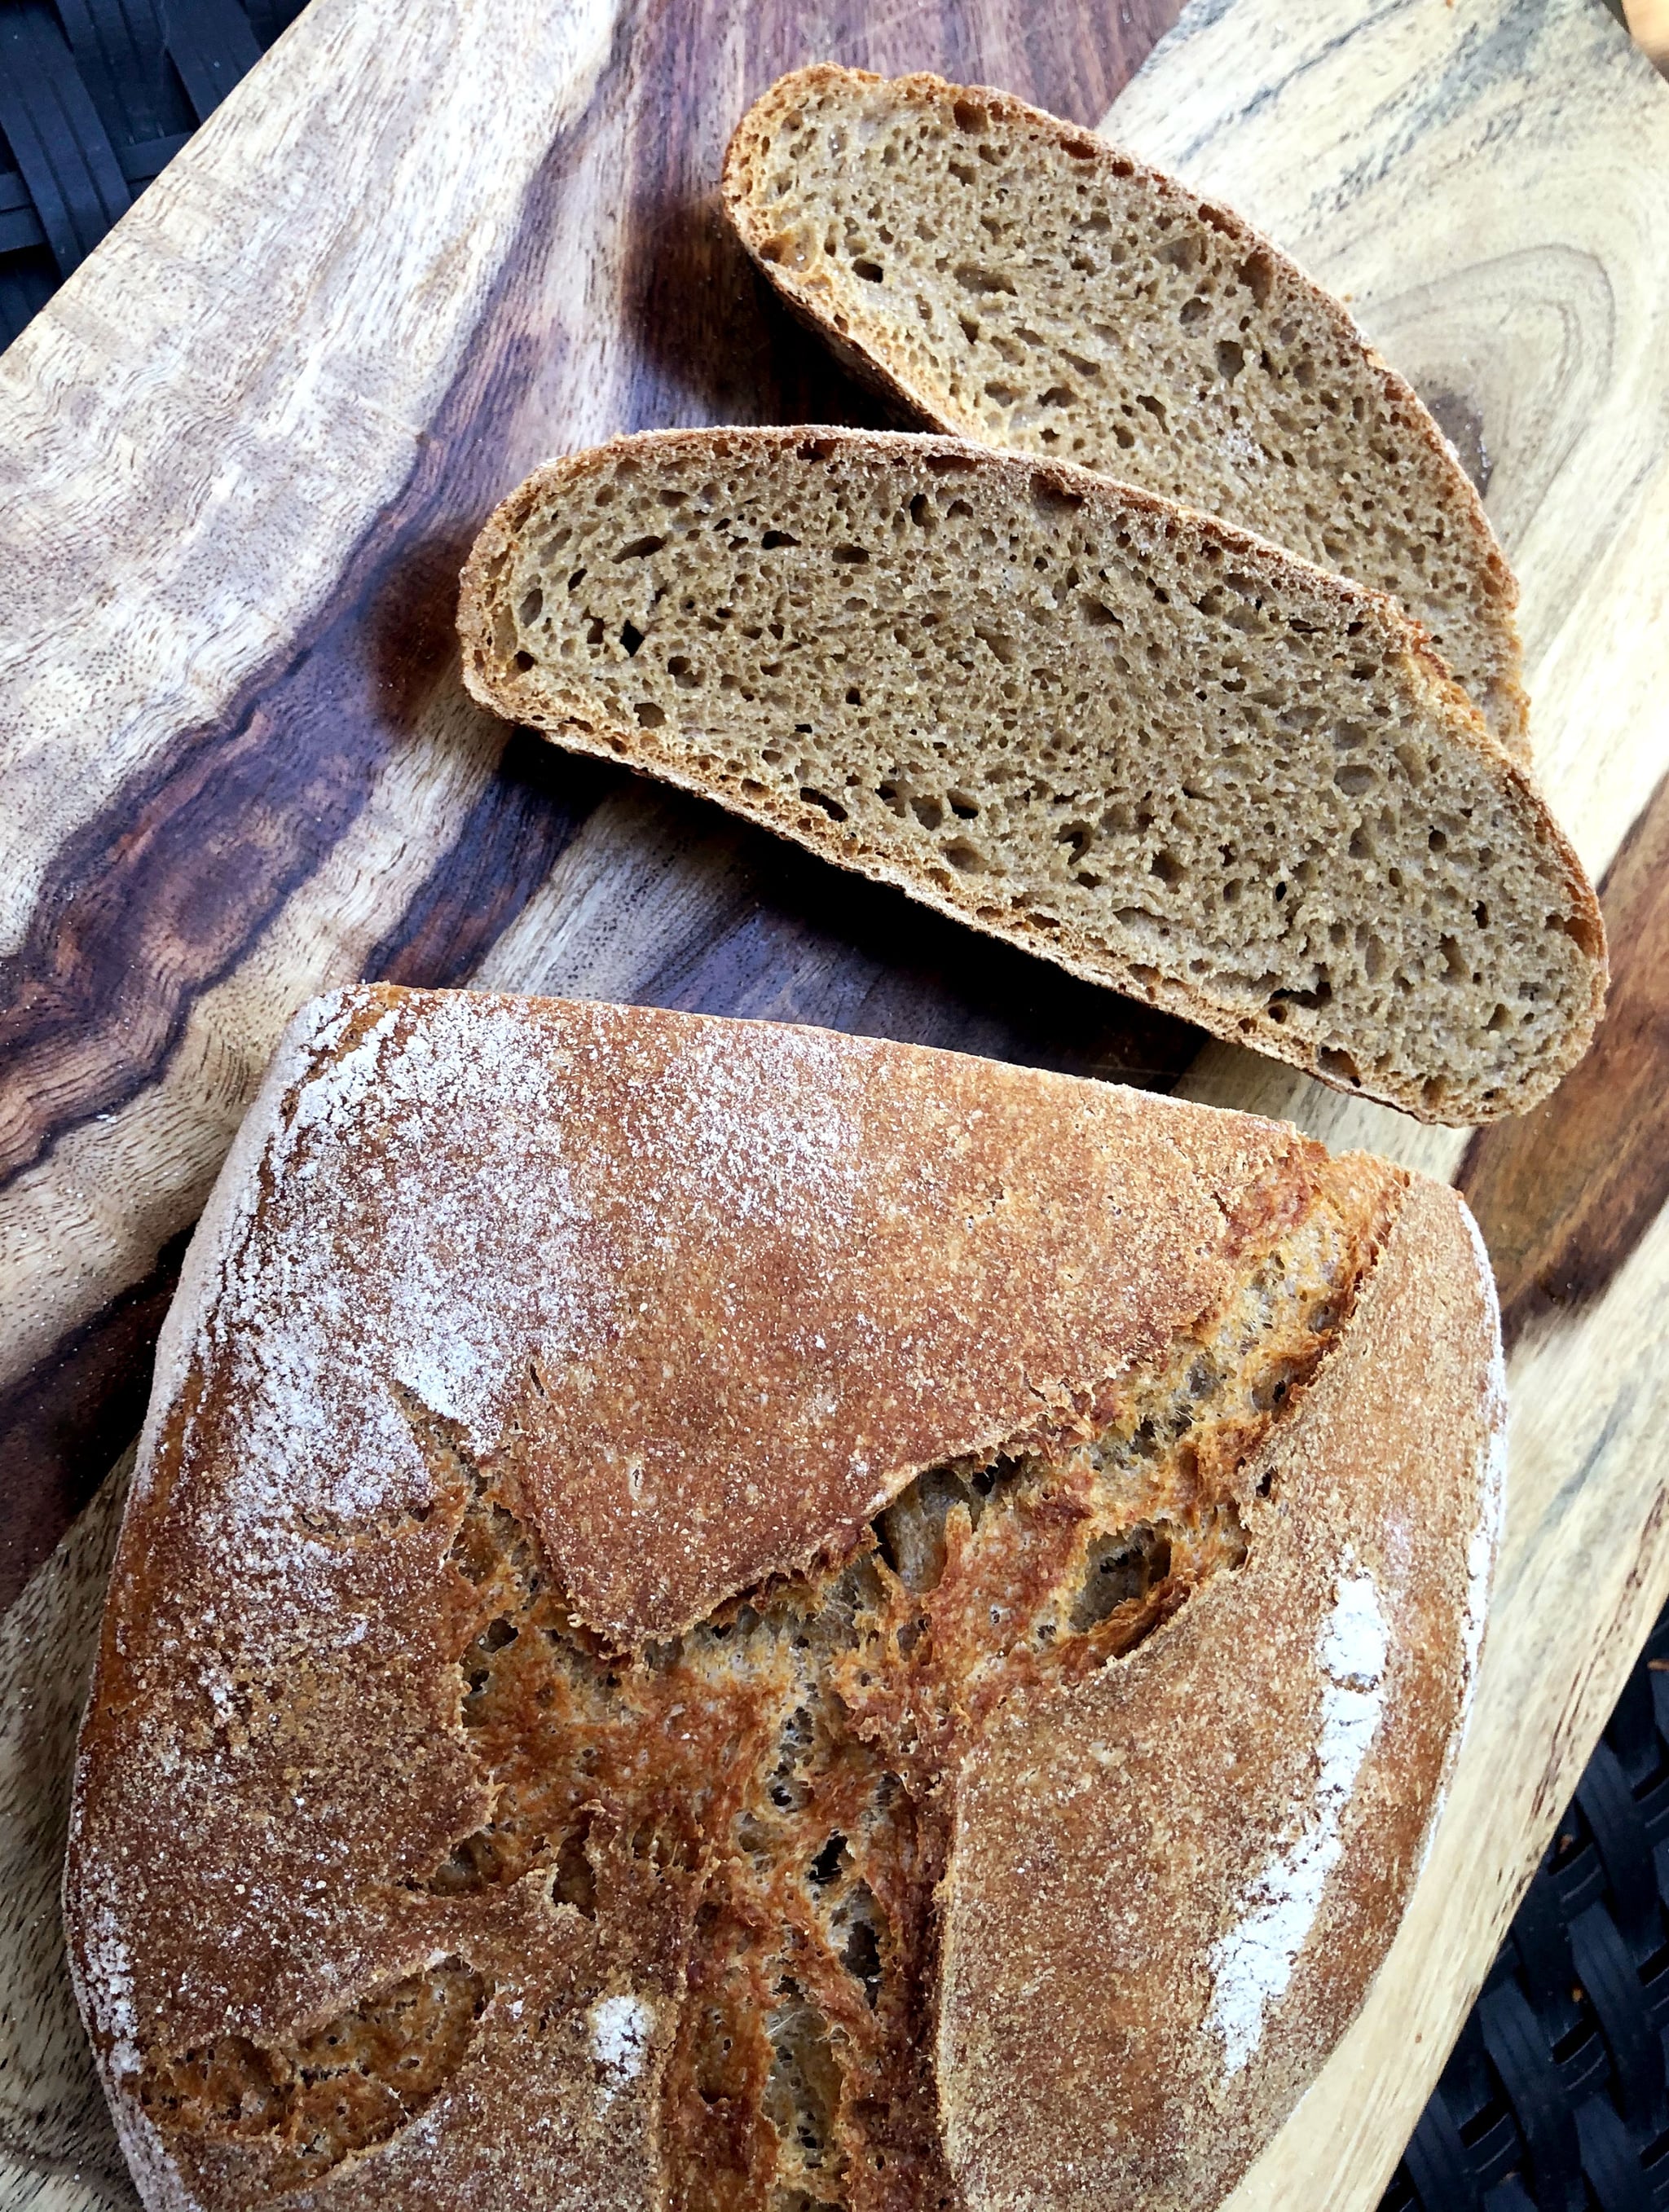
This is a no-knead bread recipe, so it couldn't be easier to make! Most are made with all-purpose flour, and although that bread is light and delicious, white flour isn't as healthy as whole wheat. So I modified my favourite no-knead bread recipe using white whole-wheat flour. It makes for a denser texture, but it also has fewer calories and carbs per slice and is much heartier and more satisfying because it has over three times the fibre and two extra grams of protein (see the nutritional comparison below).


The one thing about this recipe is that you need to plan ahead and start the dough the night before you want to bake it. I usually mix the dough around 8 p.m. Then the next day (18 hours later) around 2 p.m., I begin on Step 3, so the dough will have time to rise from 2:15-4:15 p.m. and will be done baking by 5 p.m. You're supposed to let it cool completely on a rack, but usually by 5:15, I'm cutting into it because it's too warm and delicious to resist!
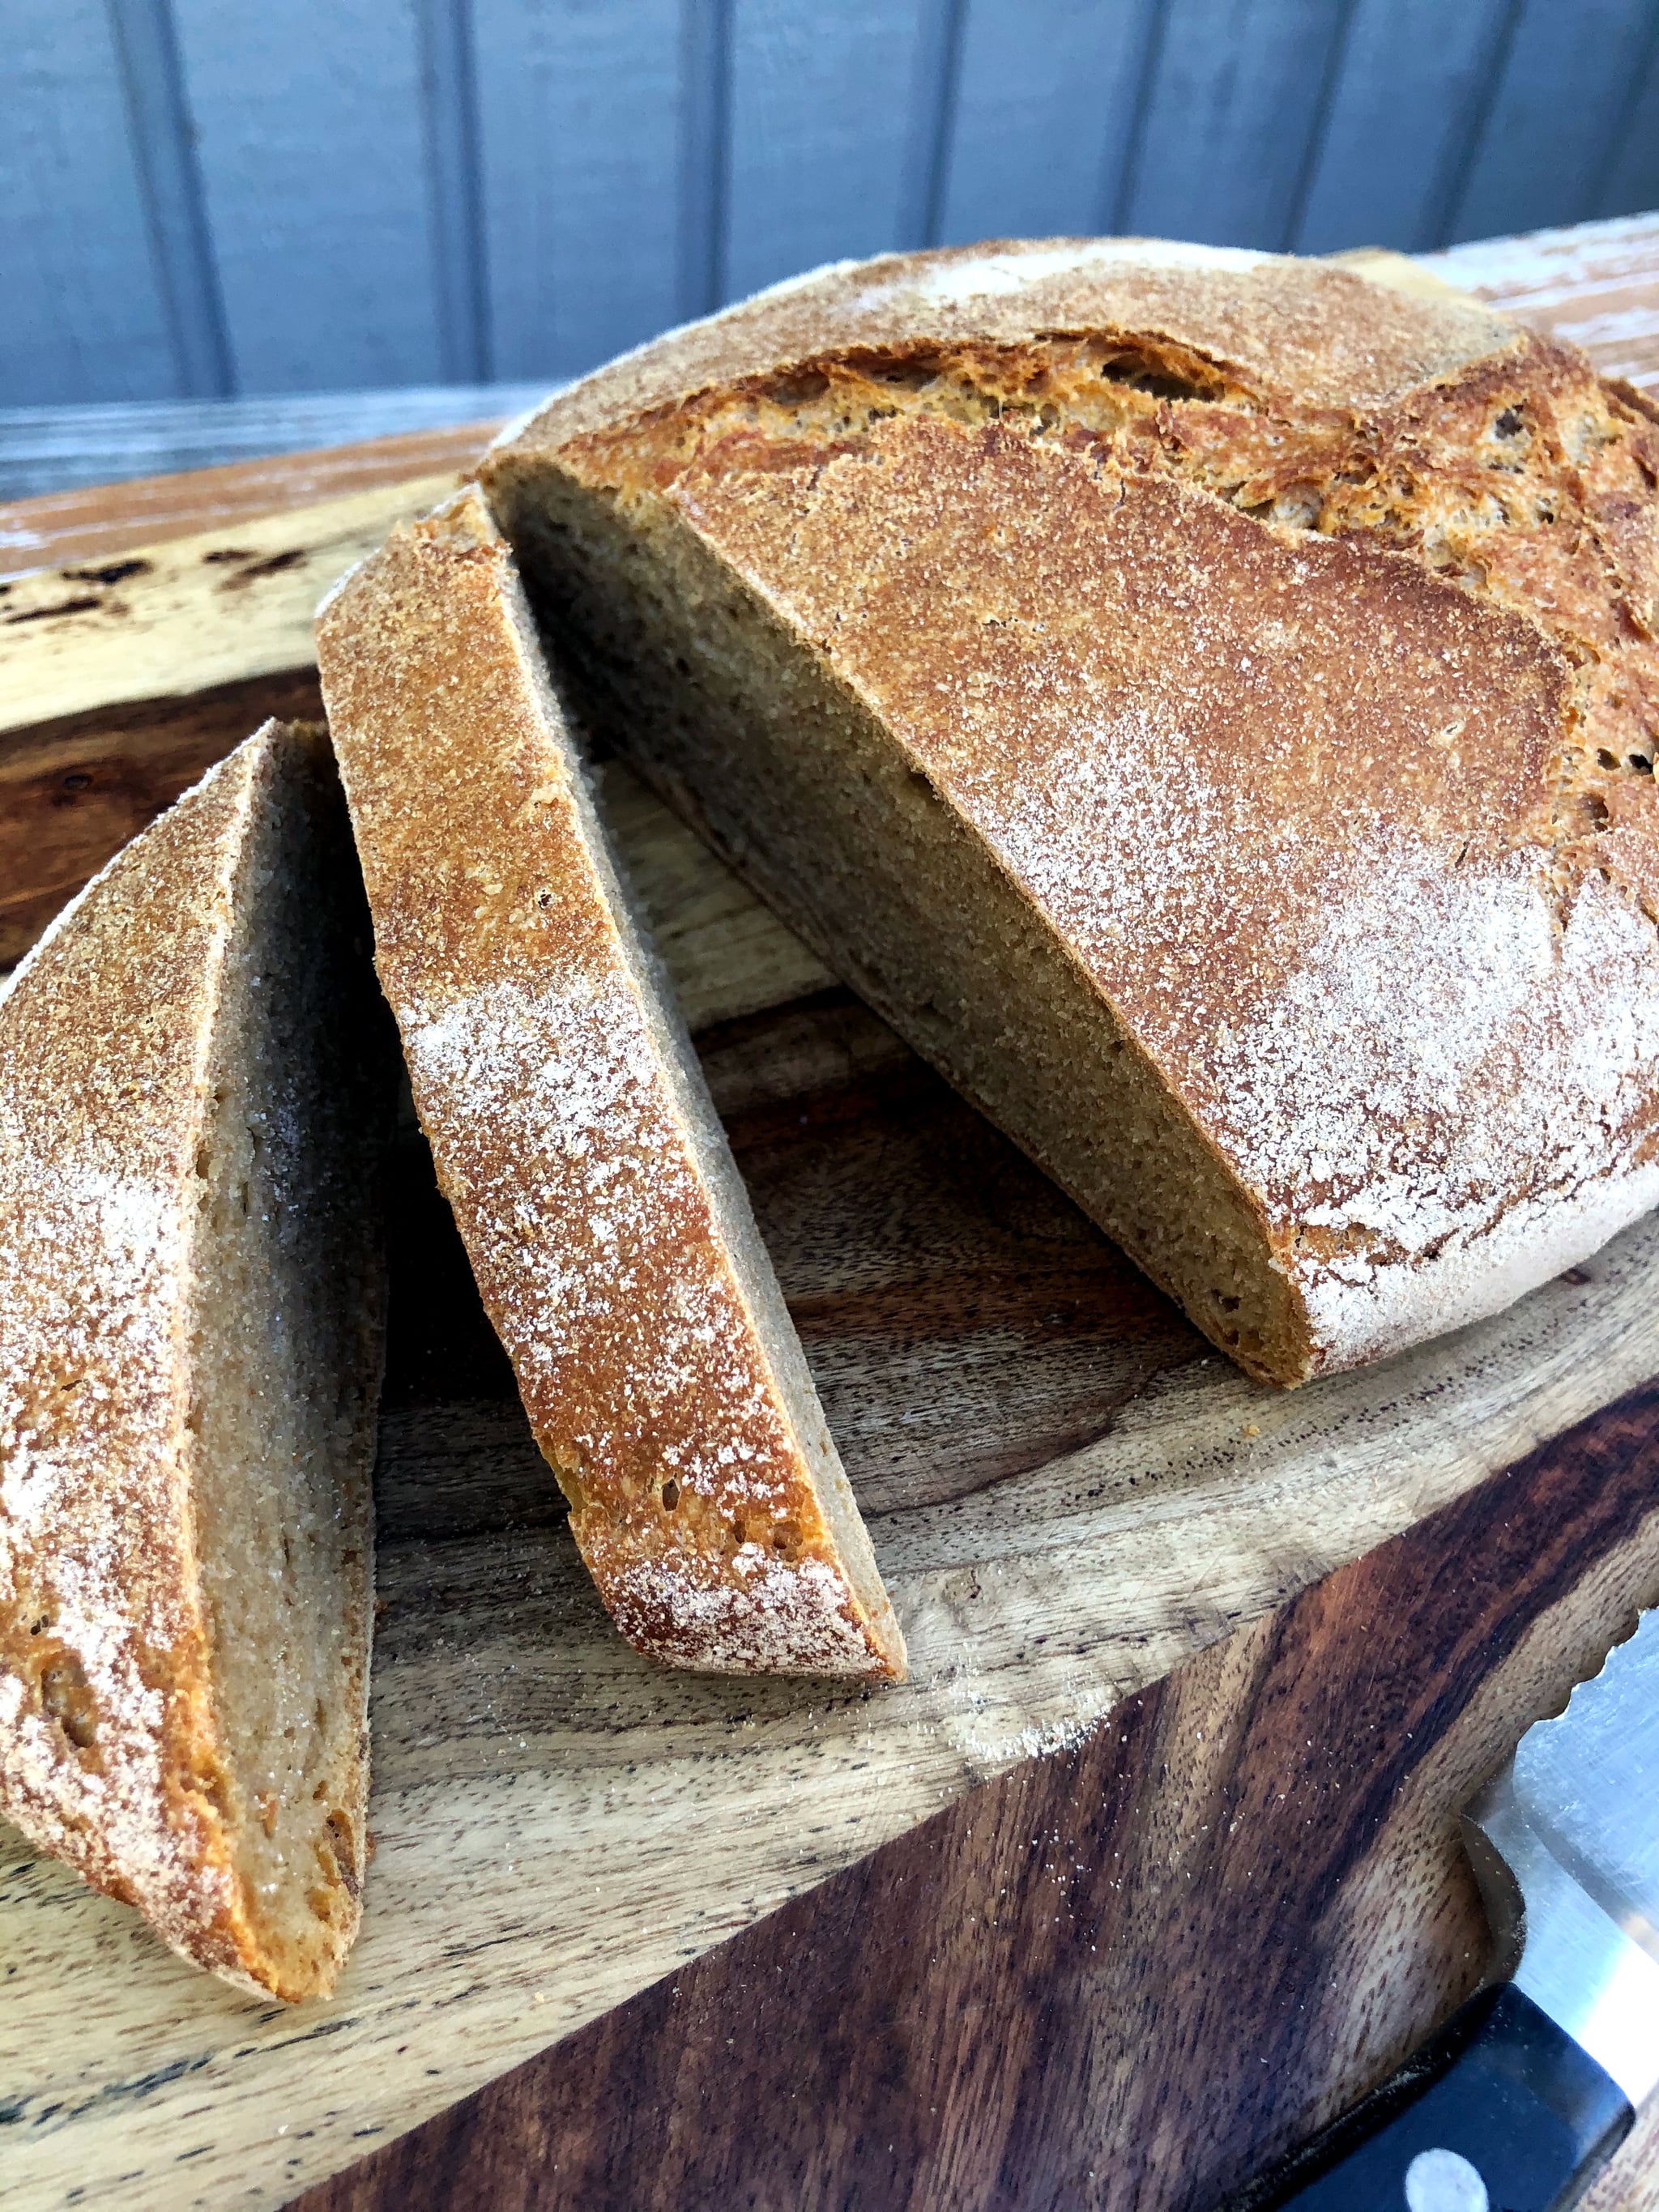
This bread has a hard, crusty outer layer with a soft and slightly moist interior. You won't believe how amazing this bread tastes and how little effort it takes to make. Store any leftovers (if there are any!) in a reusable container.
It tastes so delicious the next day toasted with smashed avocado, sliced tomato, and a sprinkle of Everything but the Bagel Seasoning. Try it with homemade nut butter and jam, or use it to make french toast.

Whole-Wheat No-Knead Bread Recipe
Adapted from Mark Bitman's No-Knead Bread

Ingredients
- 3 cups white whole wheat flour (430 grams)
1/4 teaspoon instant yeast
2 teaspoons salt
1 1/2 cups plus 1 to 2 tablespoons of water (390 milliliters)
Directions
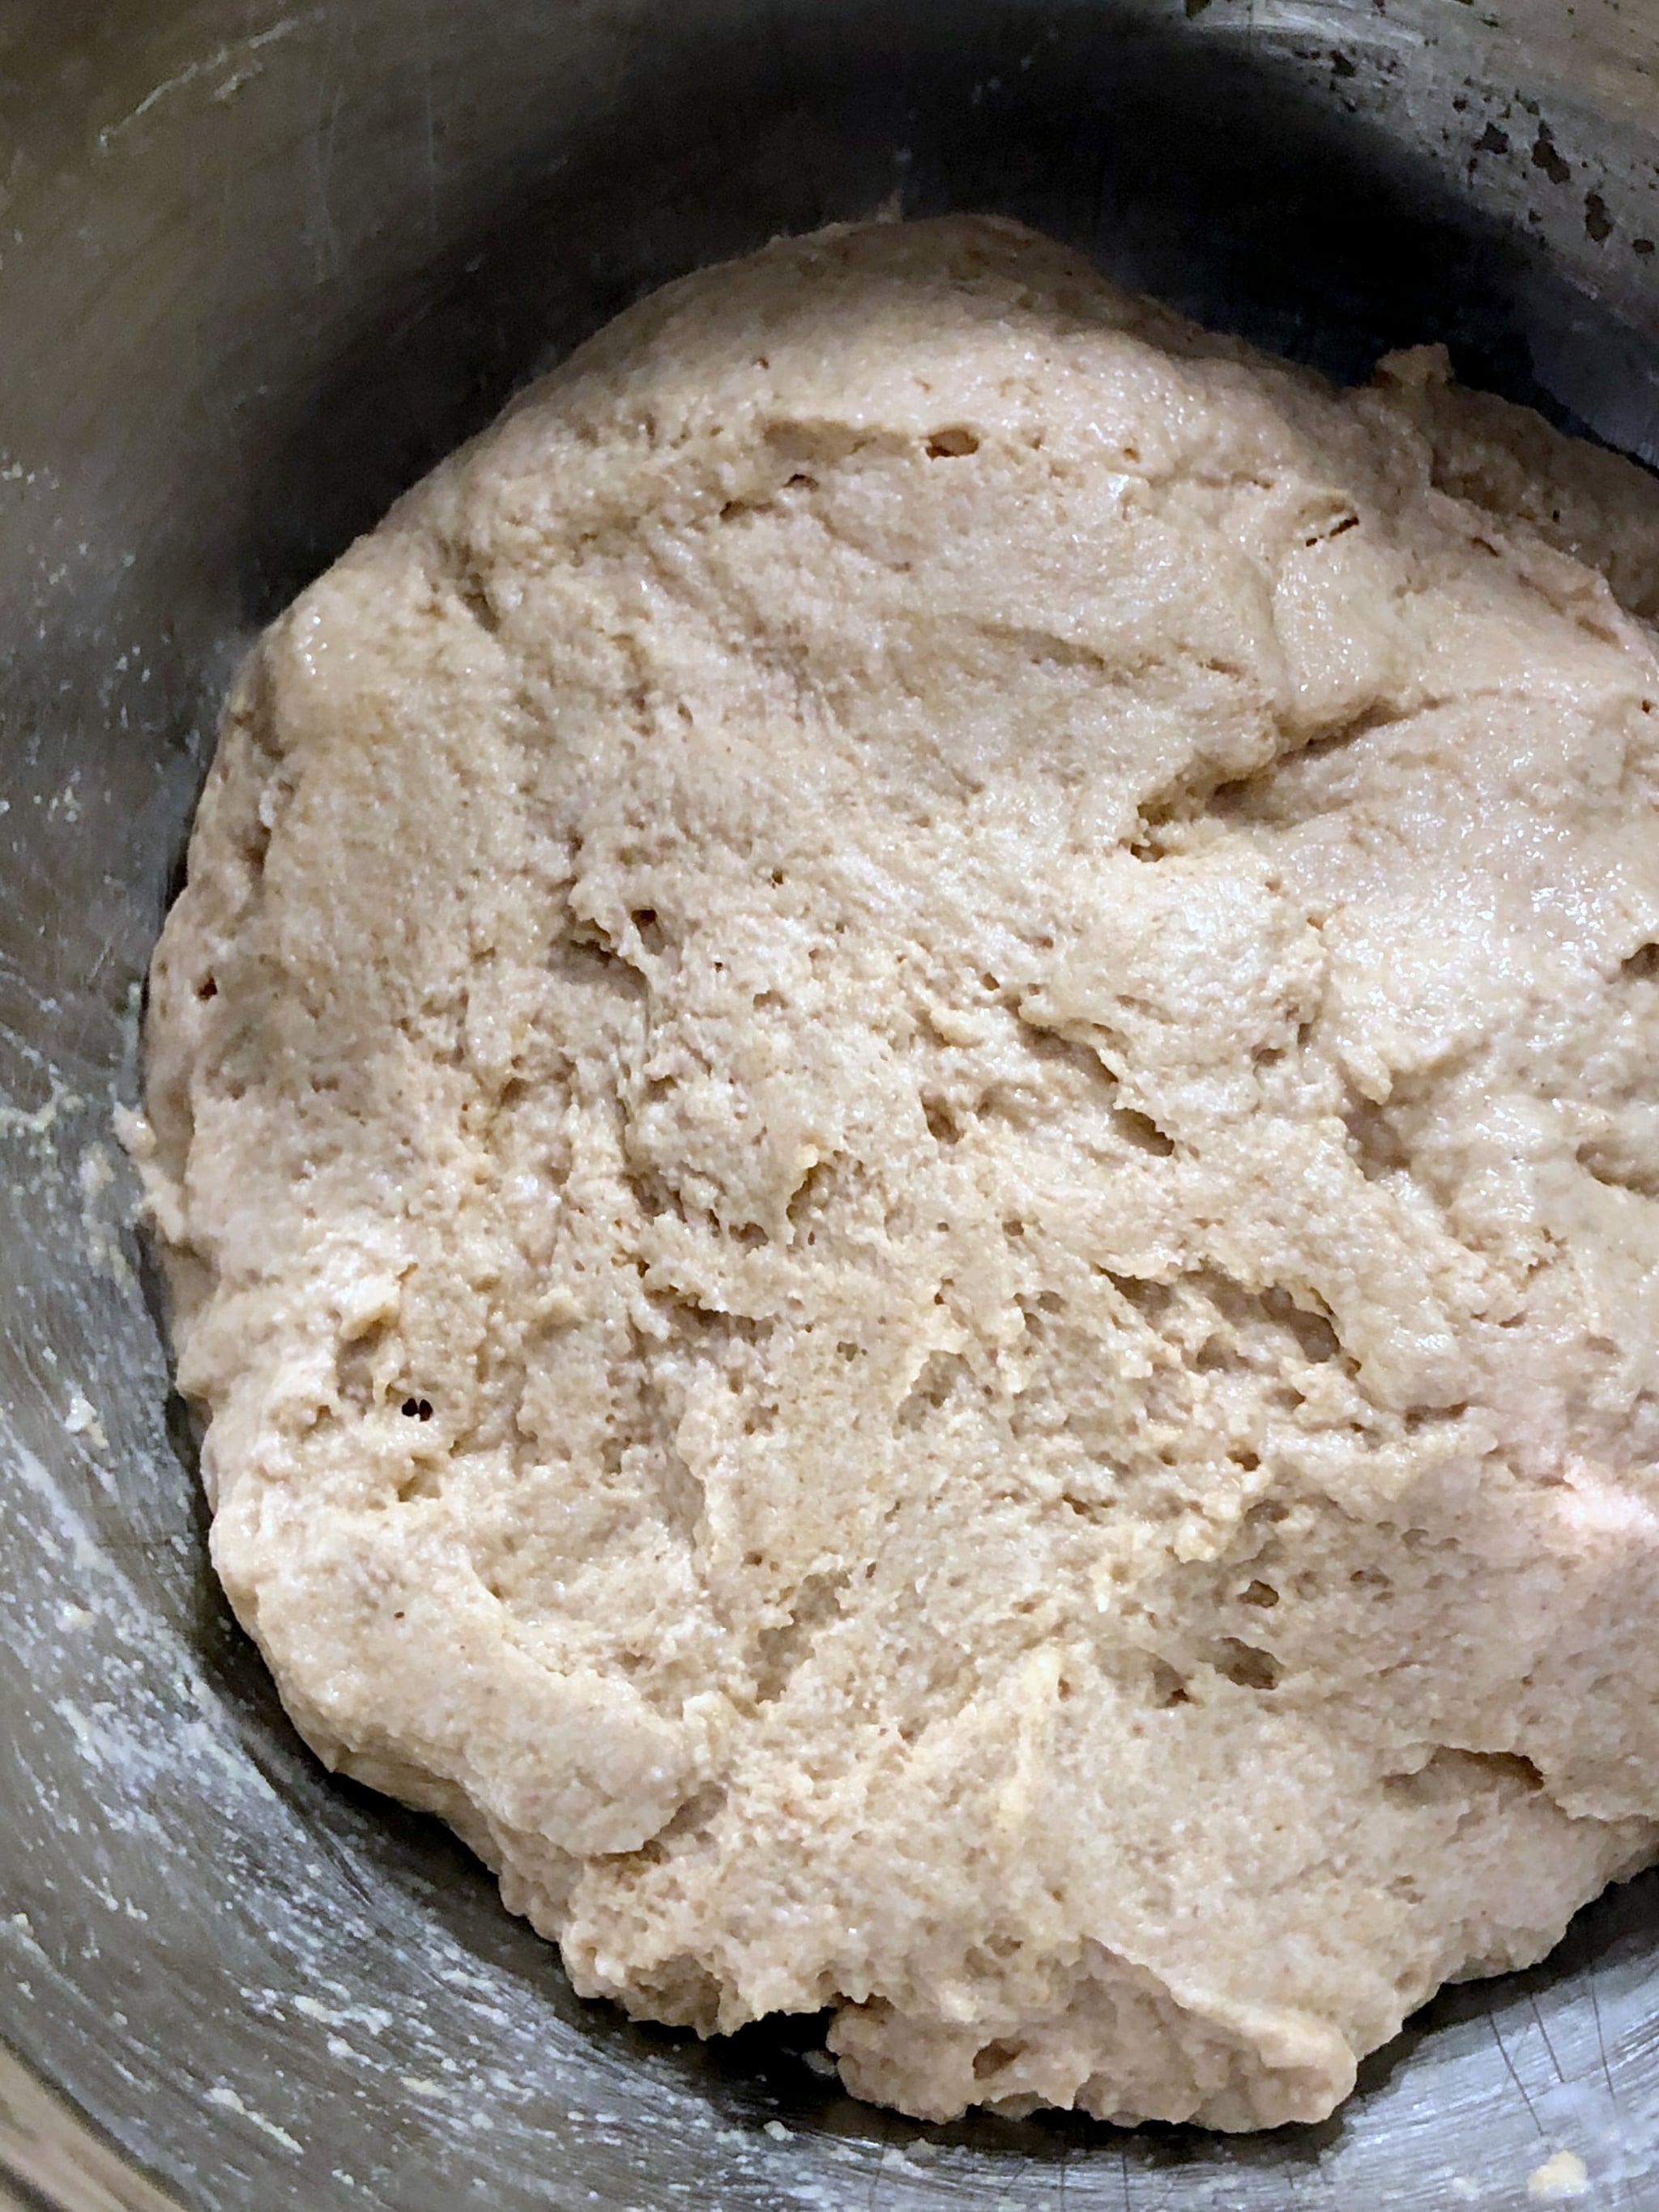
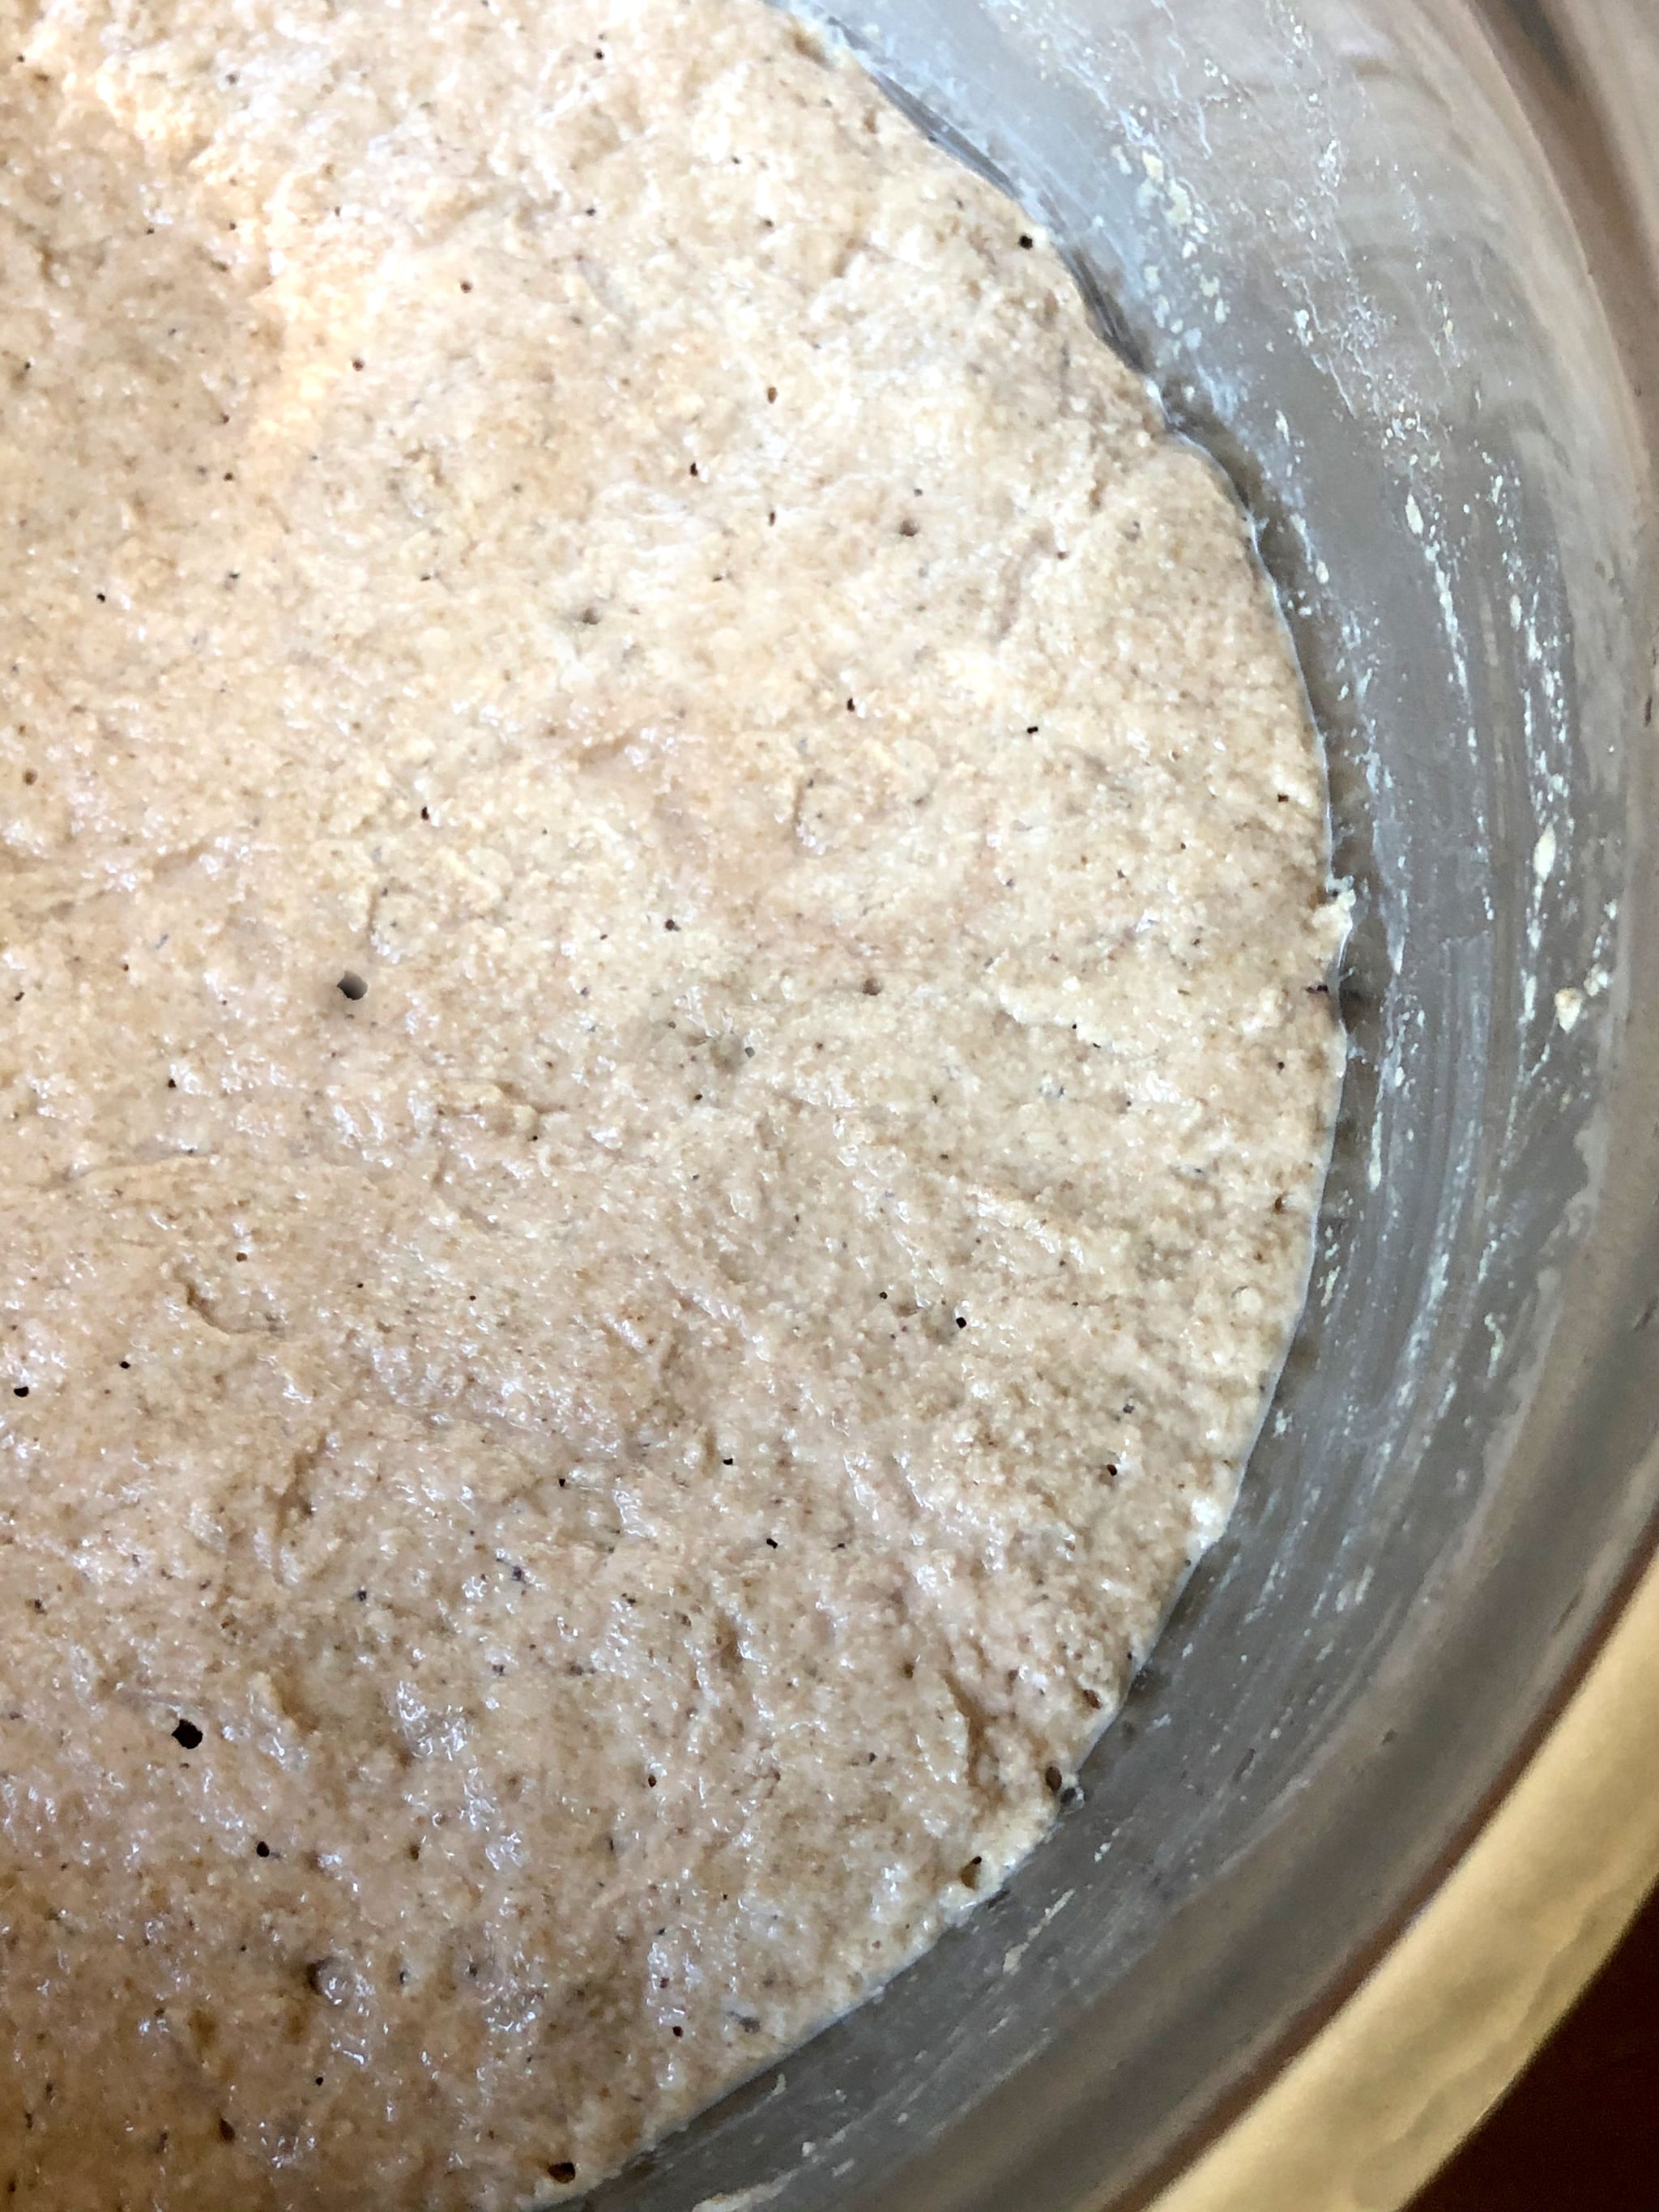
- In a large bowl, mix together the flour, yeast, salt, and water until a sticky dough ball forms. If your dough is too wet, add up to one-third cup more flour.
- Cover it with plastic wrap (I reuse a produce bag from the grocery store), and let it sit on the counter overnight, or for at least 12 hours, but preferably 18.
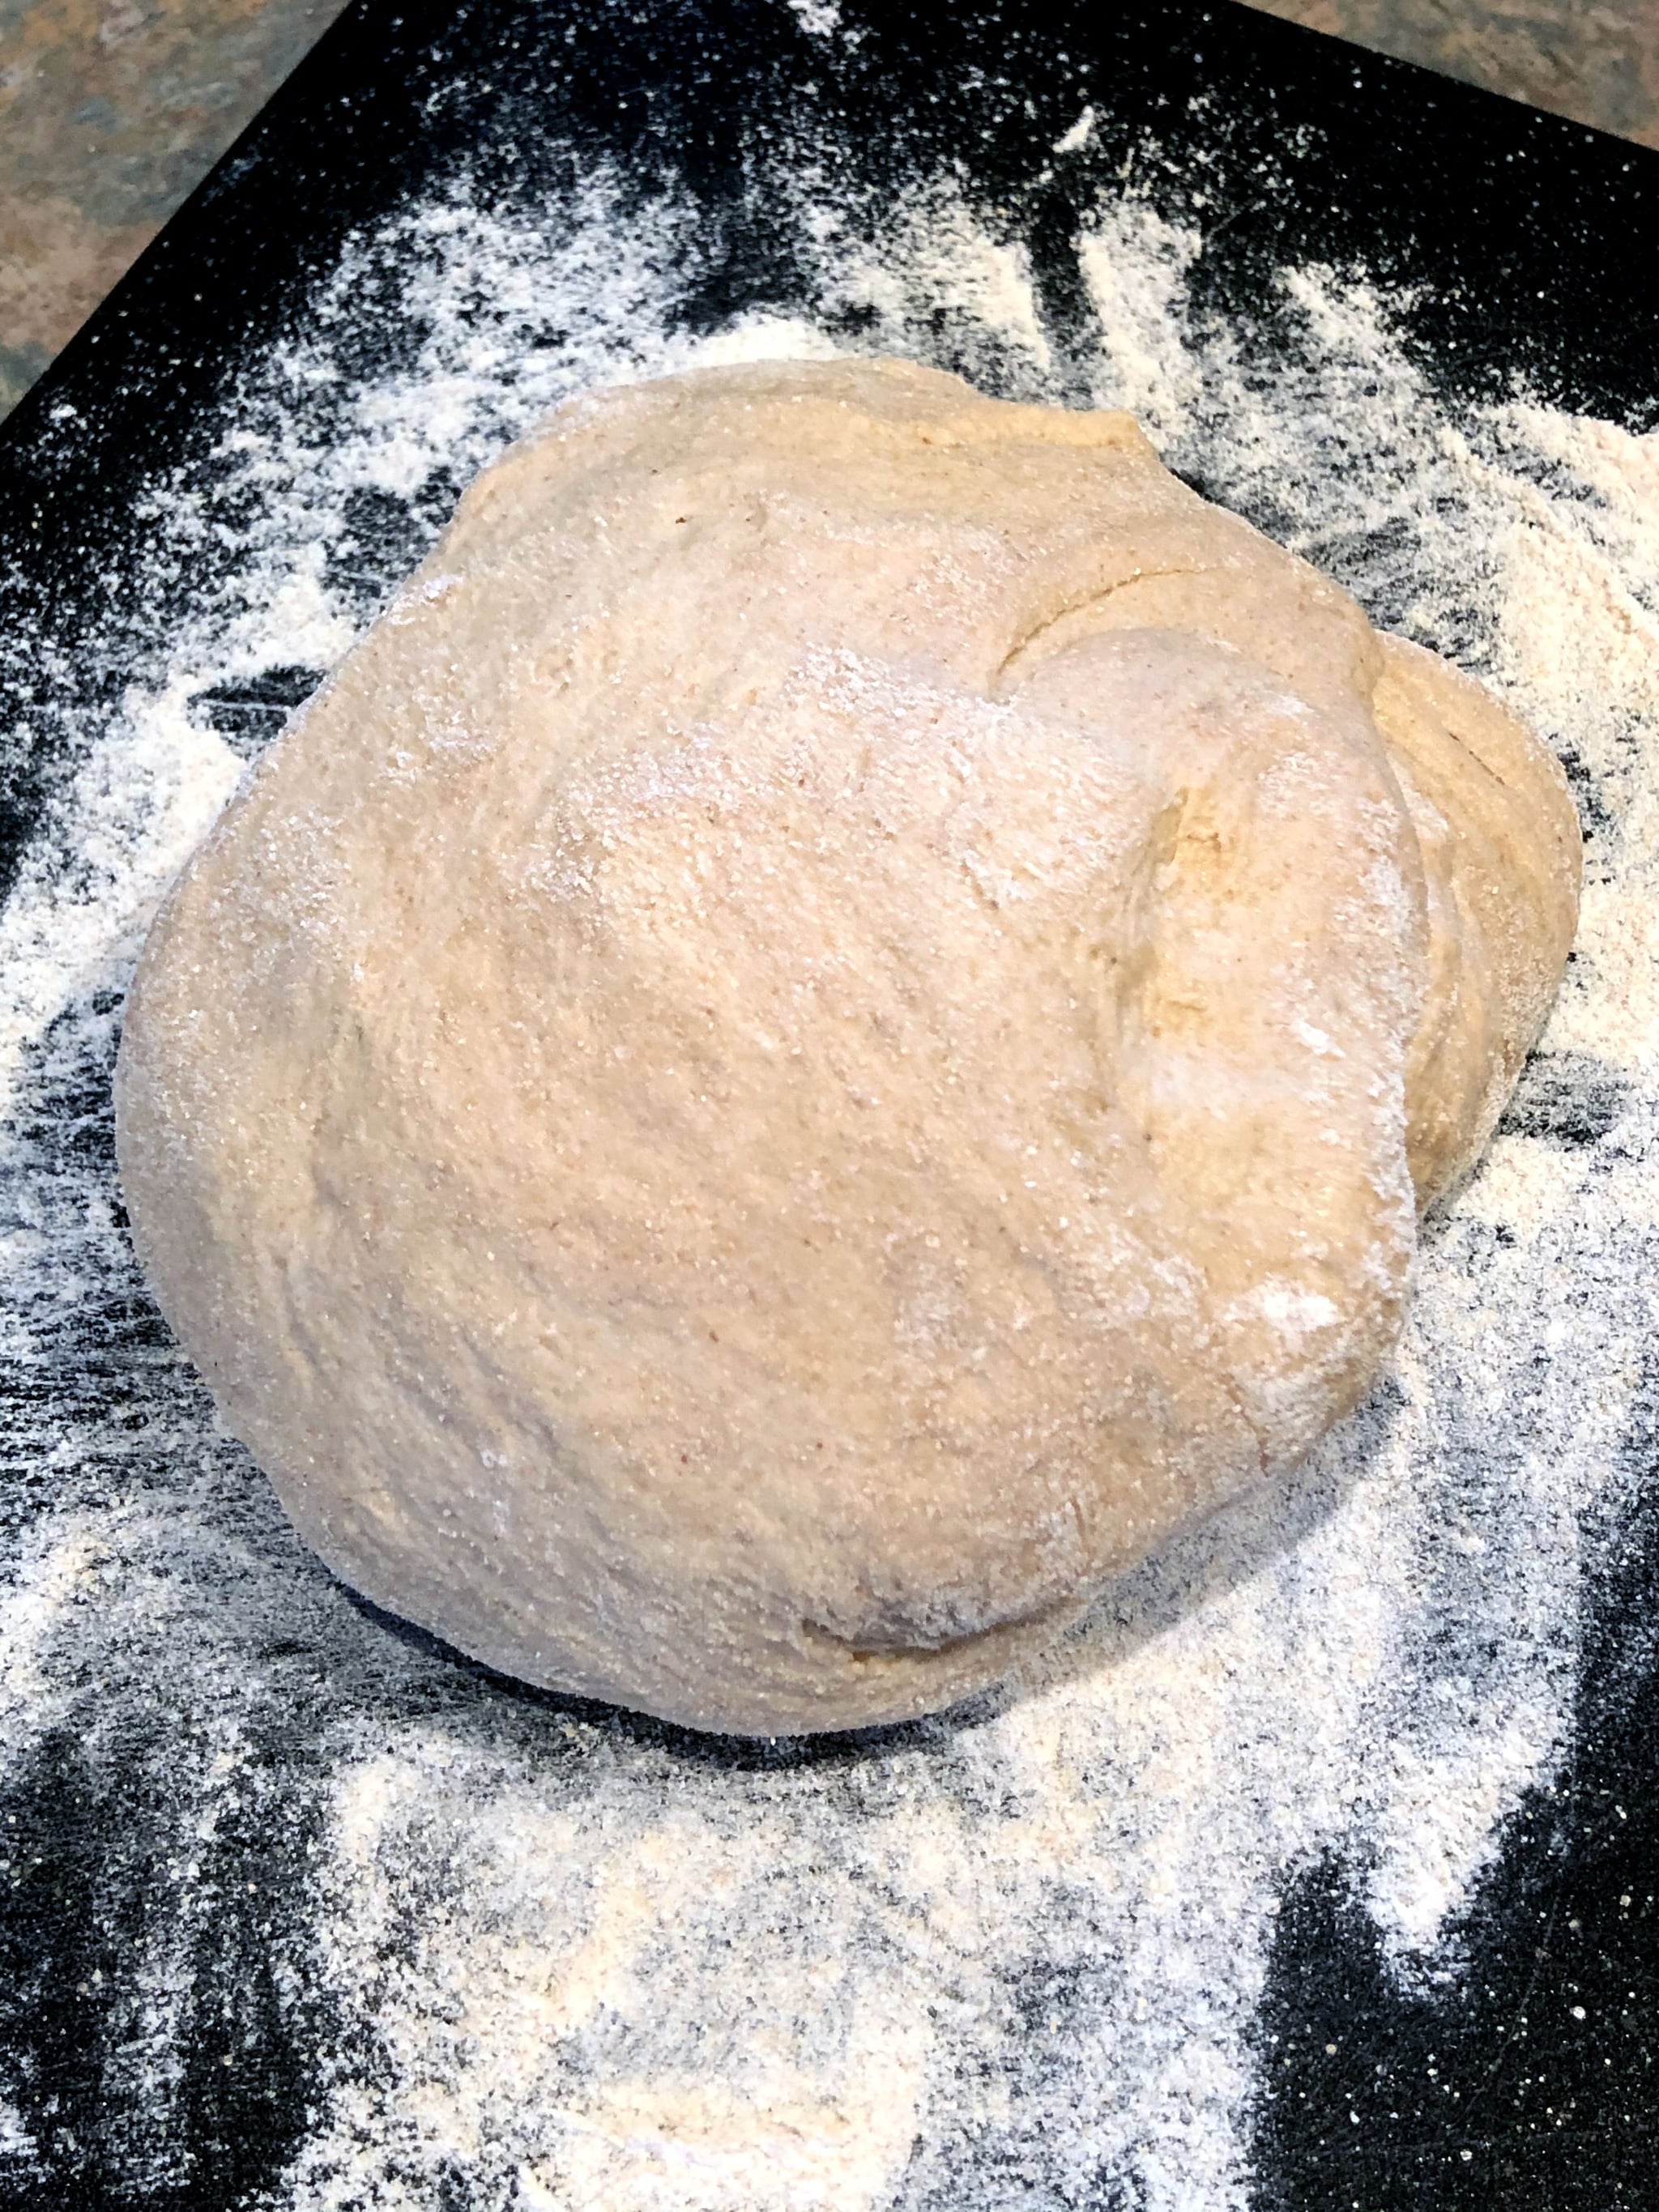
- The following day, you'll know the dough is ready when you see tiny bubbles form on the surface of the dough. Lightly flour the counter or a large cutting board and place the dough on it. Sprinkle the top with a little more flour and fold it over on itself once or twice. Cover loosely with the same plastic wrap and let it rest about 15 minutes.
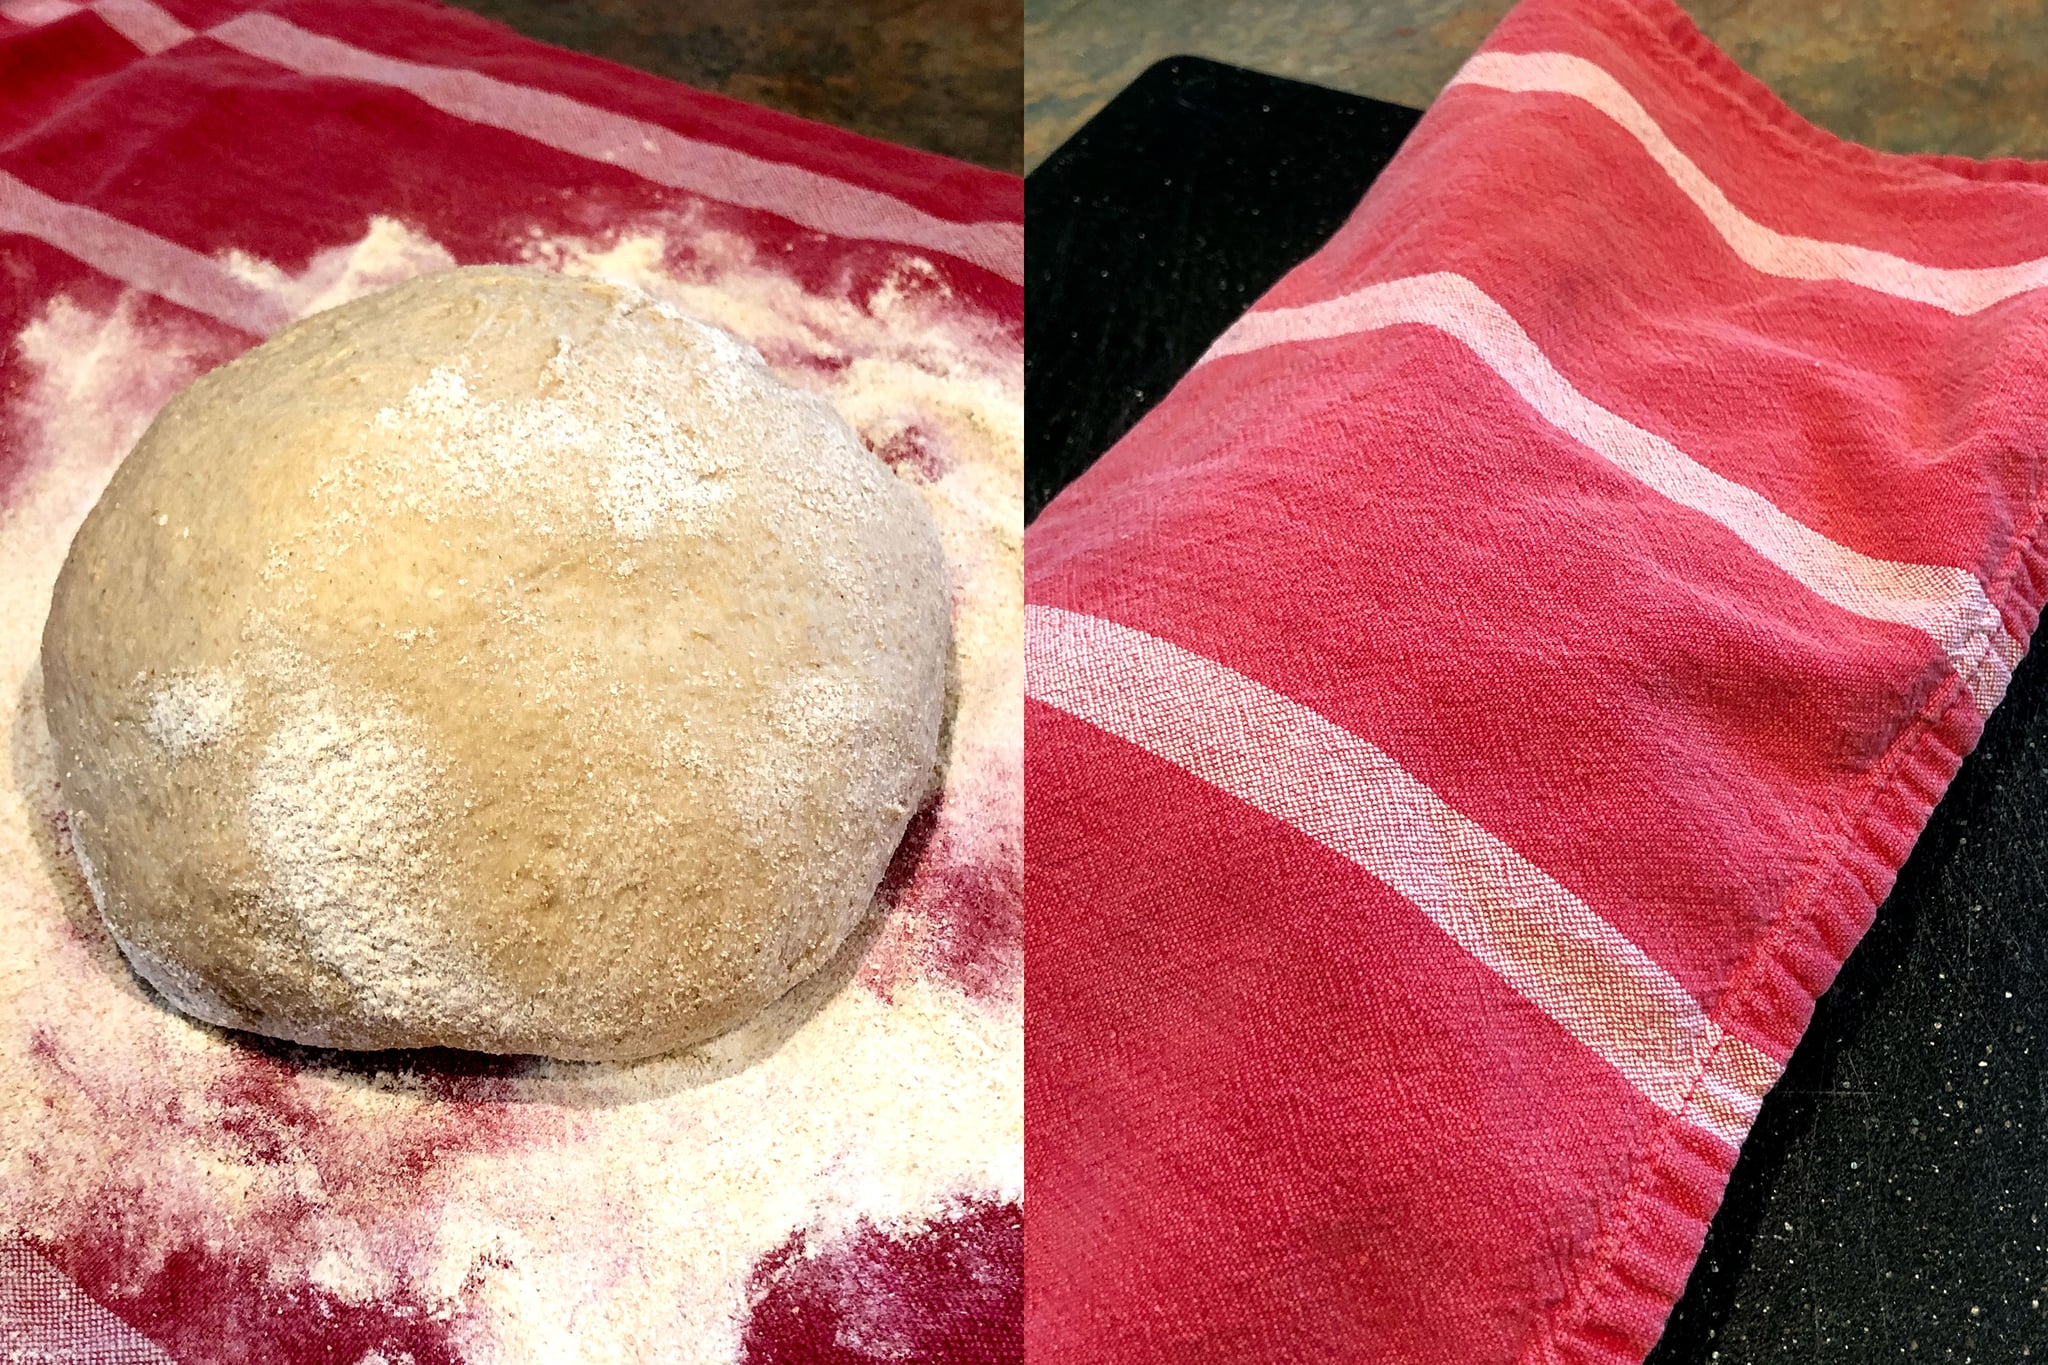
- Generously coat a cotton towel (not terry cloth) with flour. Using just enough flour to keep the dough from sticking to the counter or to your fingers, gently and quickly shape the dough into a ball. Place the dough seam side down on the towel and dust with more flour. Fold the towel over the dough and let it rise for about two hours, or until it's doubled in size.
- At least 30 minutes before the dough is ready, heat your oven to 450° F. I usually set a timer for 90 minutes after the previous step to remind me to turn the oven on. Put a 6- to 8-quart heavy covered pot (cast-iron, enamel, Pyrex, or ceramic) in the oven as it heats.
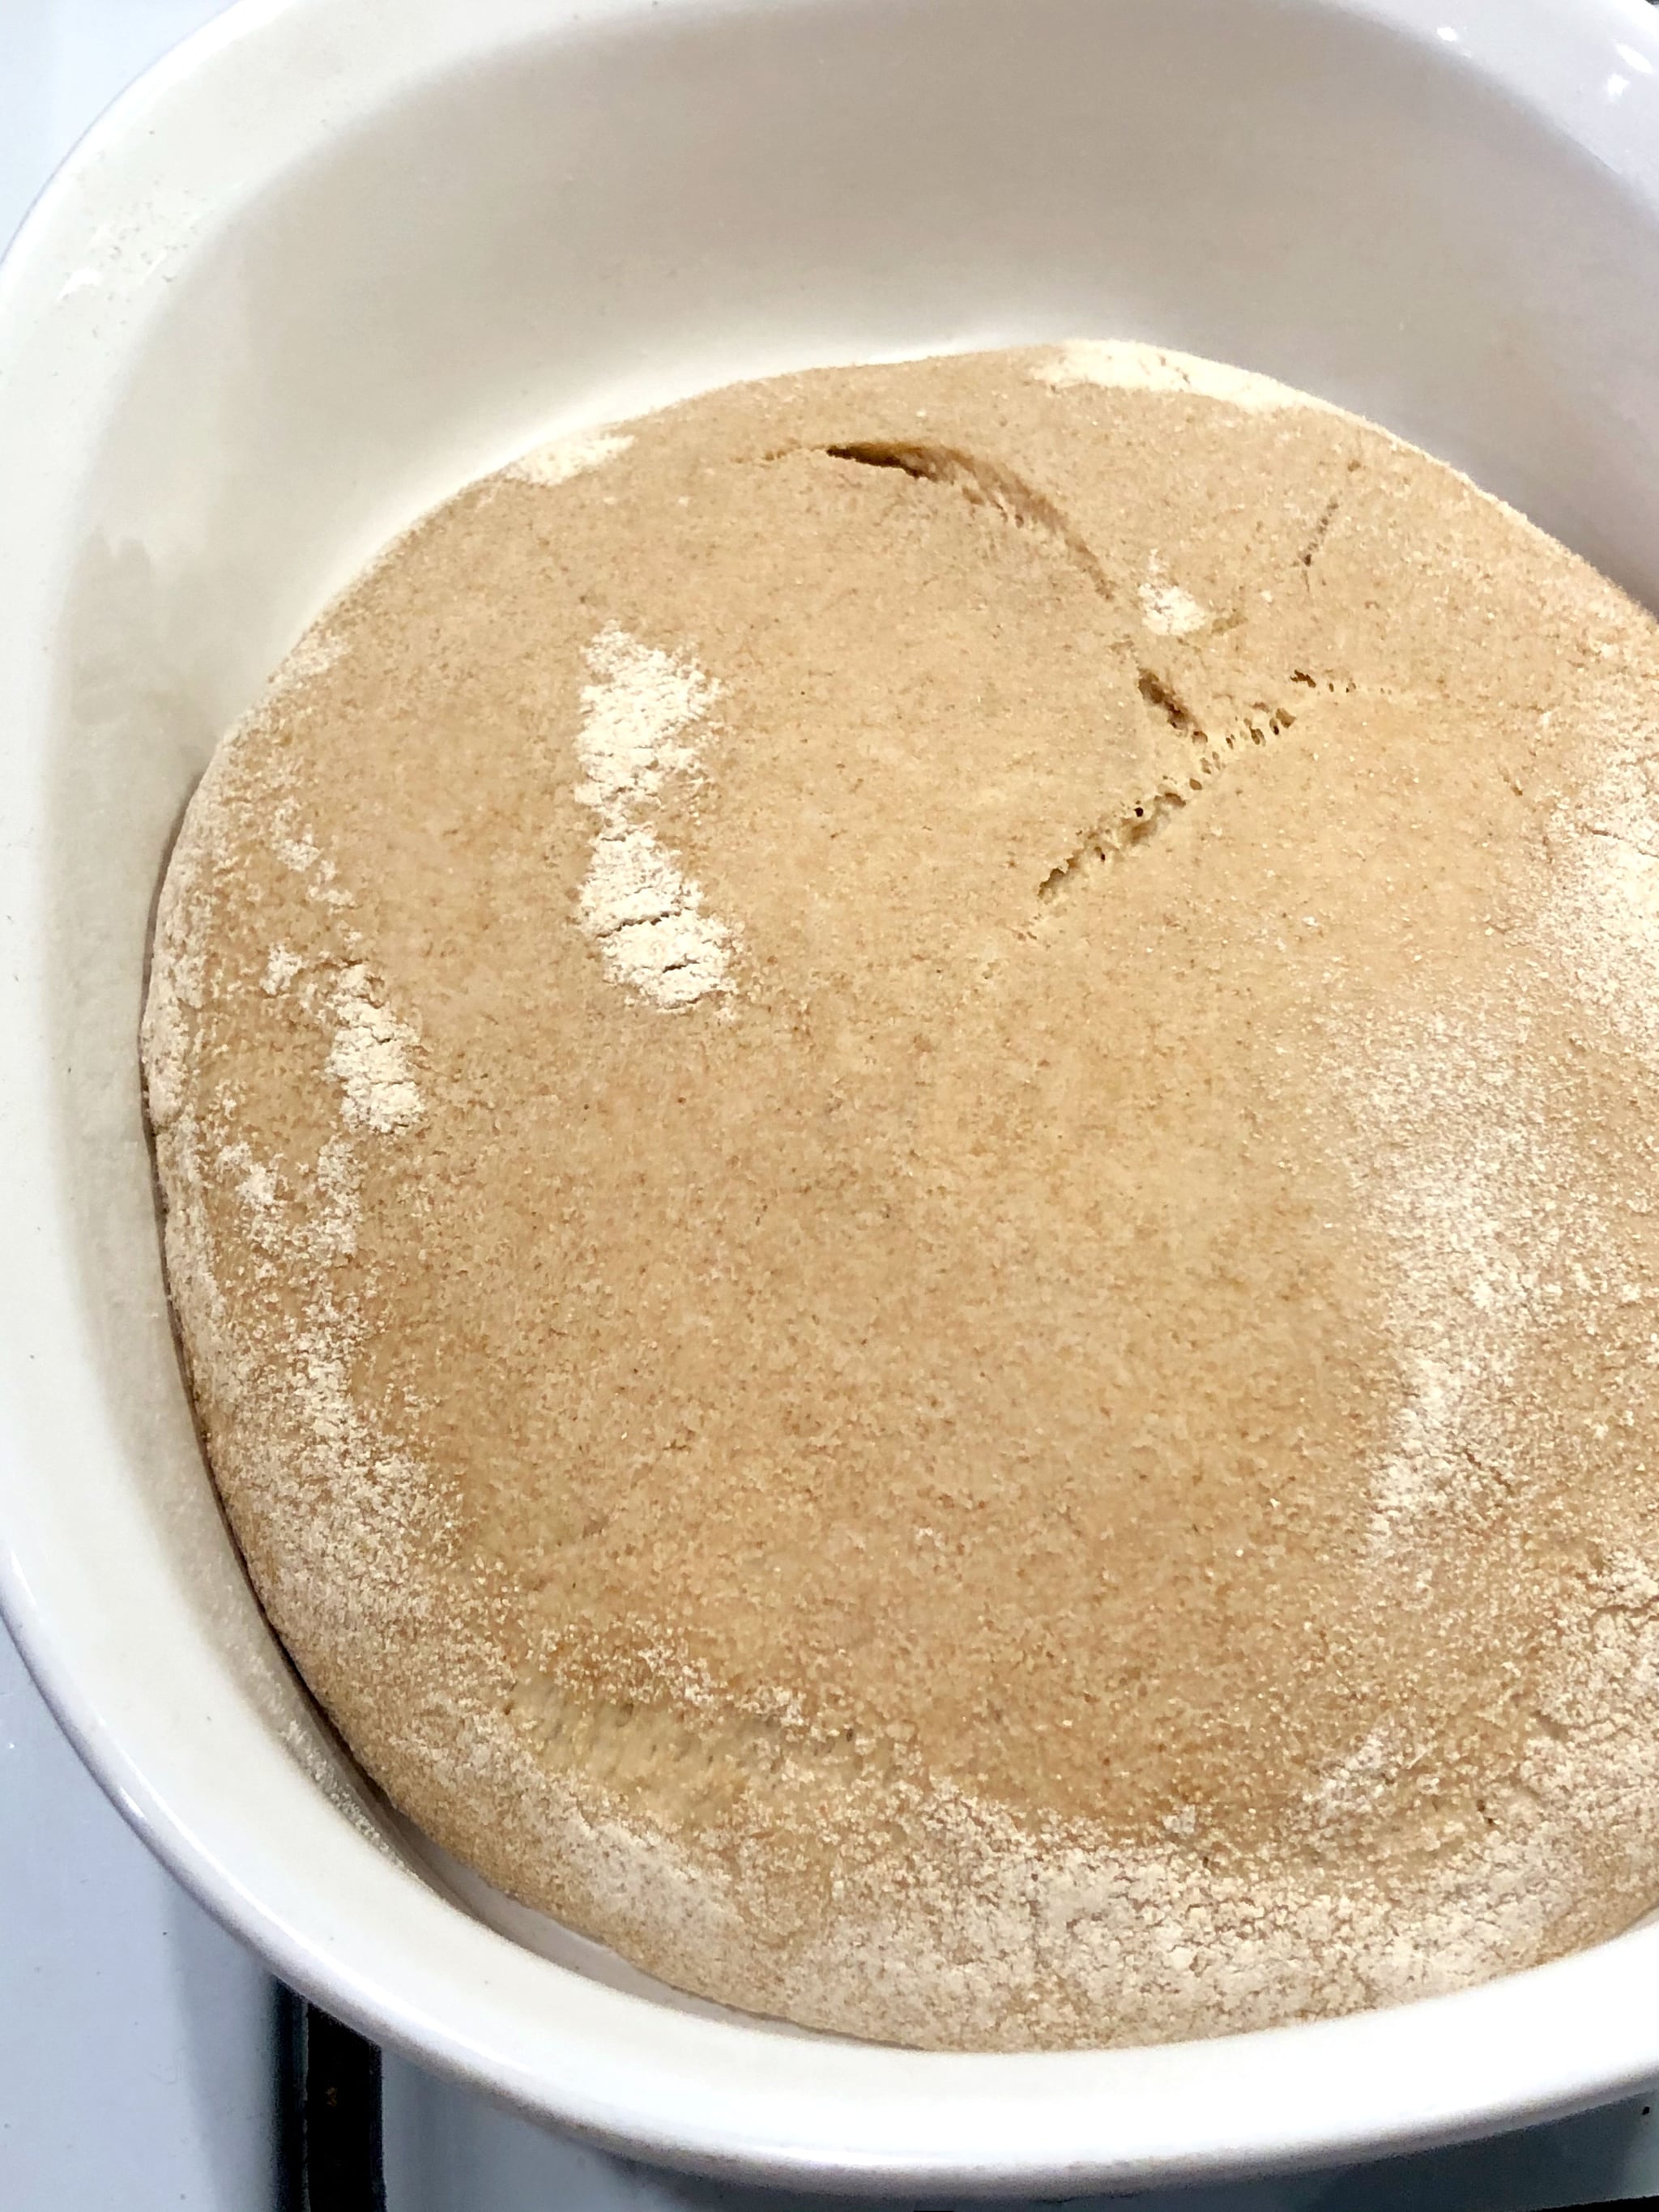
- When the dough is ready, carefully remove the hot pot from the oven. There's no need to oil the pan or line it with parchment paper. Slide your hand between the dough and the towel and turn the dough over into the hot pot with the seam side up — it may look like a wrinkled mess, but that's OK. Shake the pan once or twice if the dough is unevenly distributed; it will straighten out as it bakes.
- Cover with the lid and bake 30 minutes, then remove the lid and bake for another 15 to 30 minutes, until the loaf is beautifully browned. I like it slightly brown so I bake it uncovered for 15 minutes, but you may prefer a dark brown crust, so bake it uncovered closer to 30 minutes. Cool the bread on a rack for 15 minutes and enjoy!
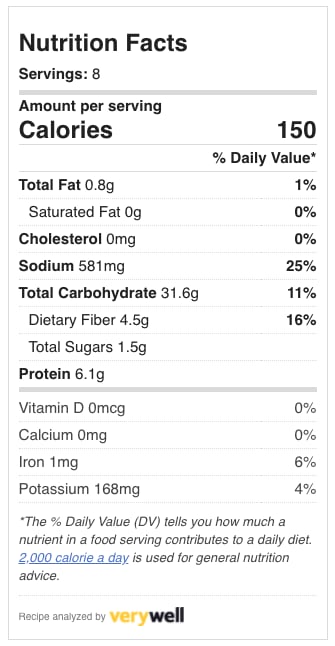
Makes about eight servings. Here's the nutritional info for one serving:
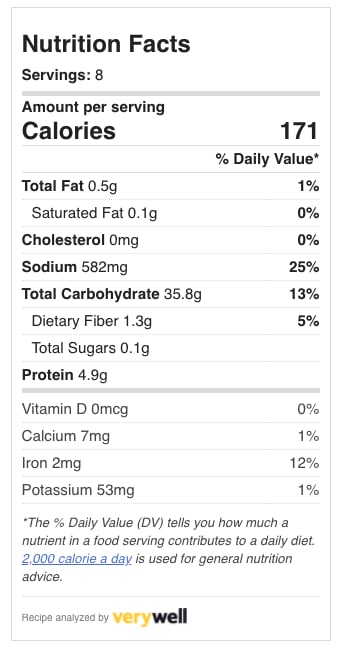
For comparison, here's the nutritional information for one serving if you used all-purpose flour:
Information
- Yield
- 8 servings
- Prep Time
- 5 minutes
- Cook Time
- 45 minutes
- Total Time
- 49 minutes, 59 seconds


