Candy Corn Cake Recipe With Photos
This Candy Corn Surprise Cake Is Sure To Be a Hit at Your Next Monster Mash
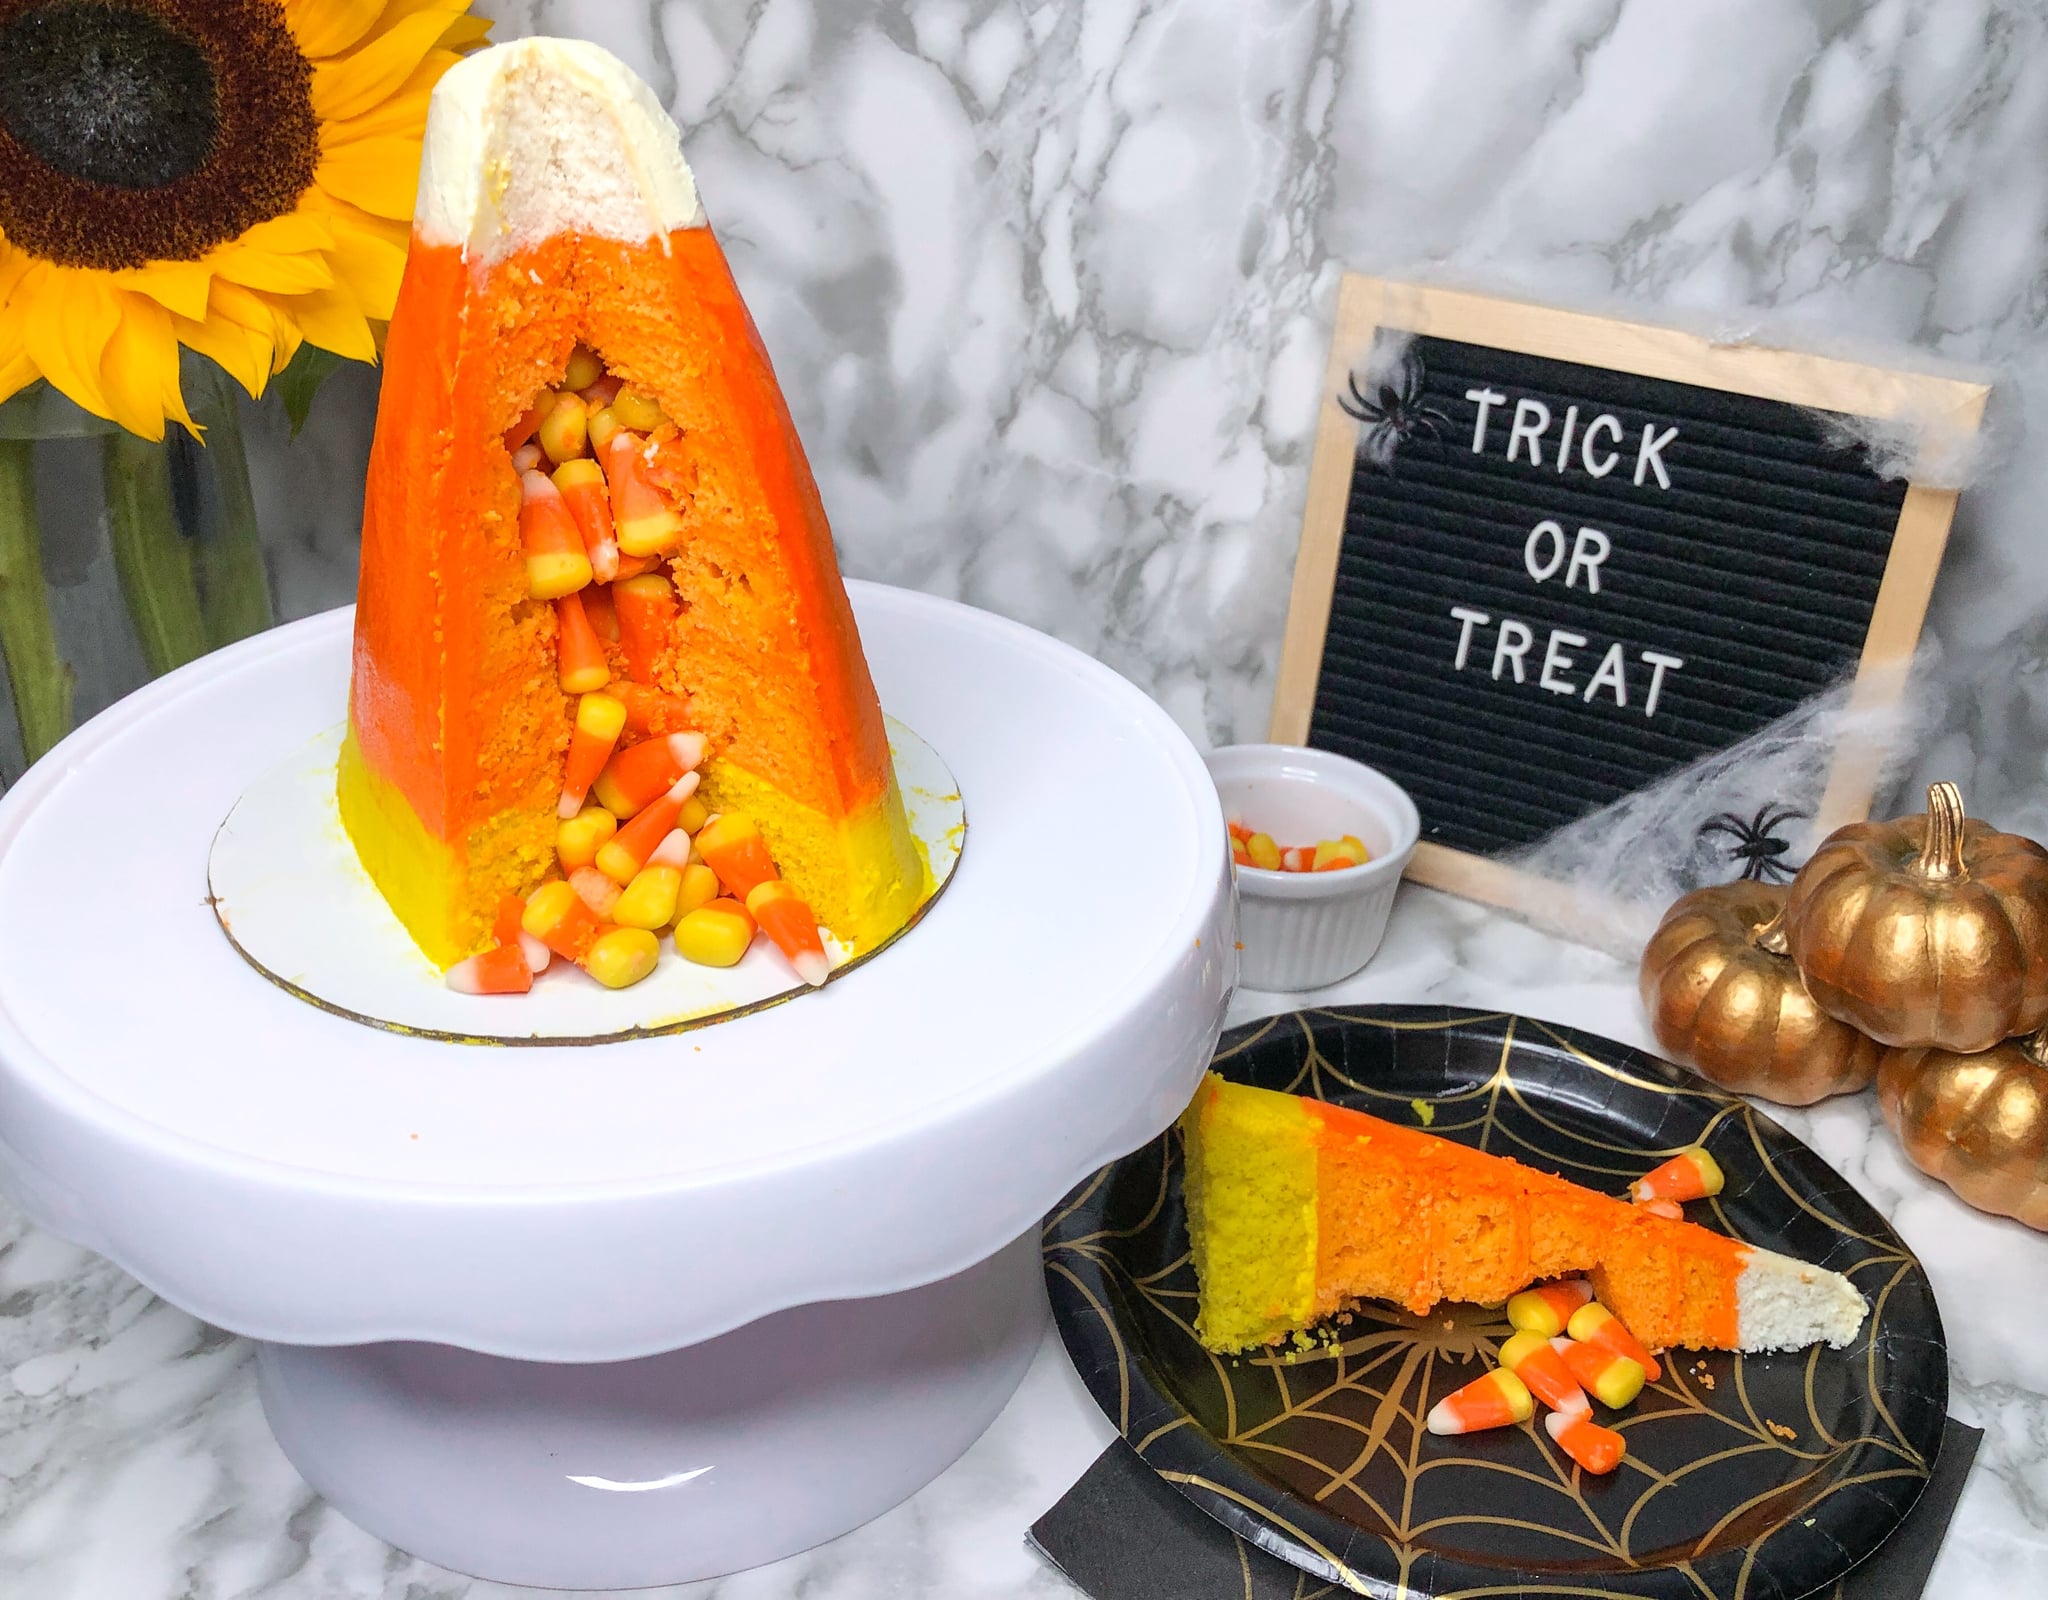
Of the many sweet treats considered to be quintessential during the Halloween season, none are more recognisable than candy corn. The tri-coloured candy can usually be found on its own, or in an assorted candy offering surrounded by other Halloween sweets. However, I decided to take this a step further and incorporate candy corn into a Halloween-themed cake that tastes just as good as it looks.
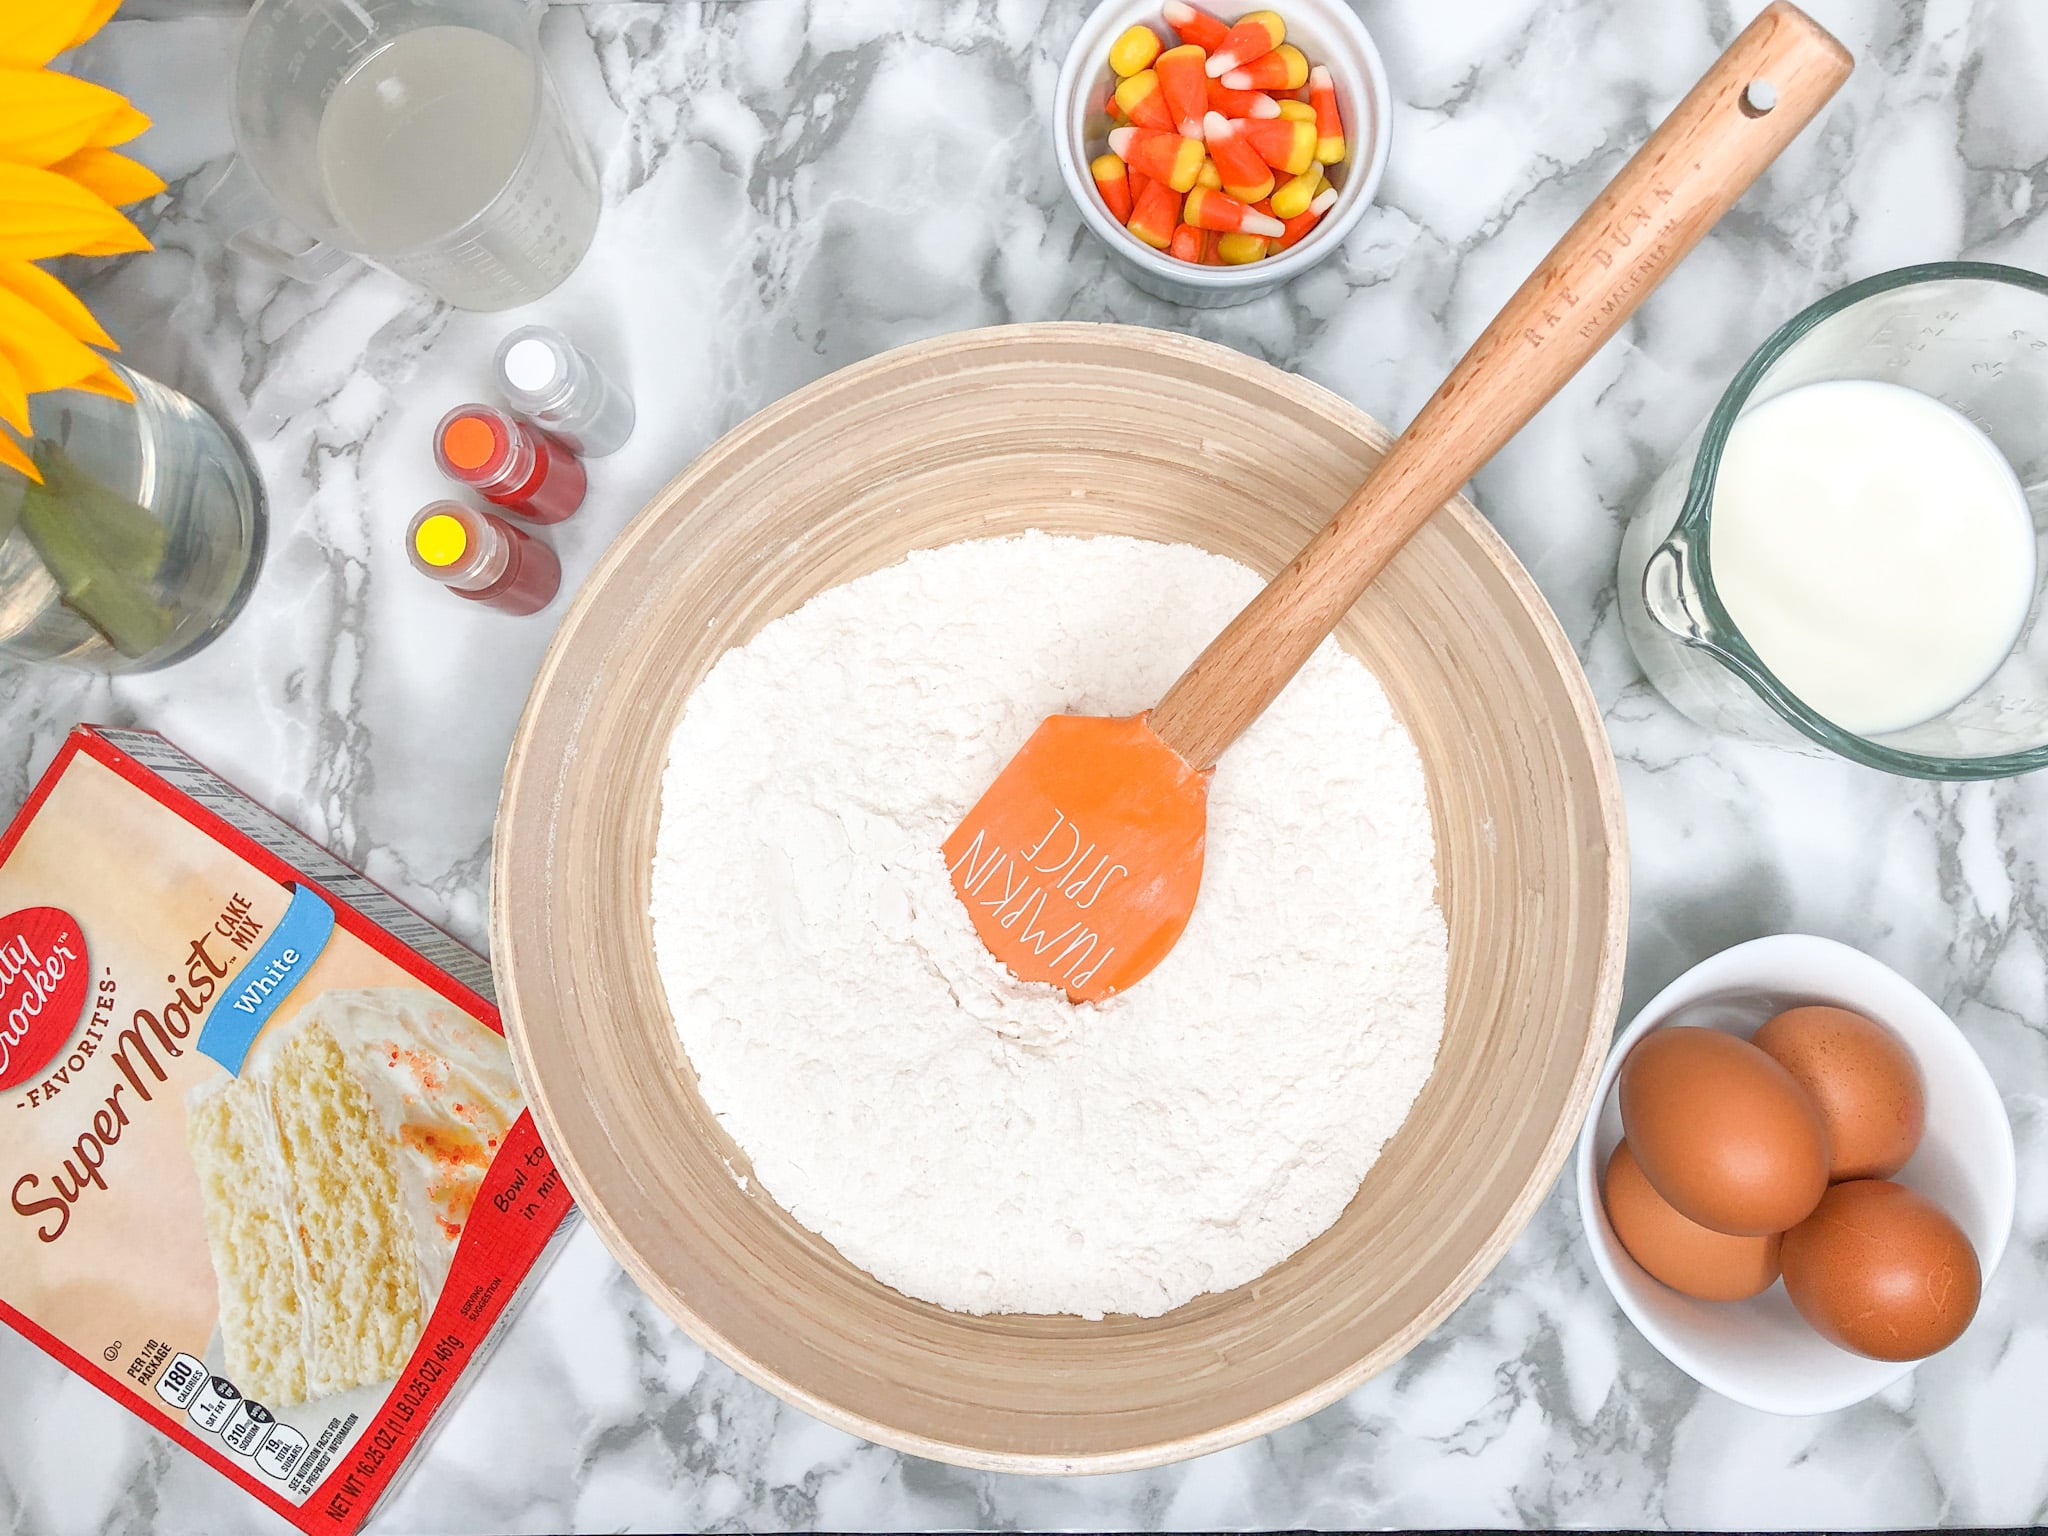
The fairly simple recipe for this fall dessert requires just one box of cake mix, a few egg whites, milk, and oil. The recipe was designed purposefully this way to make it easier to replicate this dessert with kids. With a candy corn surprise stuffed into the centre of the cake, and a delicious homemade frosting covering the outside, this candy corn cake is sure to be a hit at every Halloween party for years to come.

Candy Corn Surprise Cake
Original Recipe

Ingredients
- For the Cake
1 box white cake mix
4 egg whites
1 1/3 cup of milk
½ cup of oil
- For the Frosting
1 cup unsalted butter, softened (not melted)
2 ½ cup powdered sugar
1 teaspoon clear vanilla extract
2-3 tablespoons milk
Directions
- Pre-heat oven to 350°F
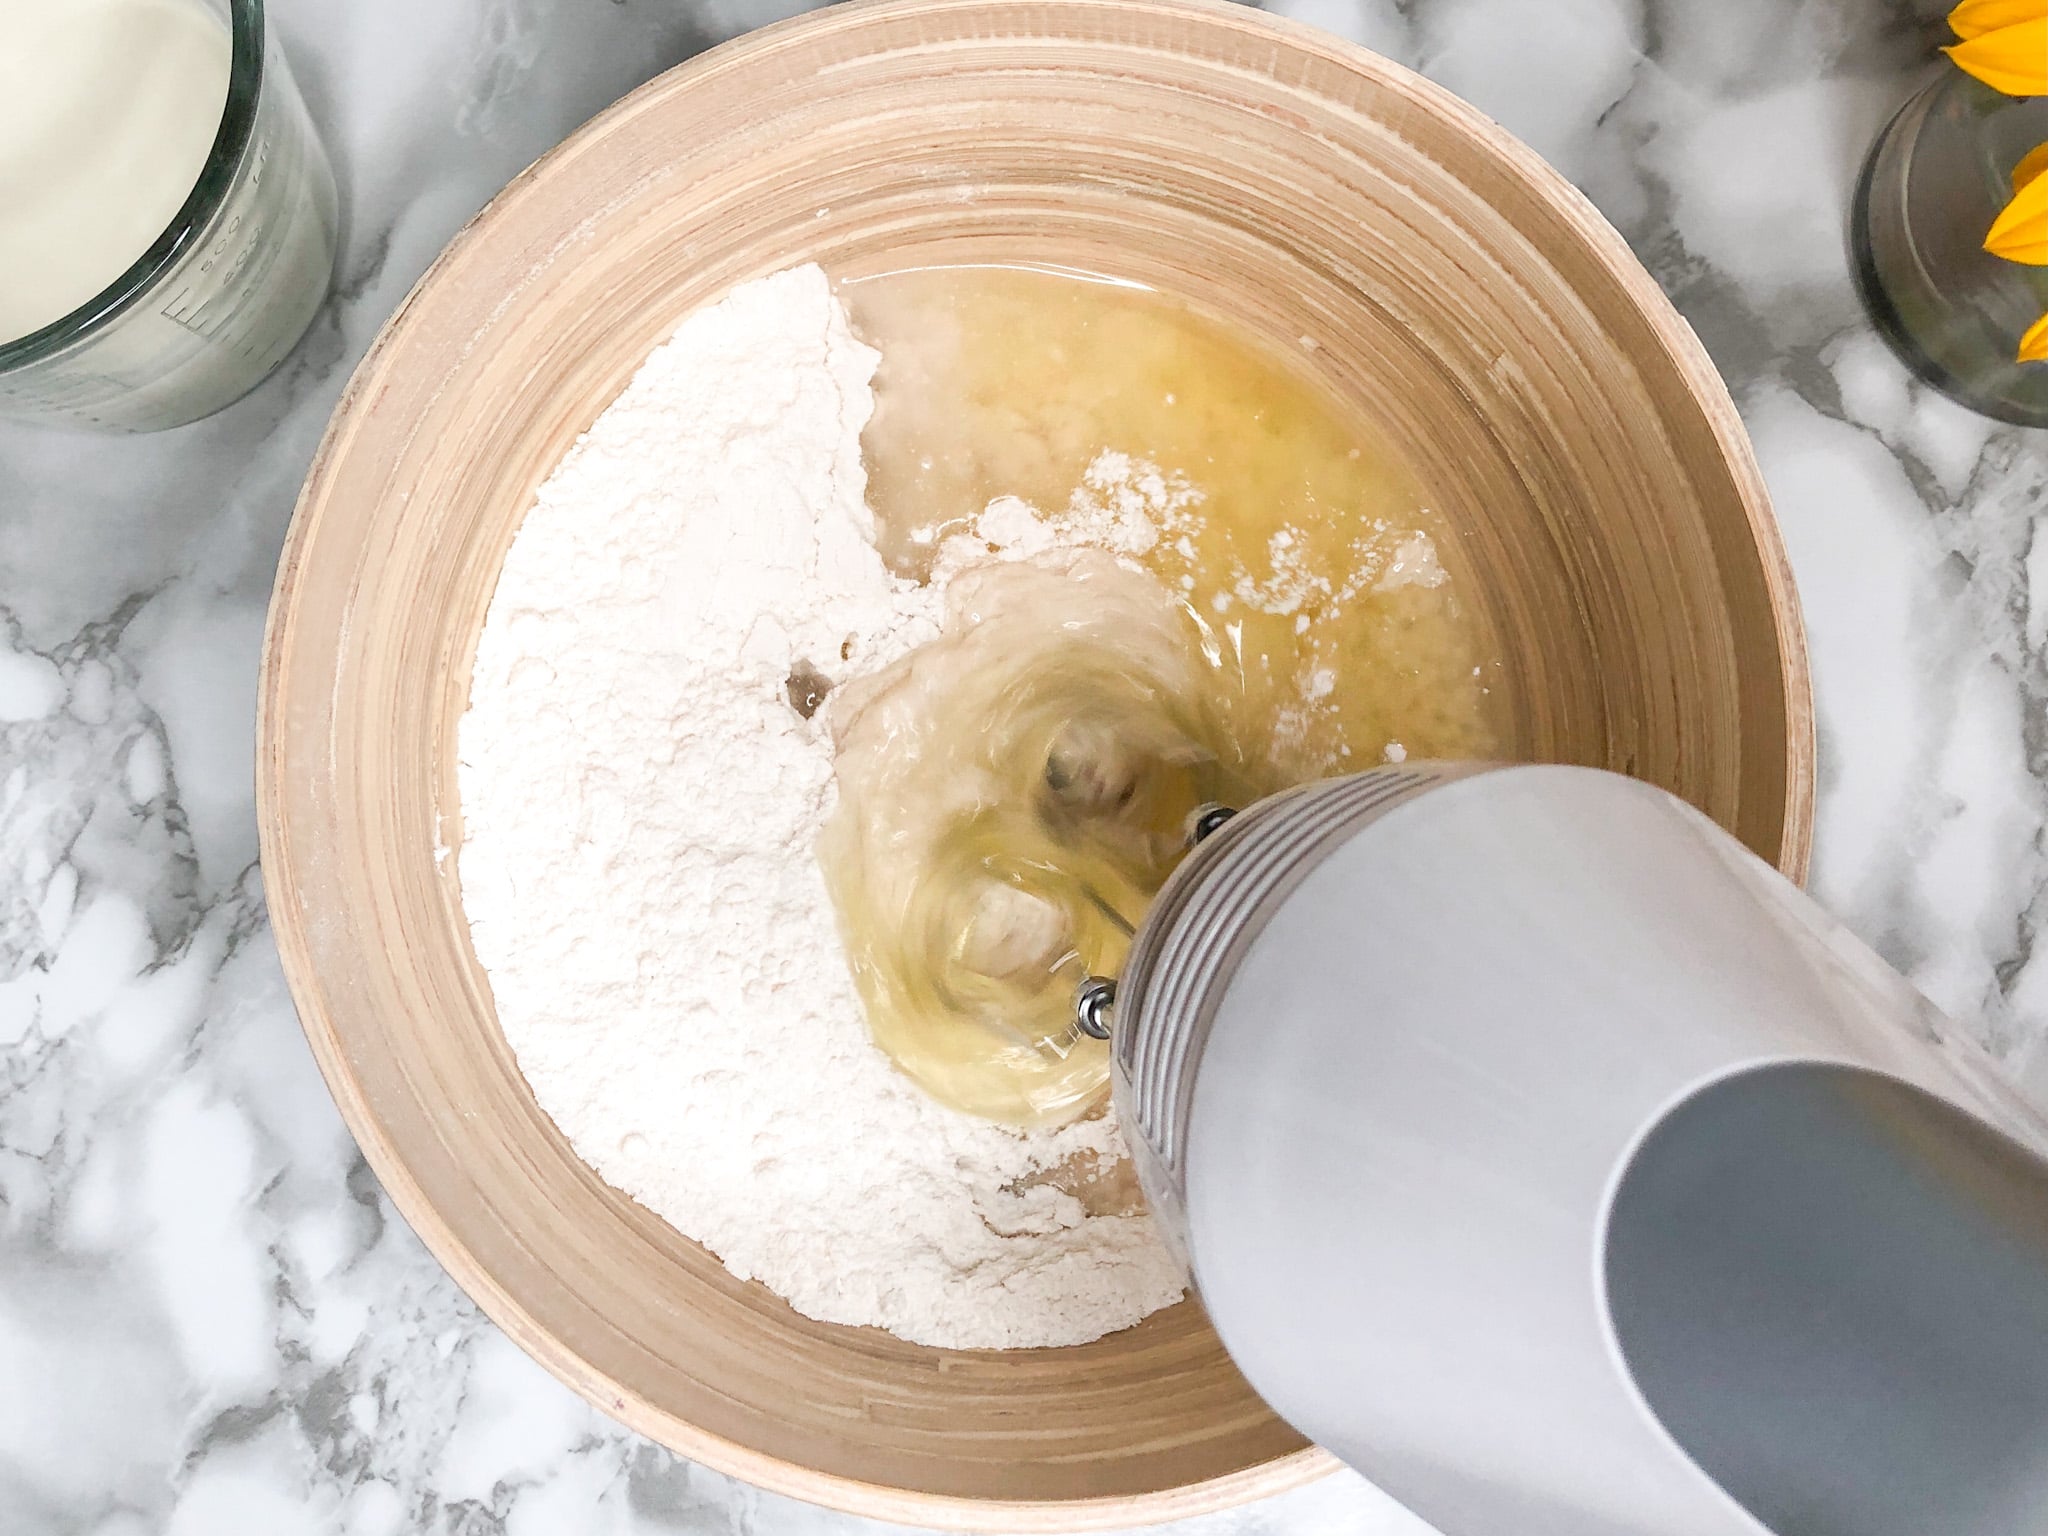
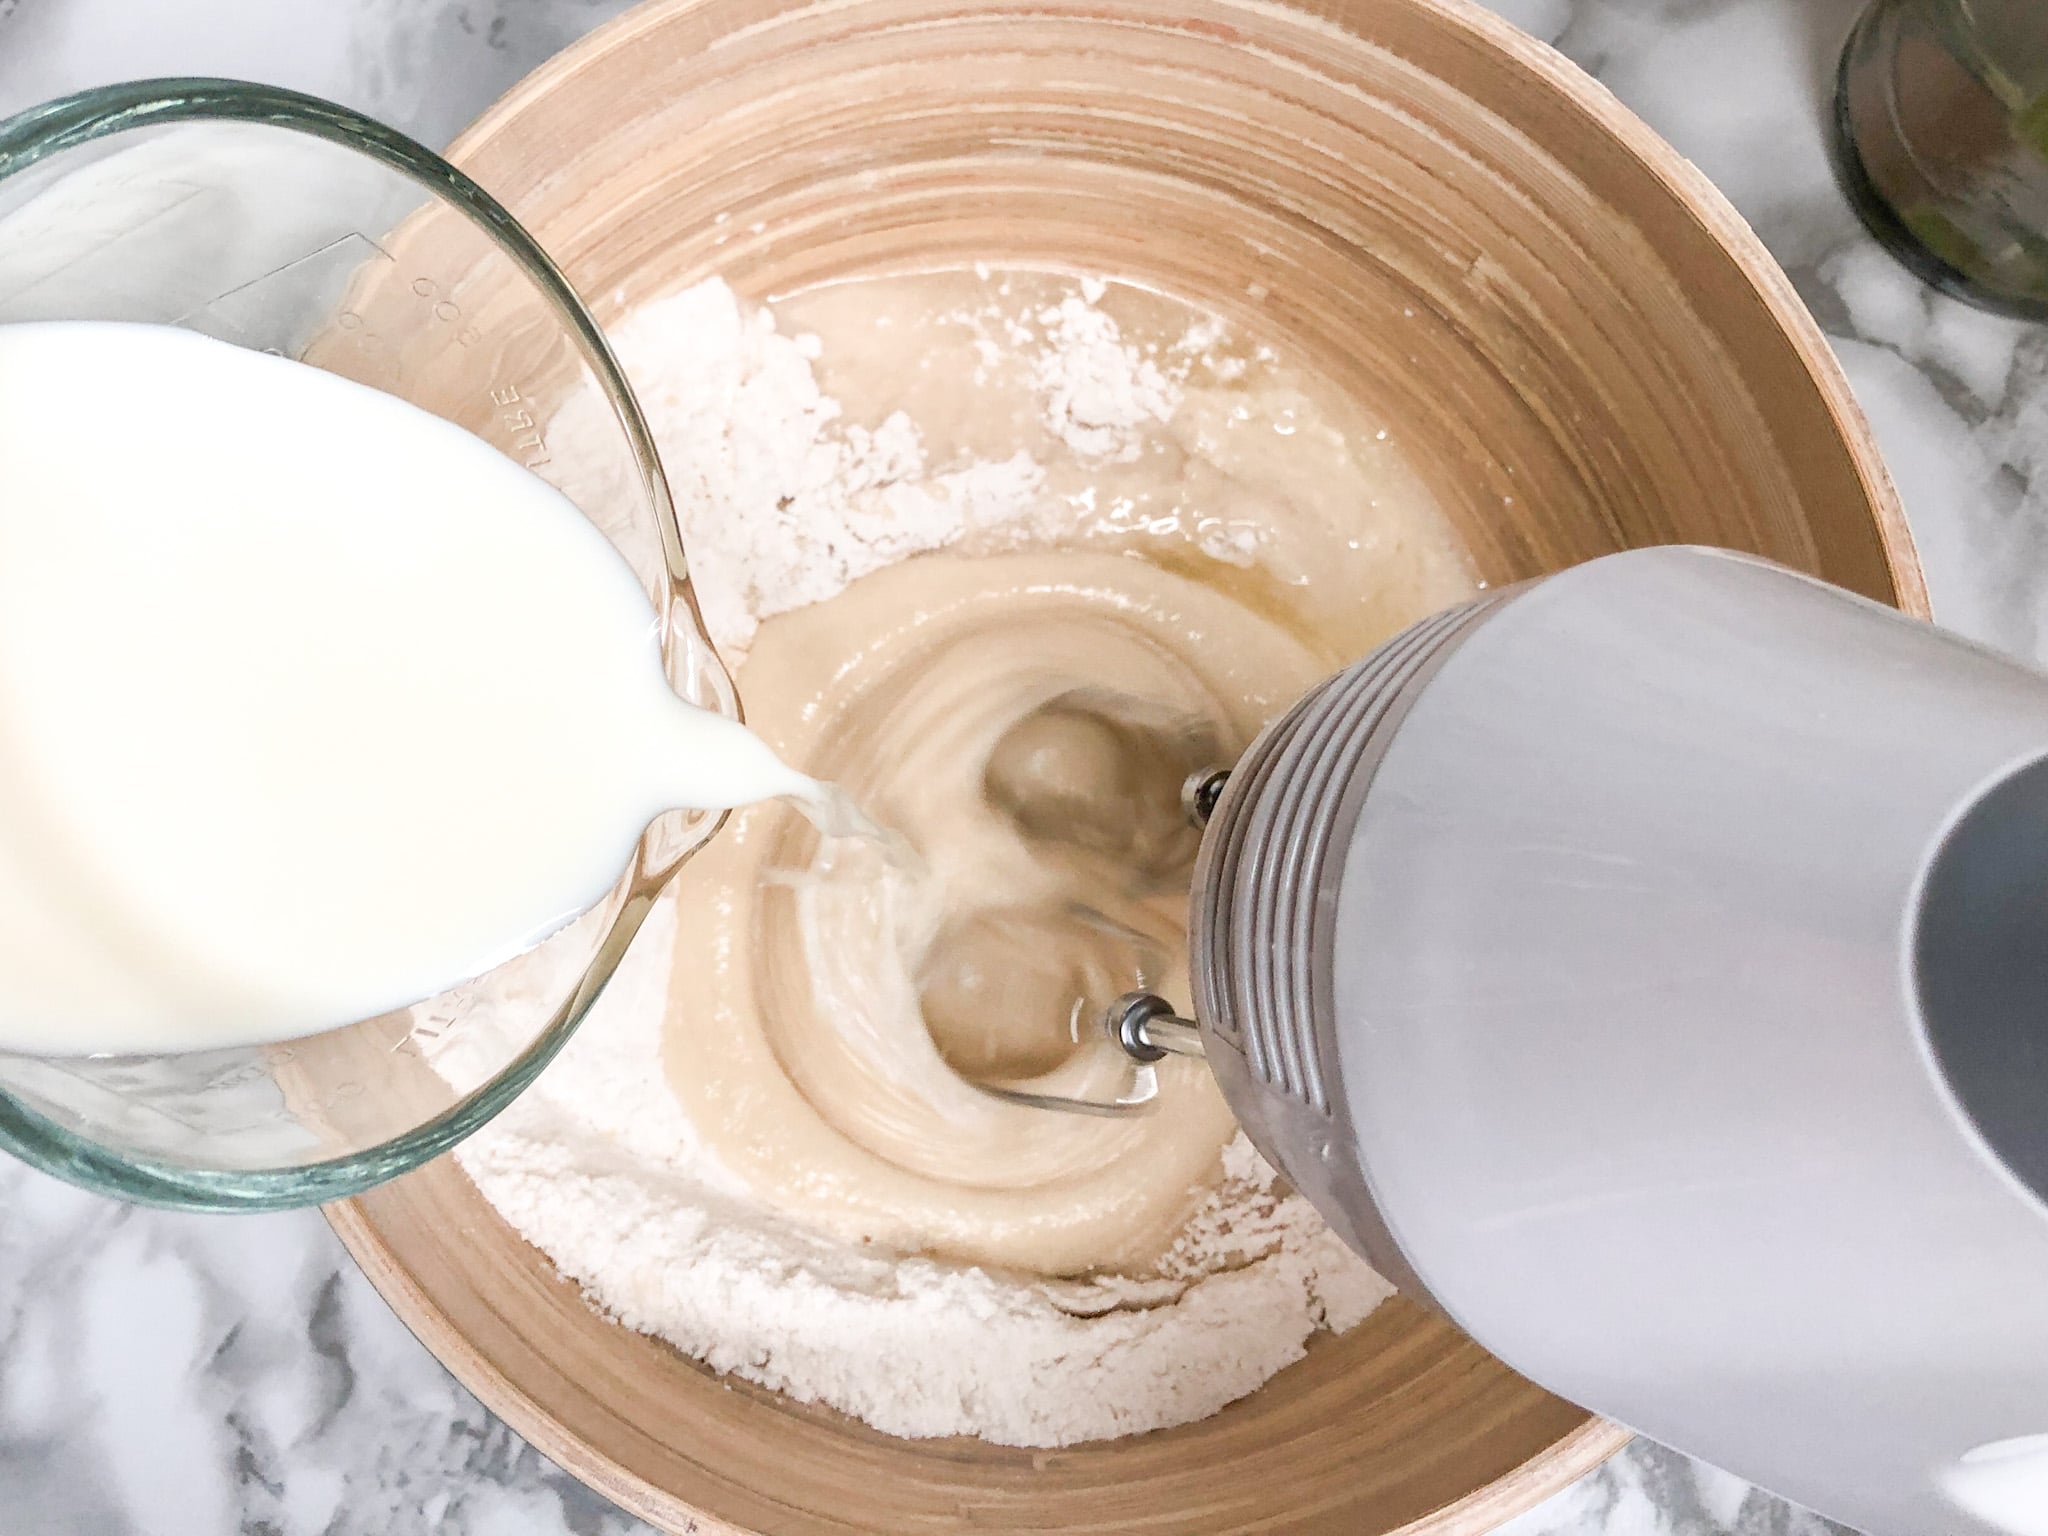
- In a large bowl, whisk together cake mix, egg whites, milk, and oil into a batter that is smooth and free of clumps.
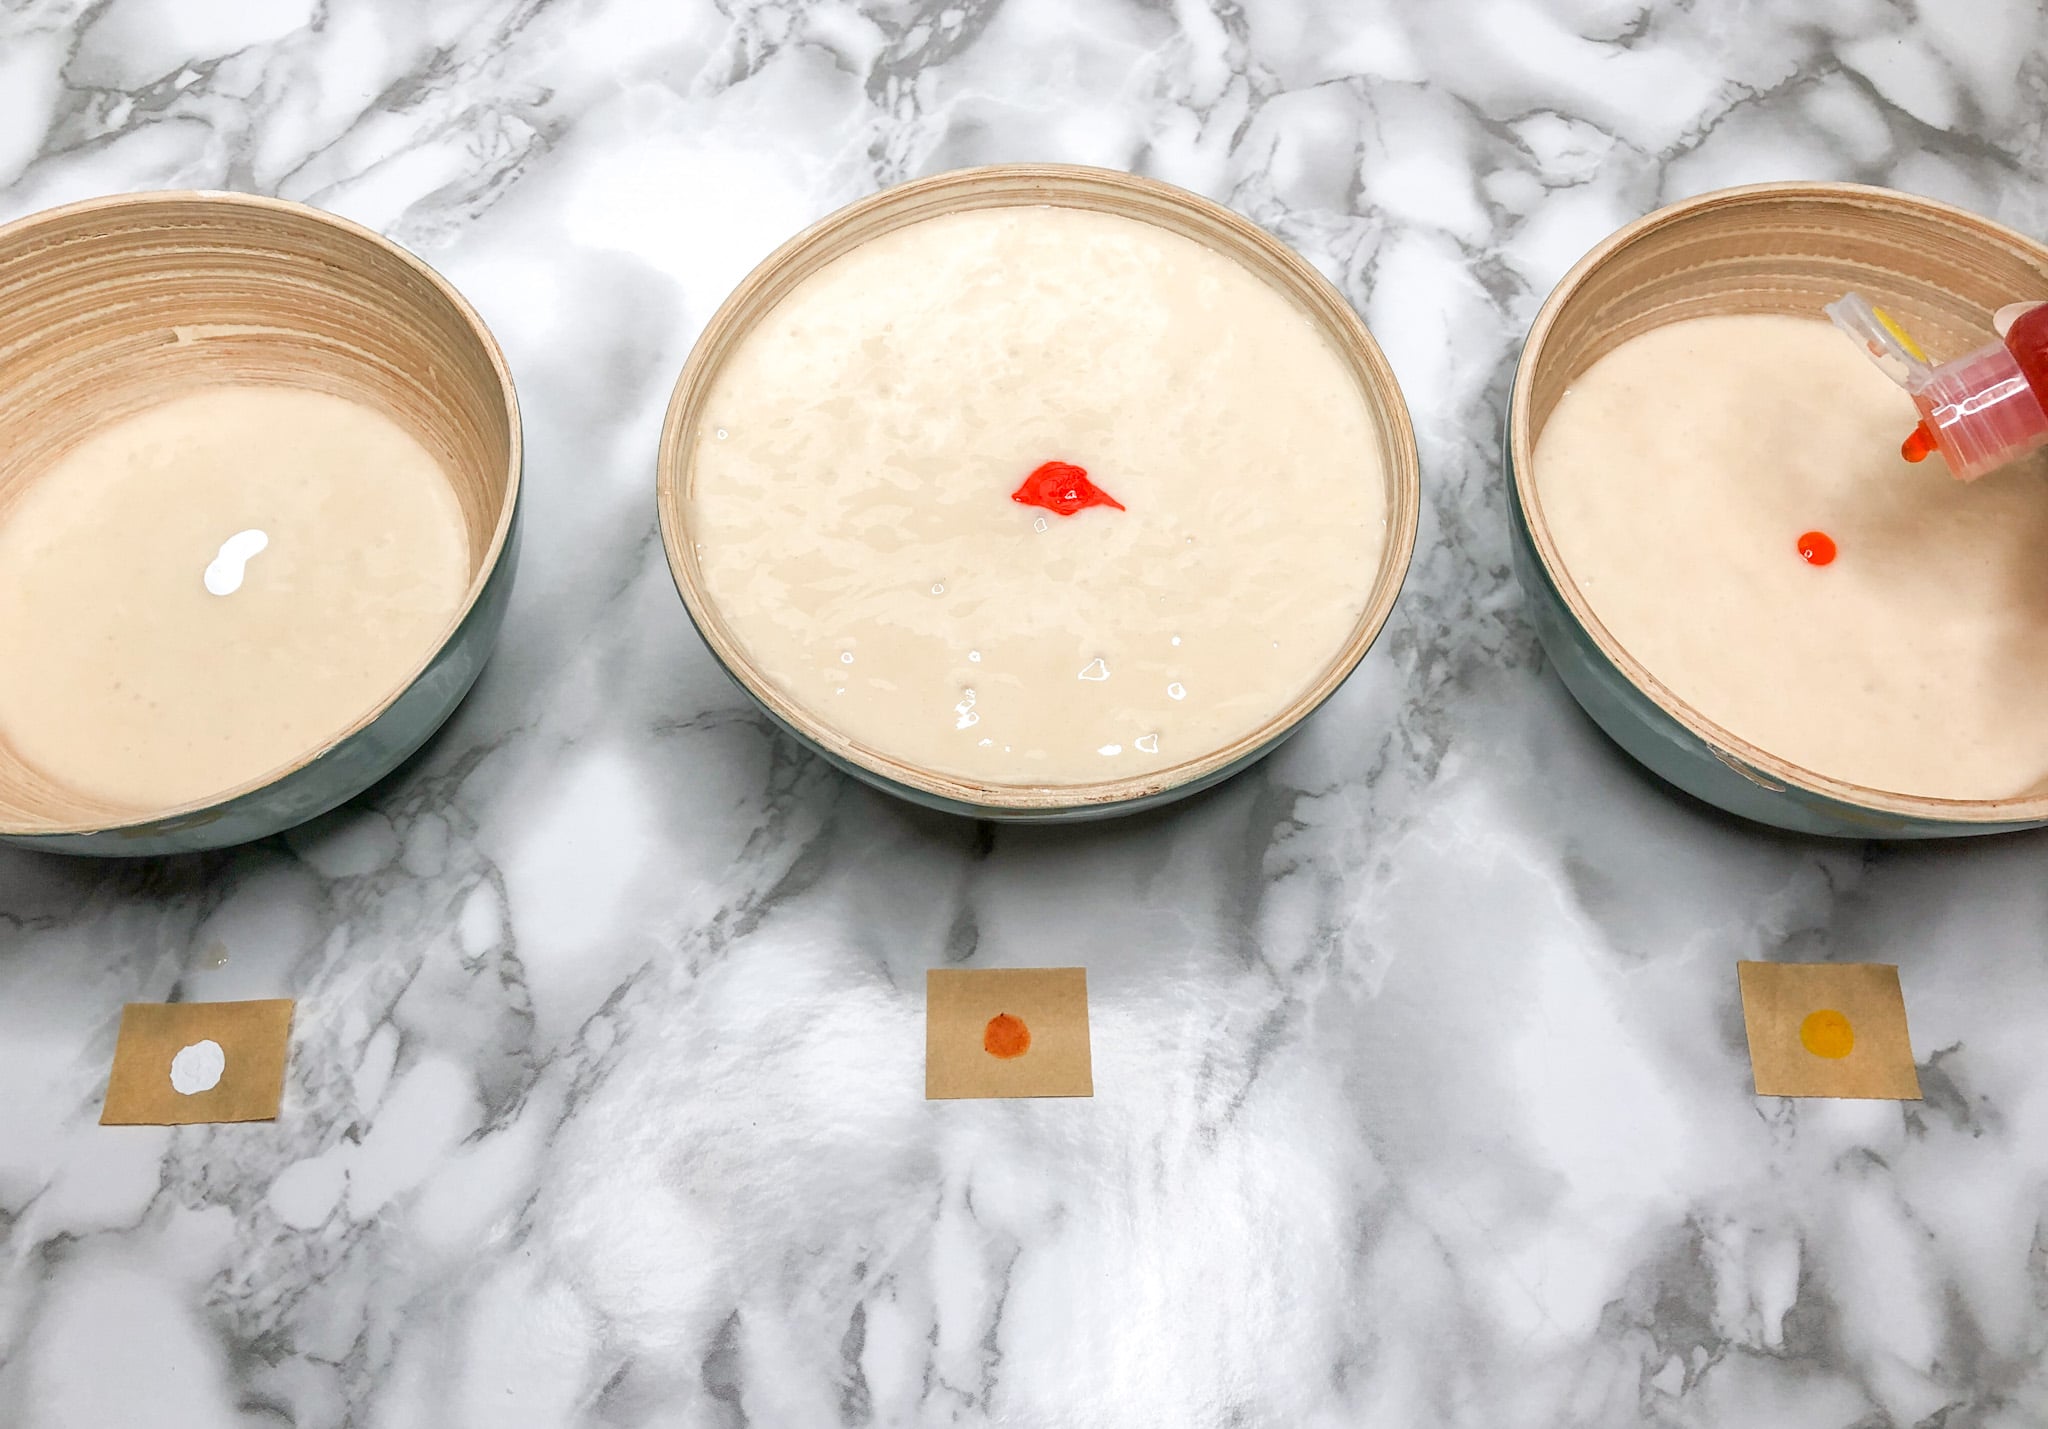
- Divide the batter into the following proportions: 1 cup for yellow, 1/8 cup for white, and the remainder (about 3 ¼ cups) for orange.
- Add 1 small drop of white gel food coloring to the bowl containing 1/8 cup of mix and stir until well-combined.
- Add 2-3 drops of yellow gel food coloring to the bowl containing 1 cup of mix and stir until well-combined.
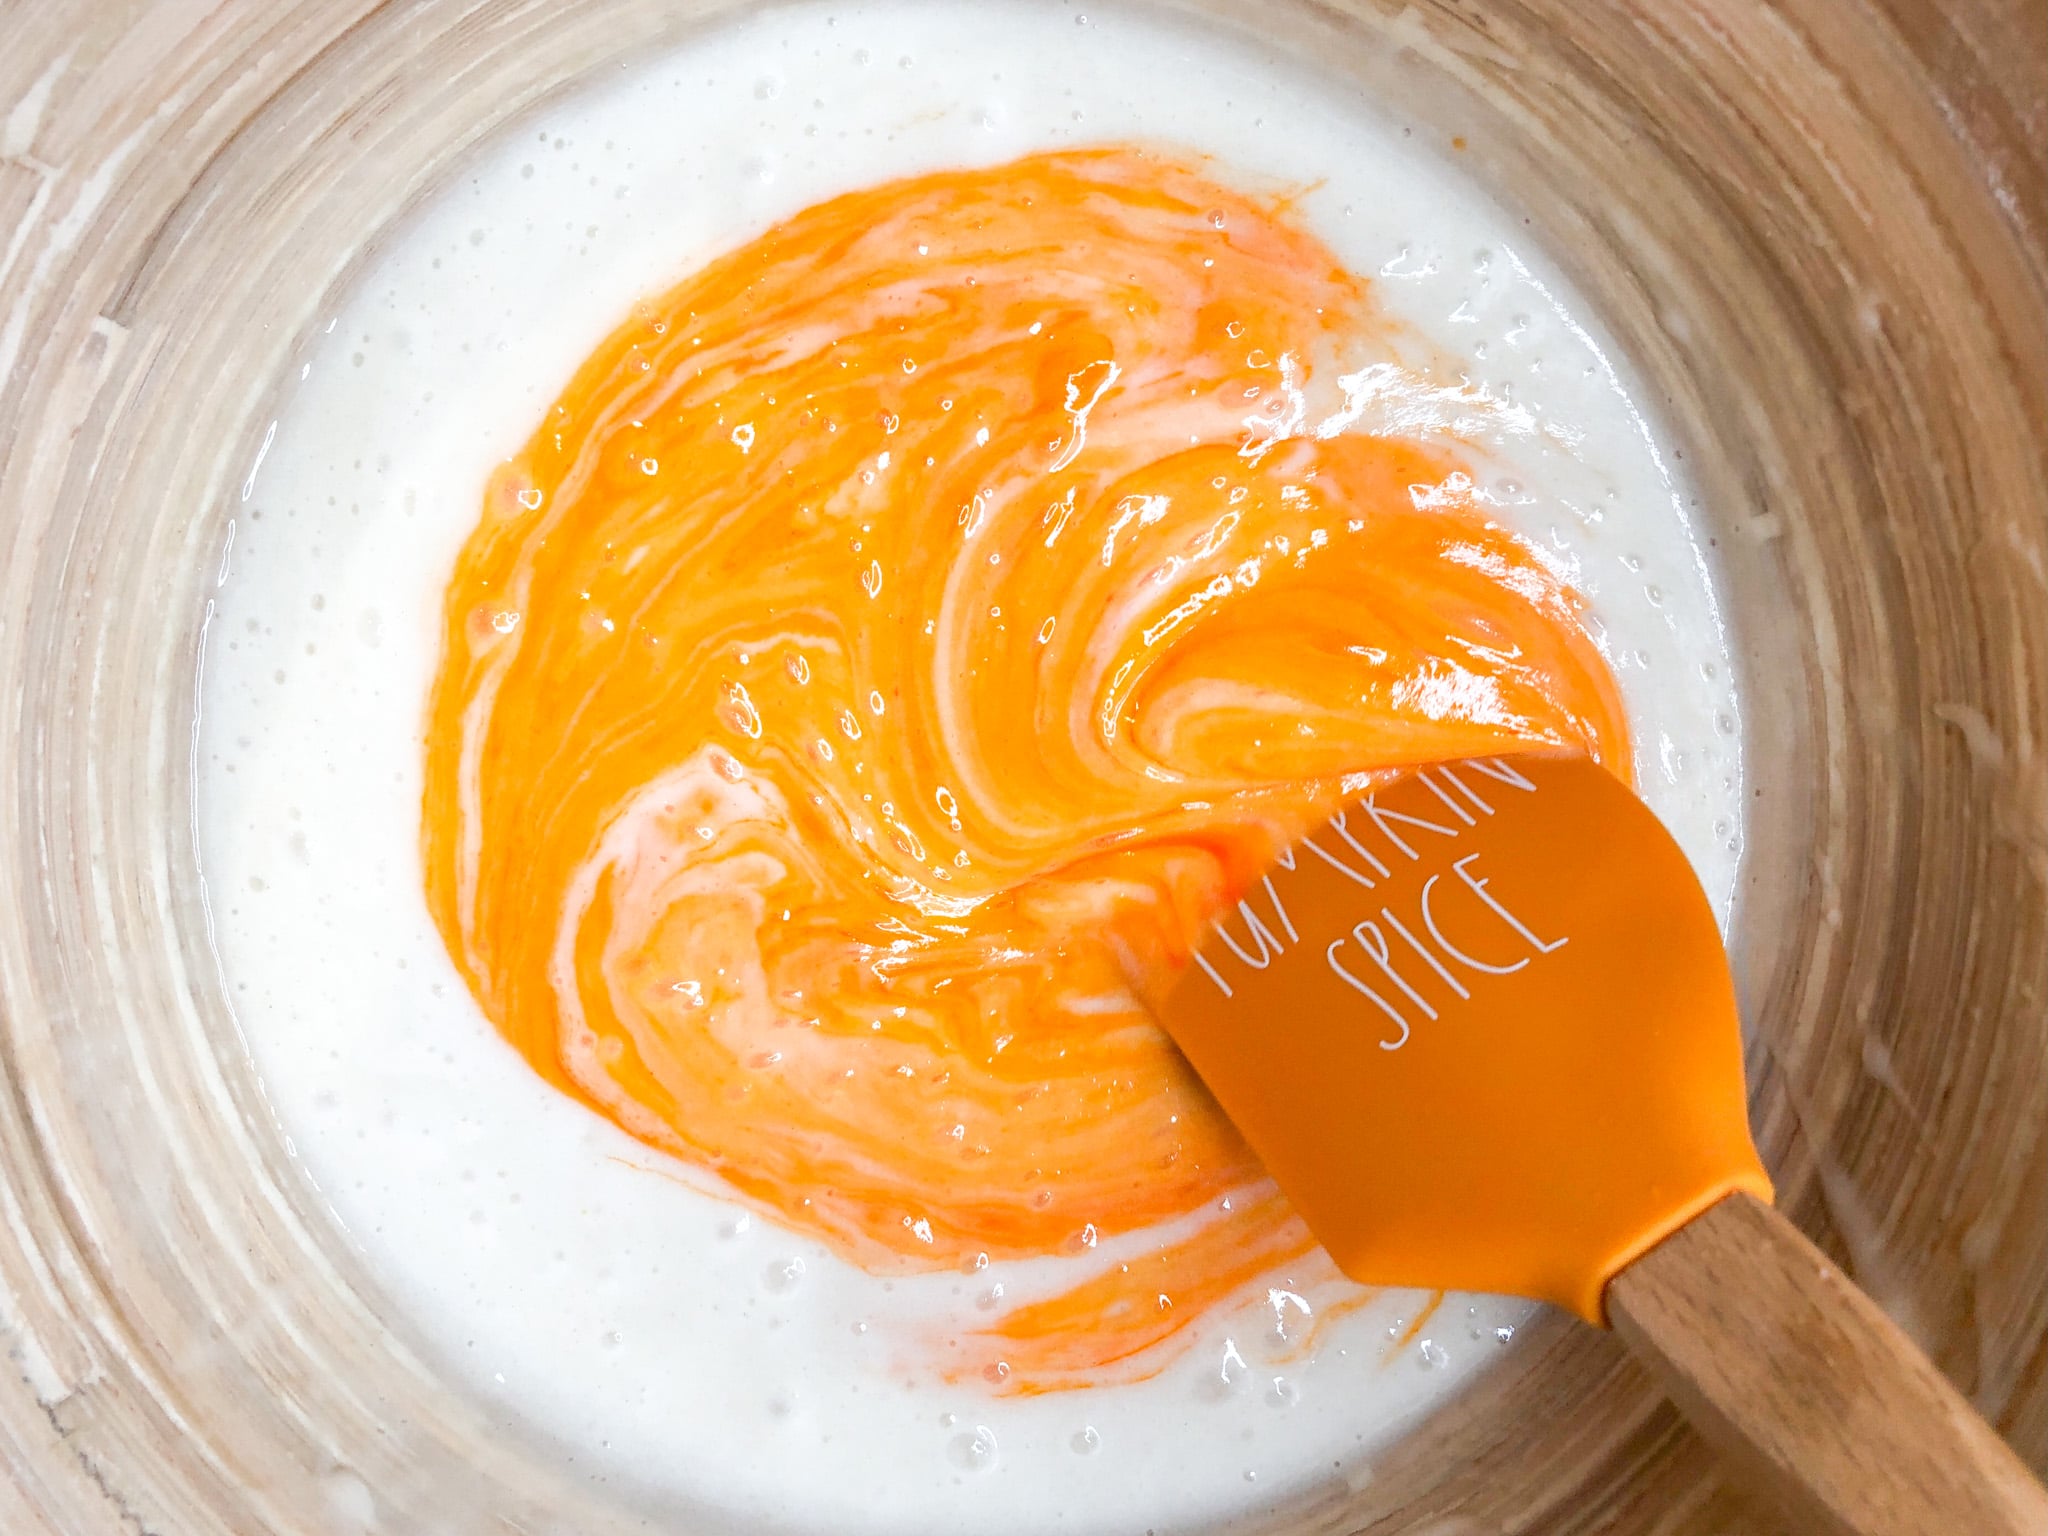
- Add 5-6 drops of orange gel food coloring to the bowl containing the remainder of the cake mix and stir until well combined.
- Prep your baking pans with butter and flour, or a non-stick cooking spray. Make sure to line the bottoms of the cake pans with parchment before adding any batter.
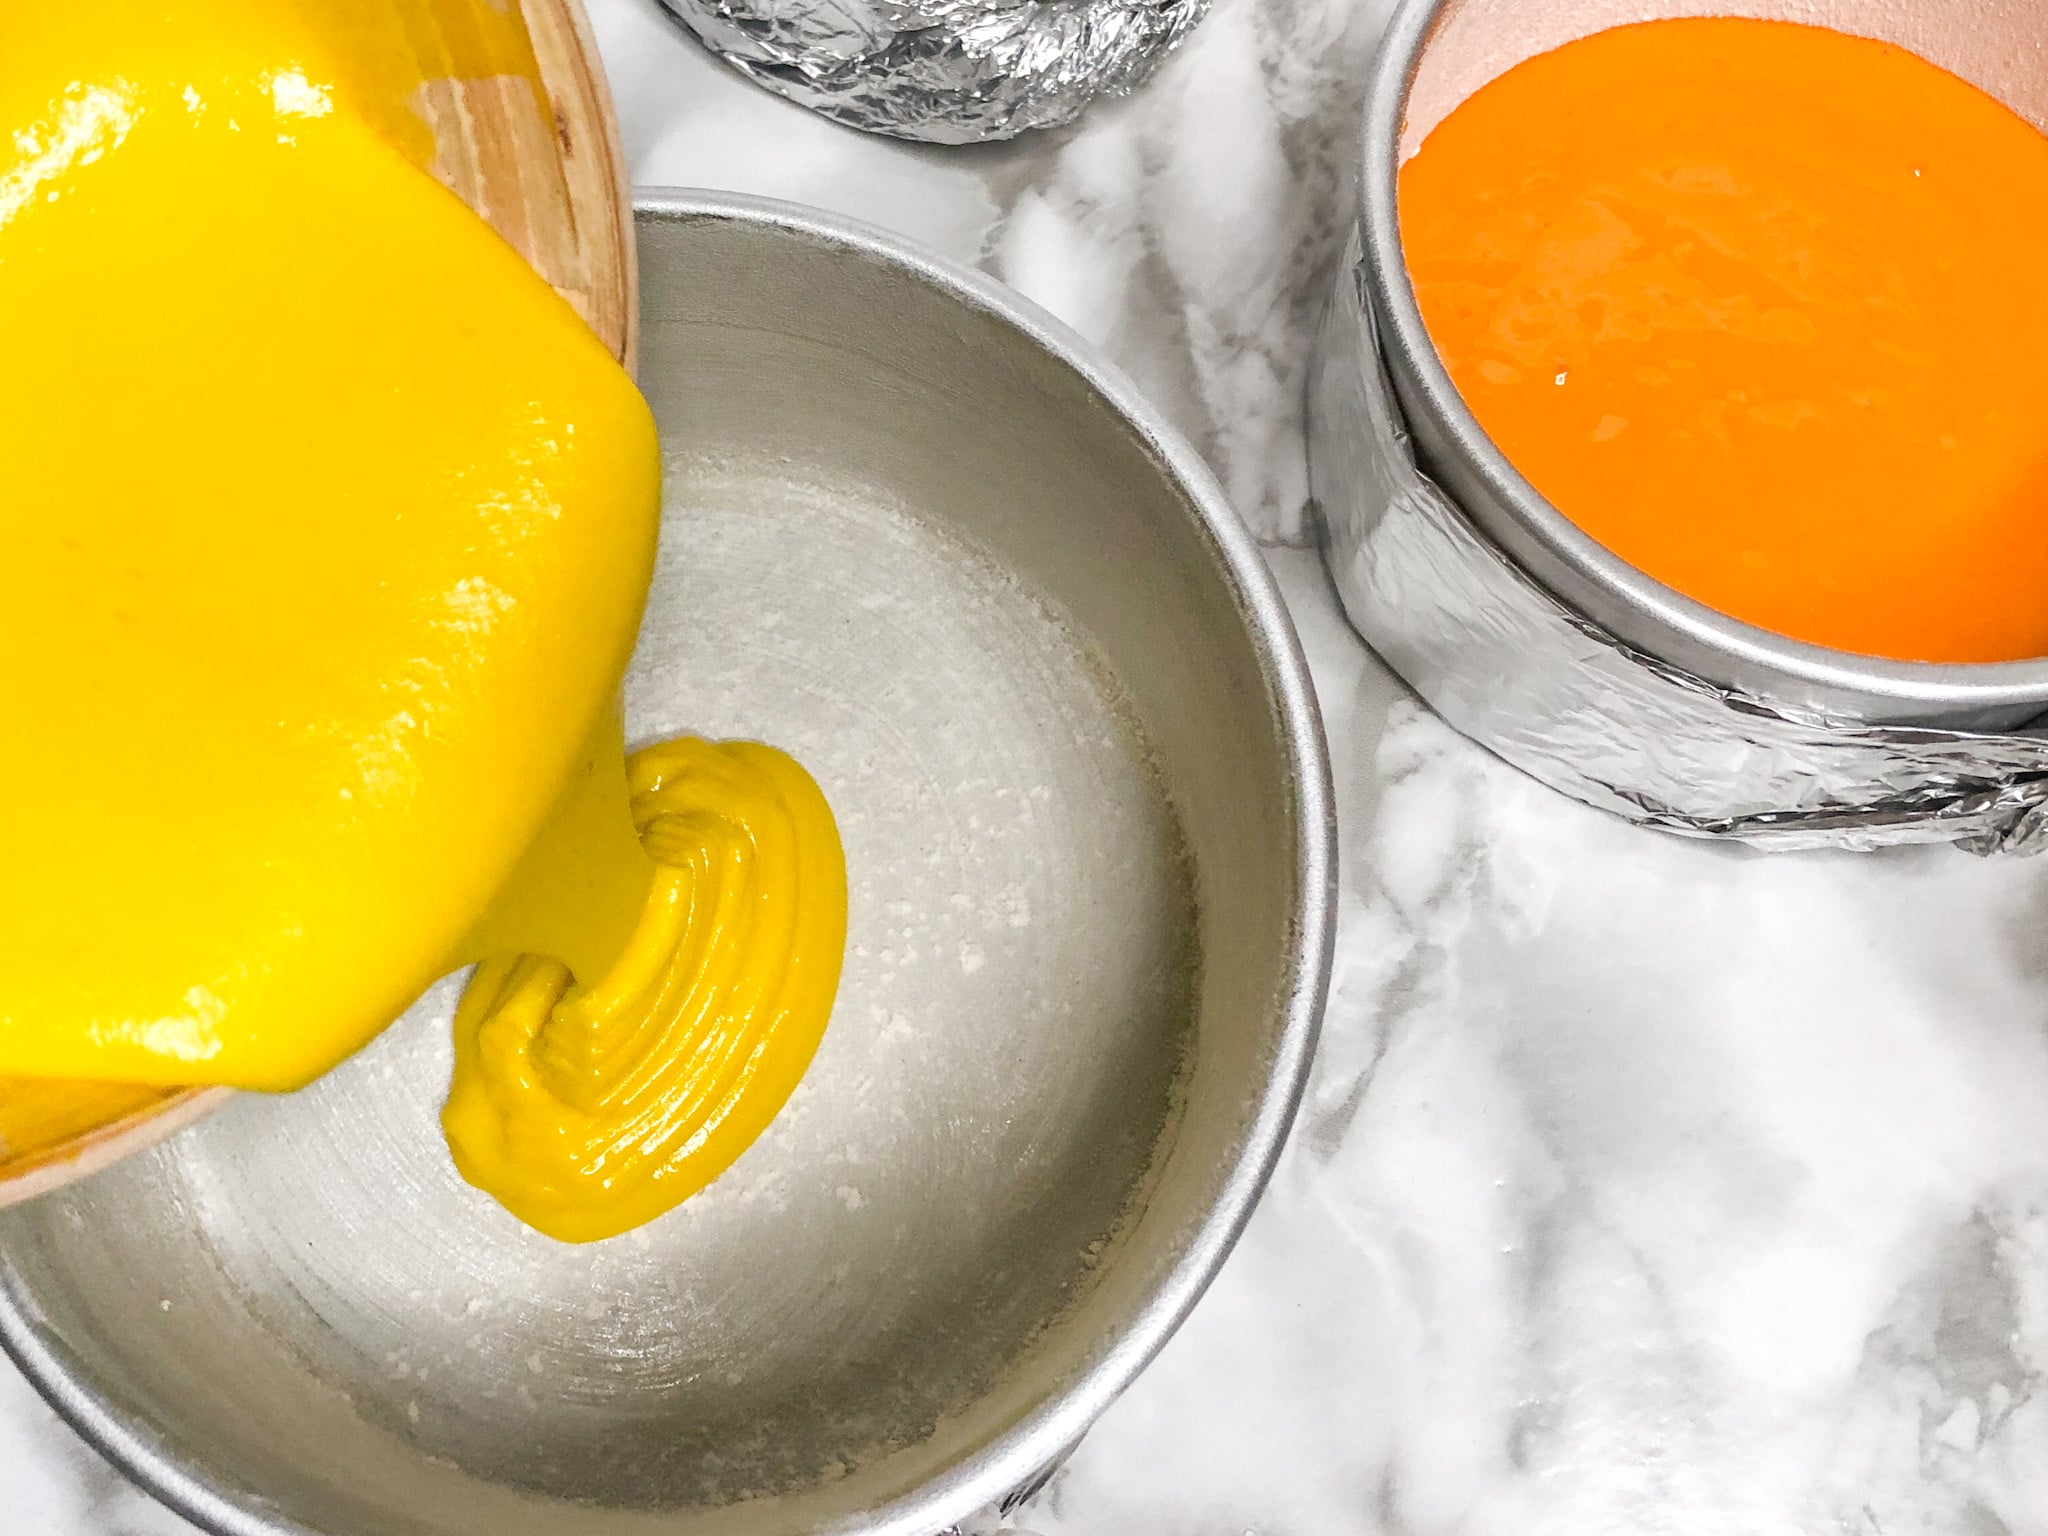
- Pour all of the yellow batter into the 6” cake pan.
- Pour all of the white batter into one cup of a prepared muffin pan.
- Pour 1 ½ cups of the orange batter into the prepared 5” cake pan.
- Pour ¾ cups of the orange batter into the 4” cake pan.
- Pour 1 cup of orange batter into the 6” cake pan.
- Place the cake pans in the oven and bake according to the instructions on the box, removing the muffin tins first, then the 6” cake pans, followed by the 4” and 5” cake pans once they are fully cooked through.
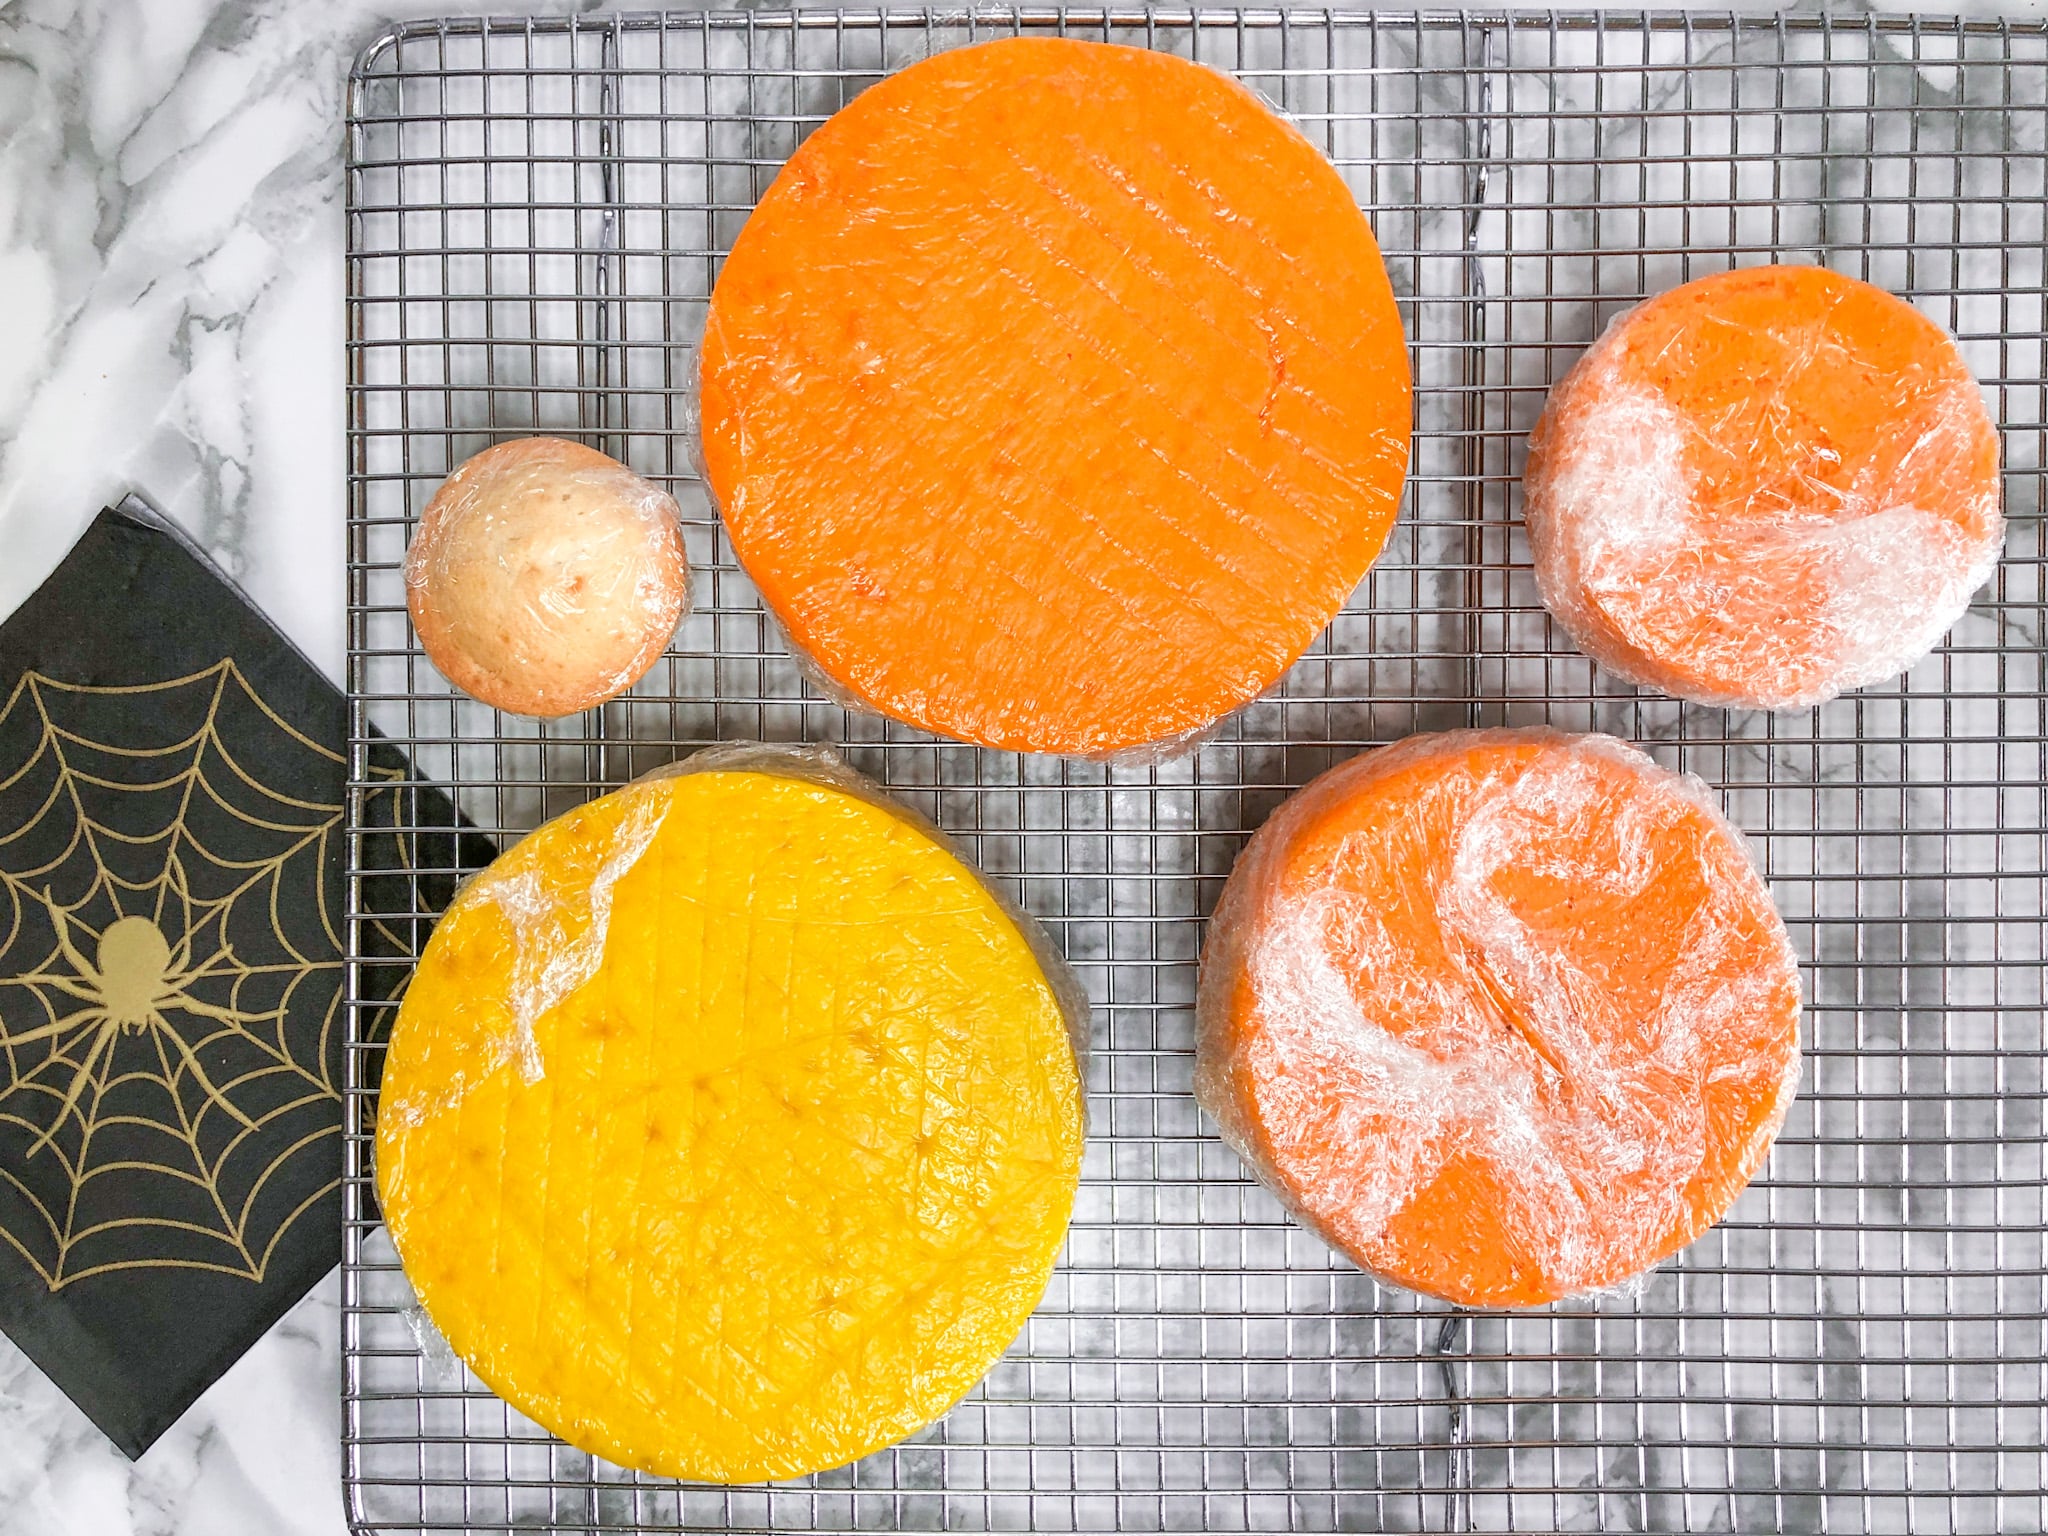
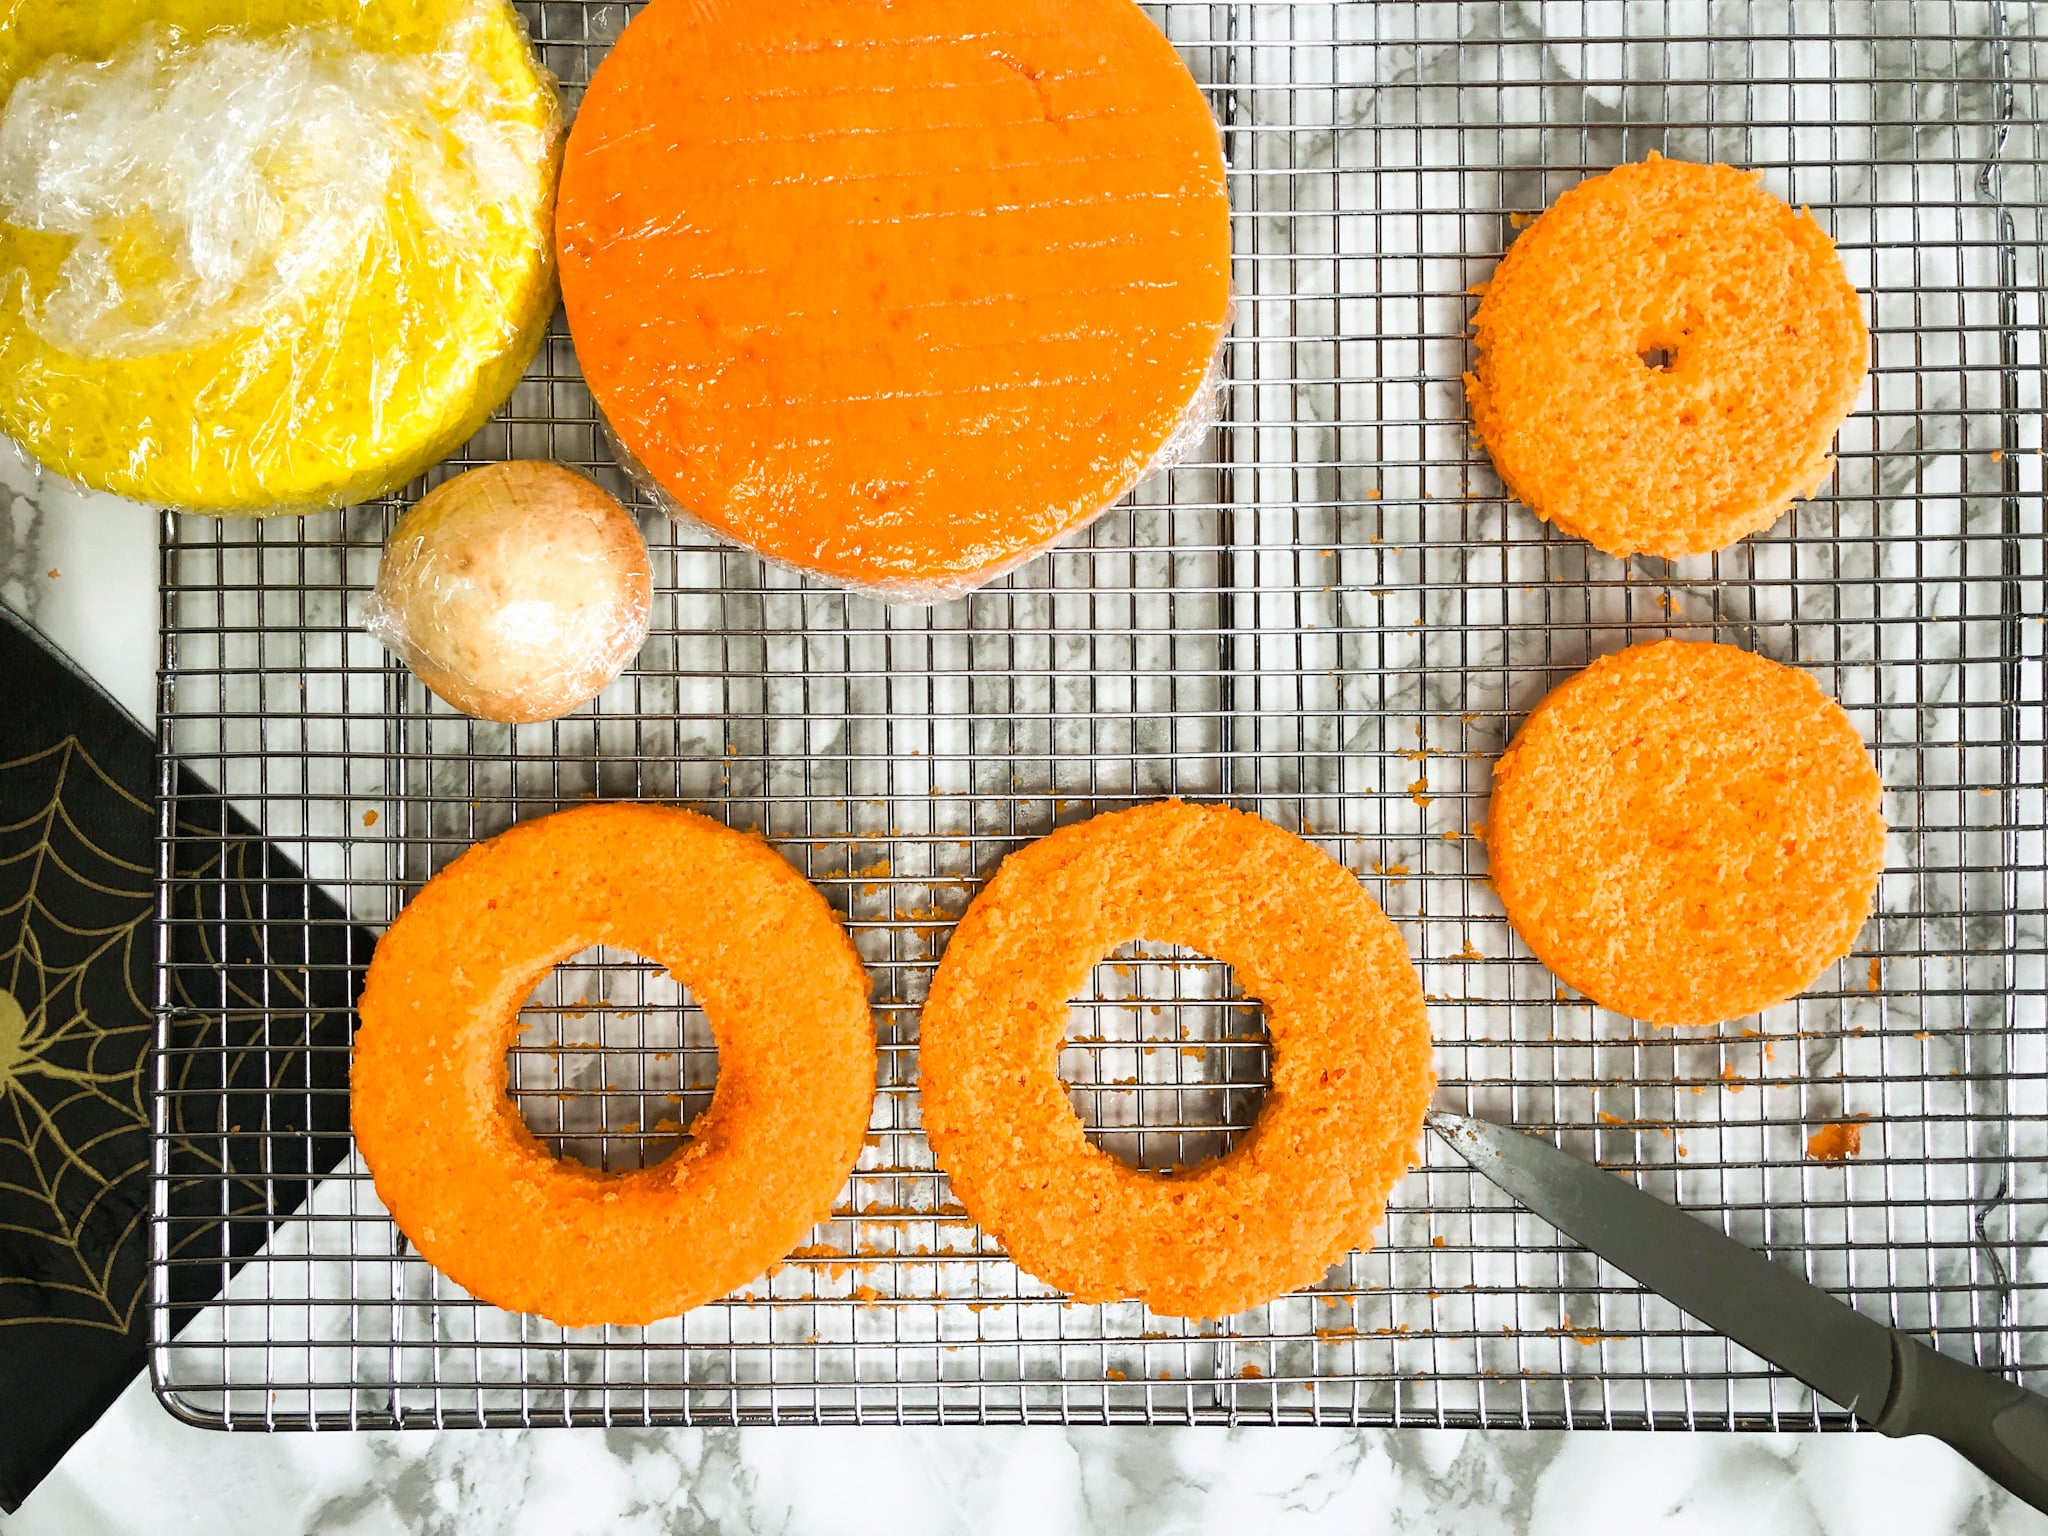
- Carefully transfer the cakes from their pans onto a cooling rack and allow to rest for a few minutes, or until they are easy to handle.
- Gently wrap the cakes in plastic wrap and place them in the refrigerator overnight or into the freezer for a few hours until they have cooled completely.
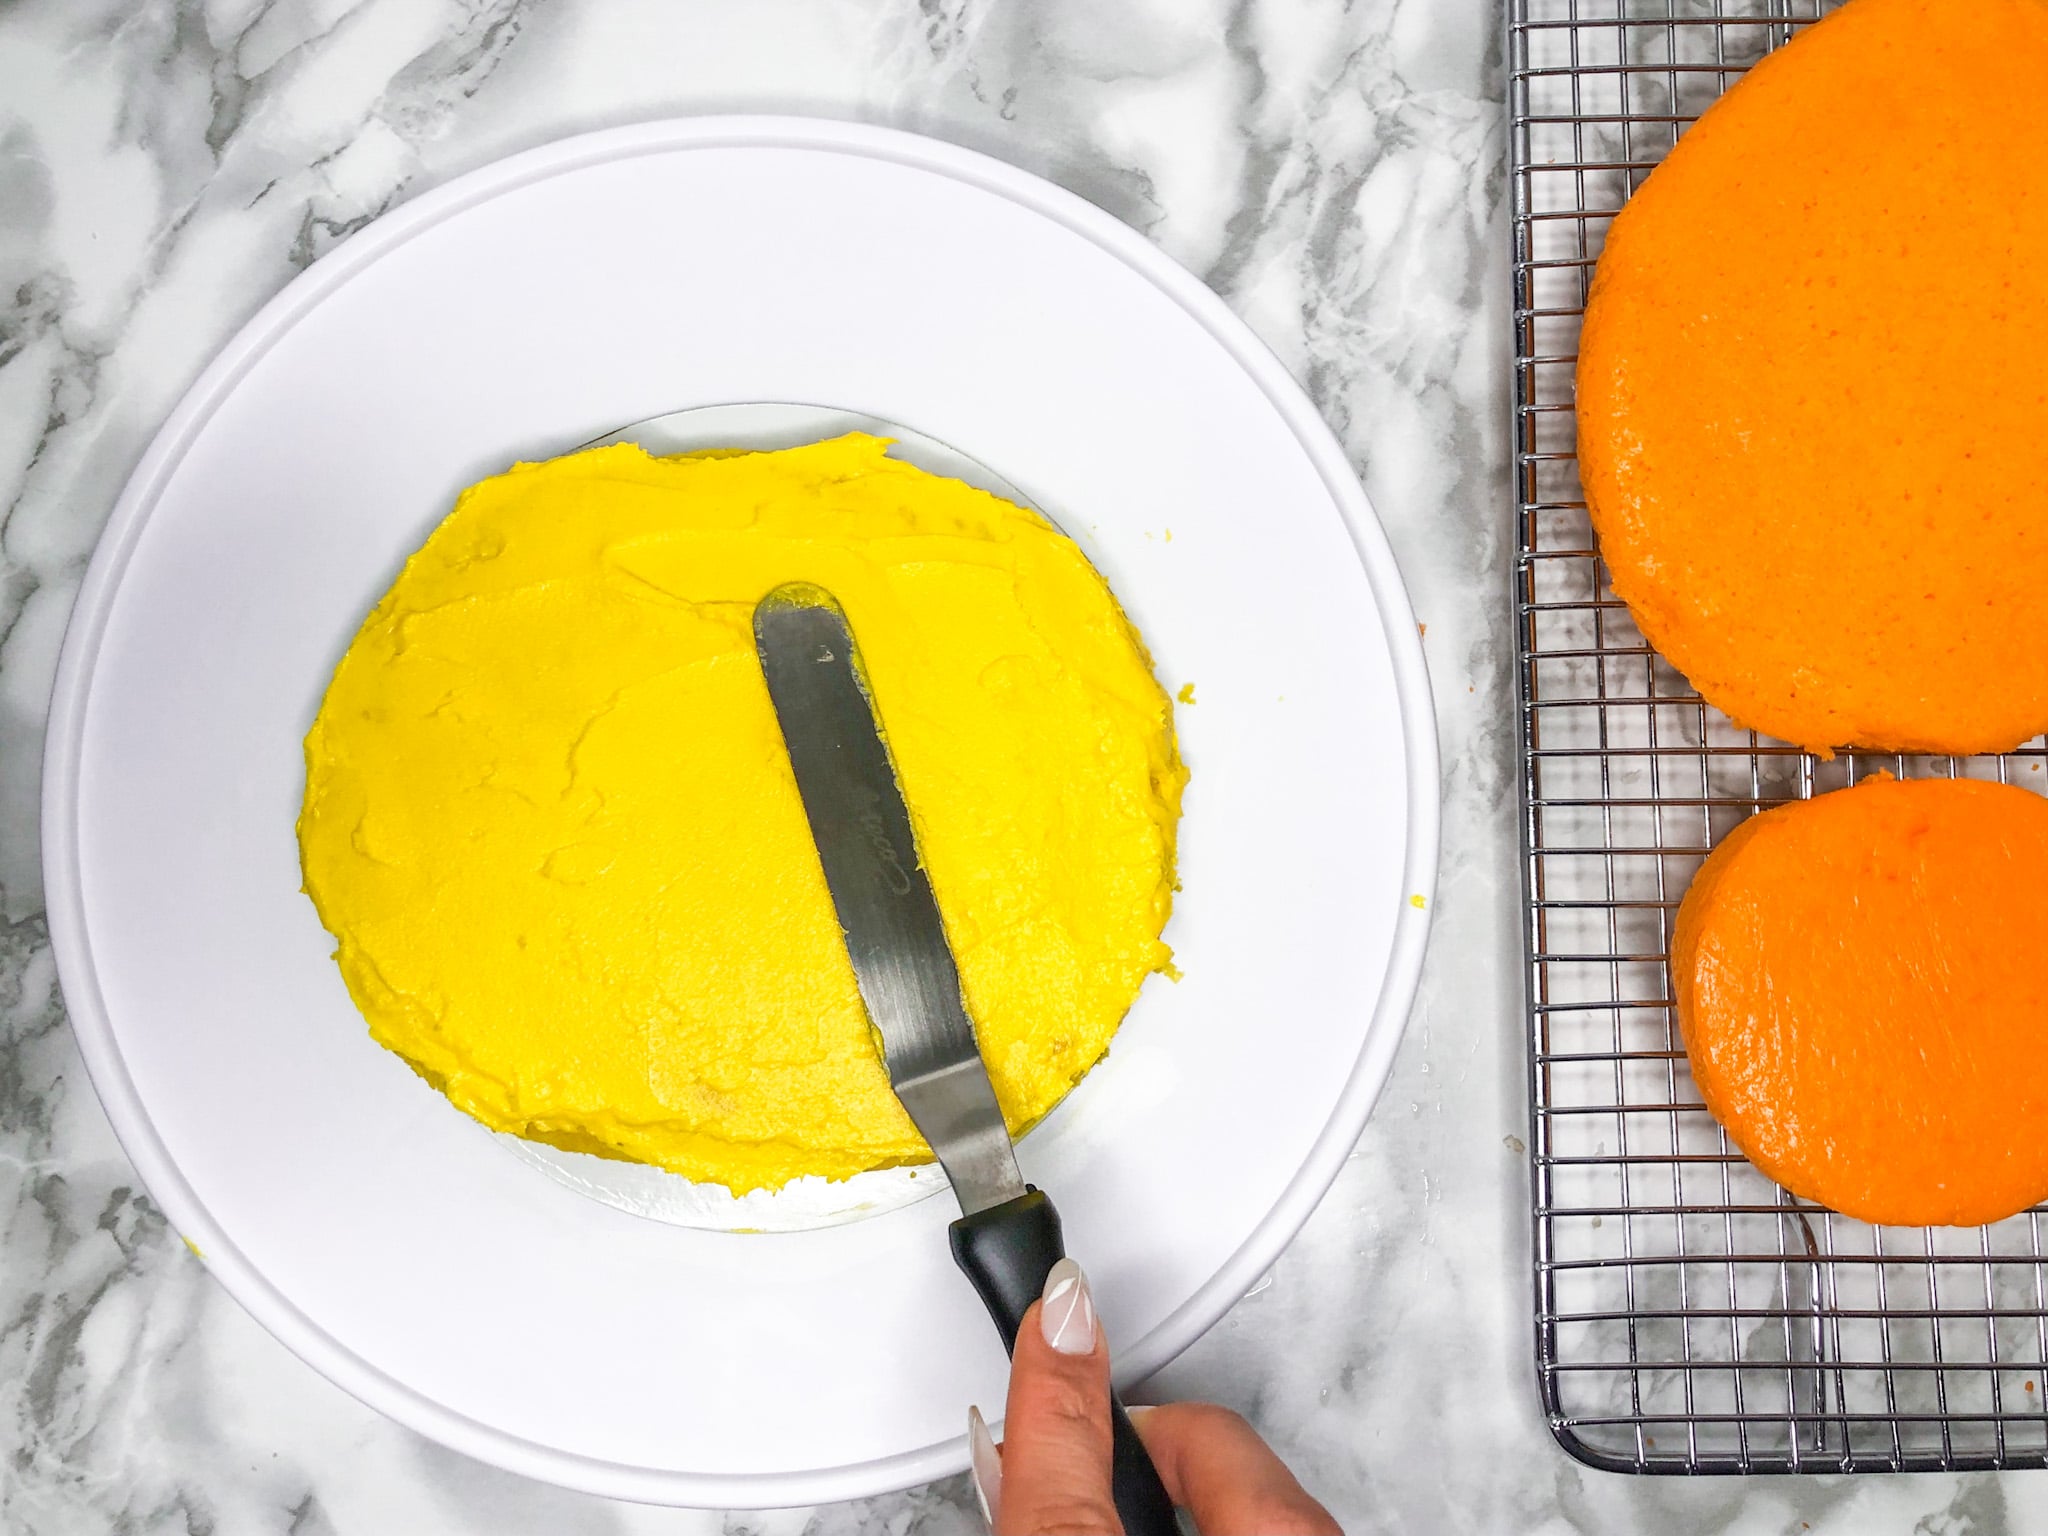
- While the cakes are cooling, cream together butter, sugar, and vanilla into a fluffy buttercream frosting.
- Divide the buttercream as follows: 1/4 cup for white, ¾ cups for yellow, and the remainder (about 2 cups) for orange.
- Dye buttercream, adding small drops at a time until desired color is produced.
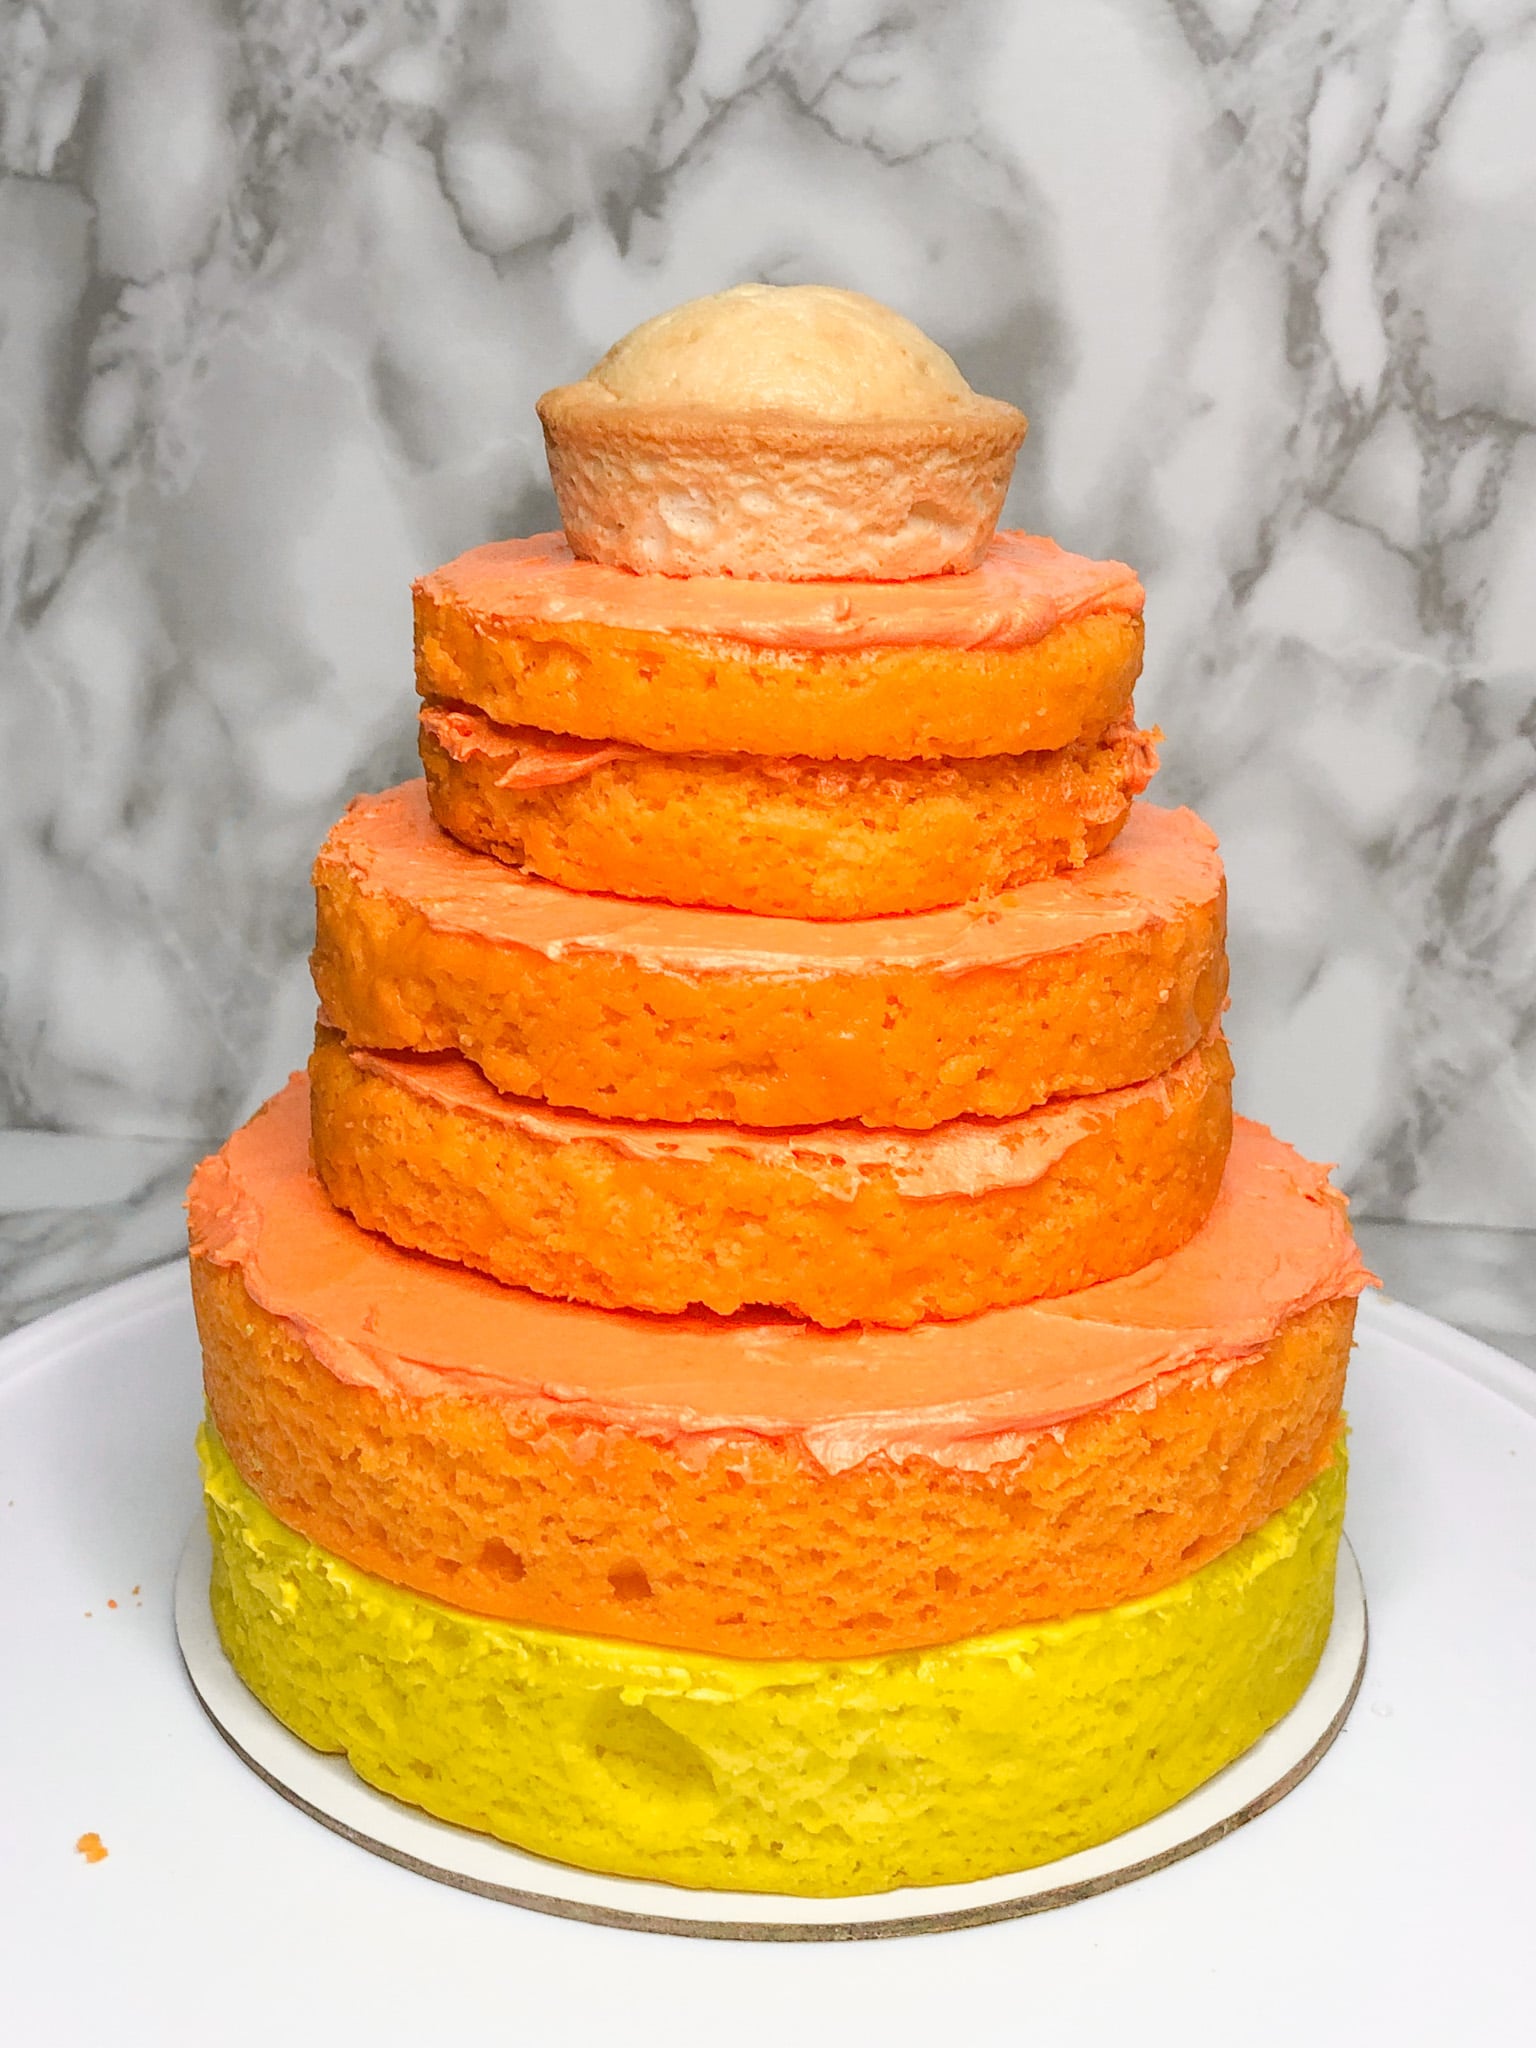
- Remove cakes from the fridge and trim the tops so that they are flat.
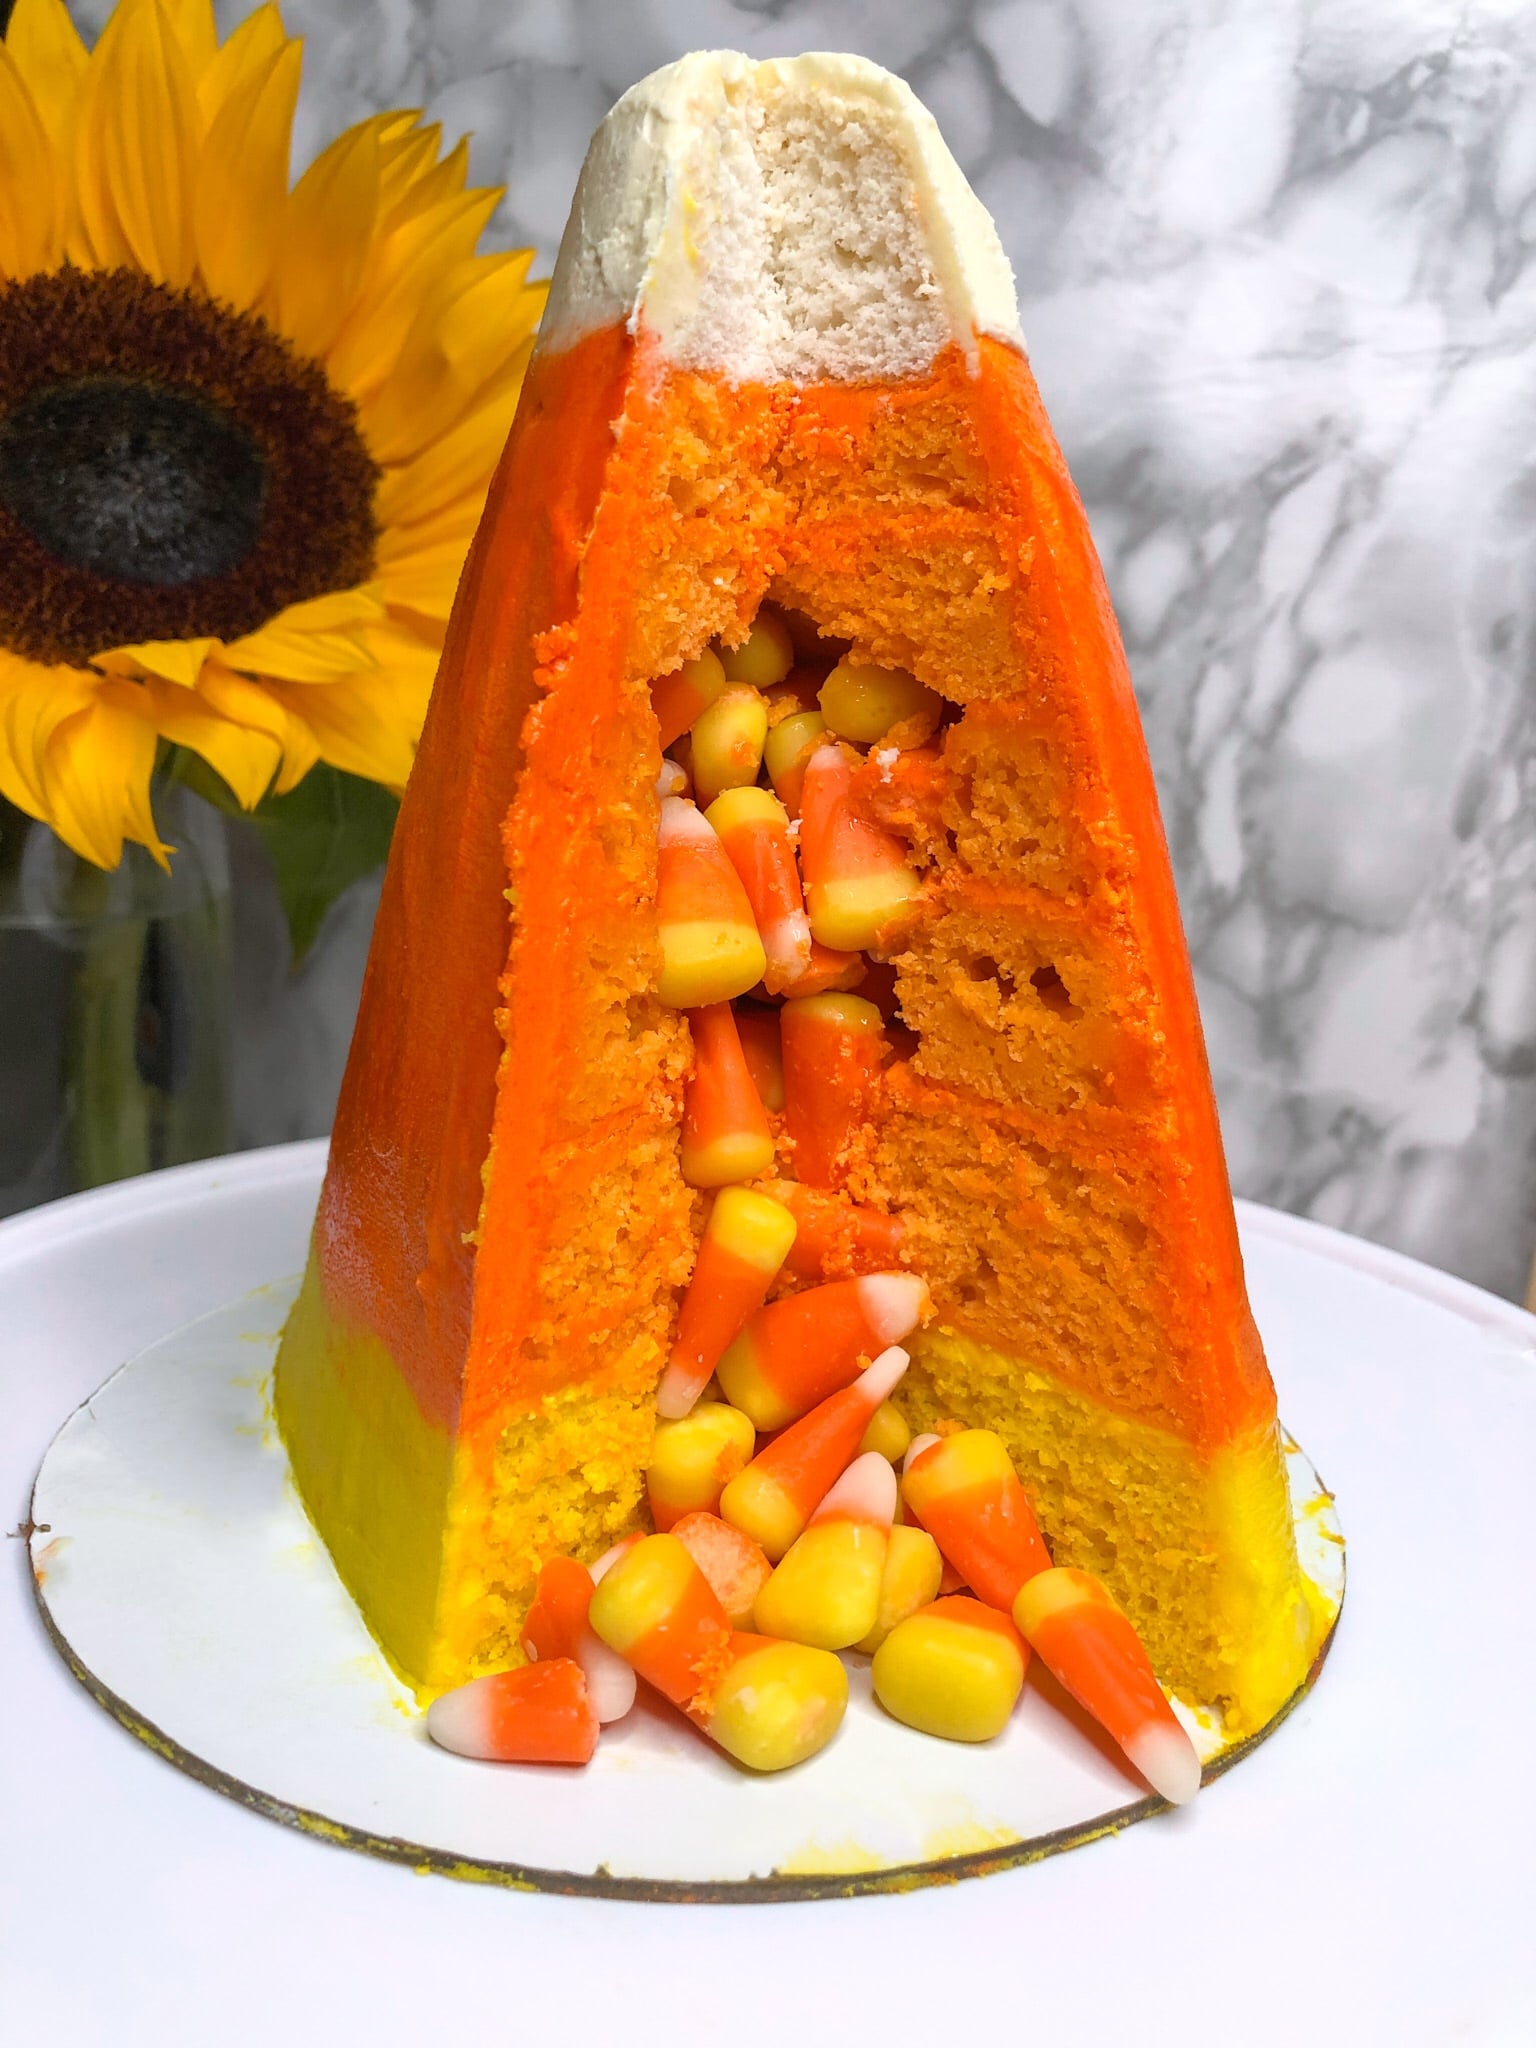
- Cut the 5” orange cake horizontally into two equal cake layers. Repeat this step with the 4” orange cake.
- Using a 2” cookie cutter, remove the center of both 5” cake layers.
- Begin assembling the cake by placing the 6” yellow cake on the bottom. Smooth over a layer of yellow buttercream before stacking the 6” orange cake on top.
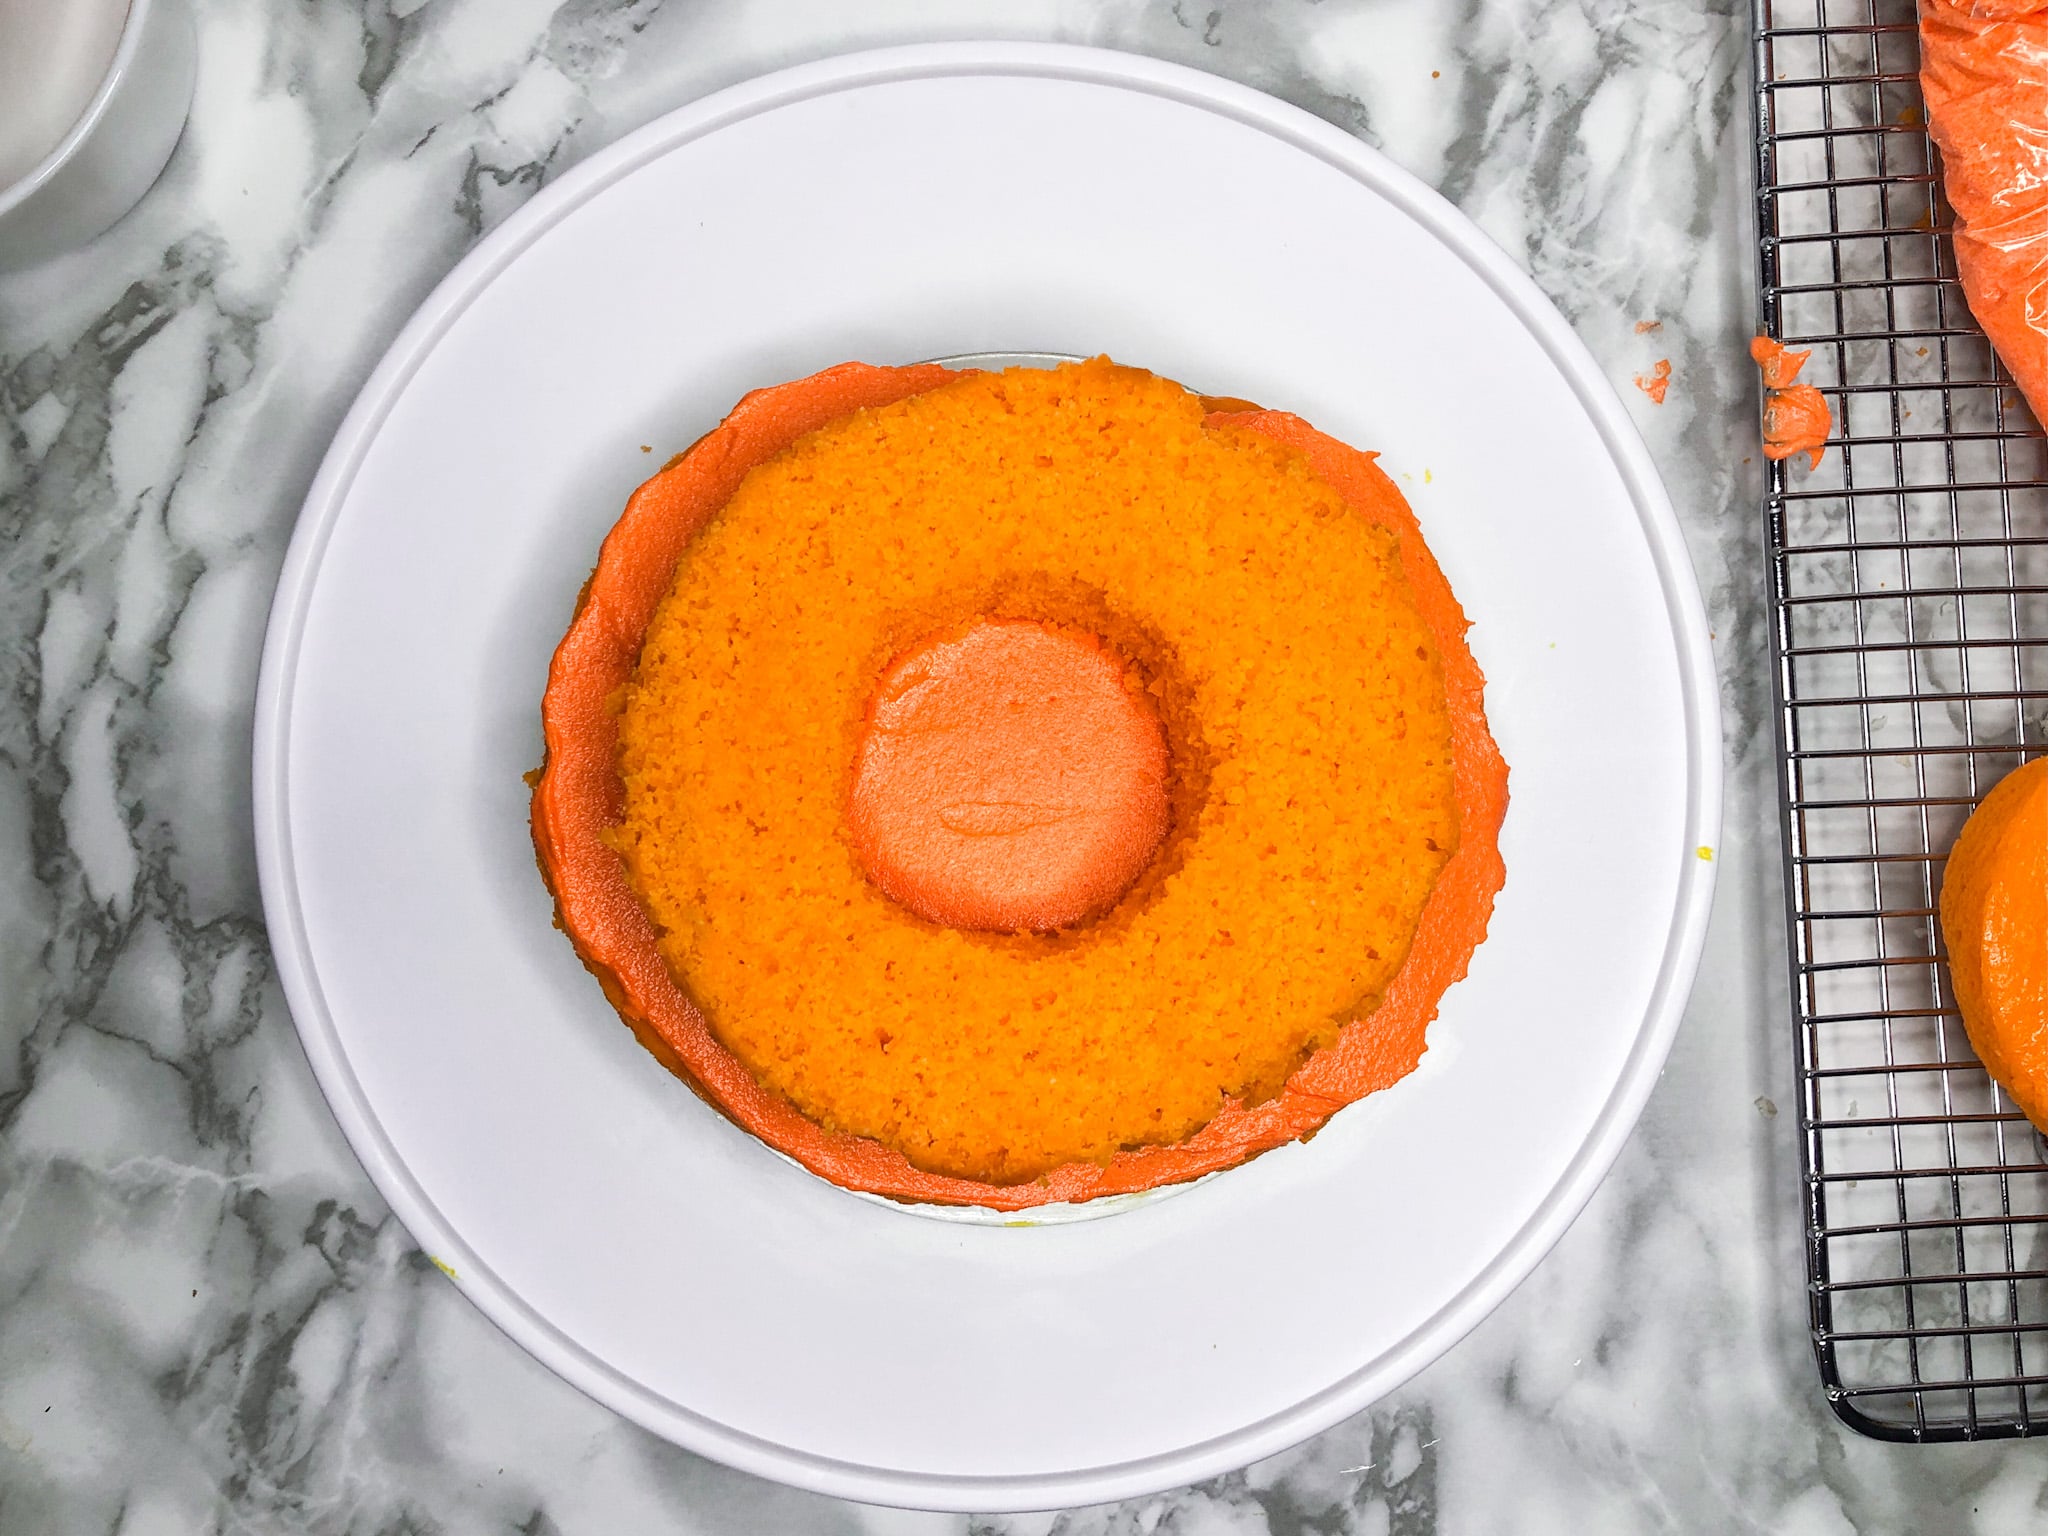
- Stack the 5” orange cake layers on top of the 6” orange cake, and place frosting in between each layers.
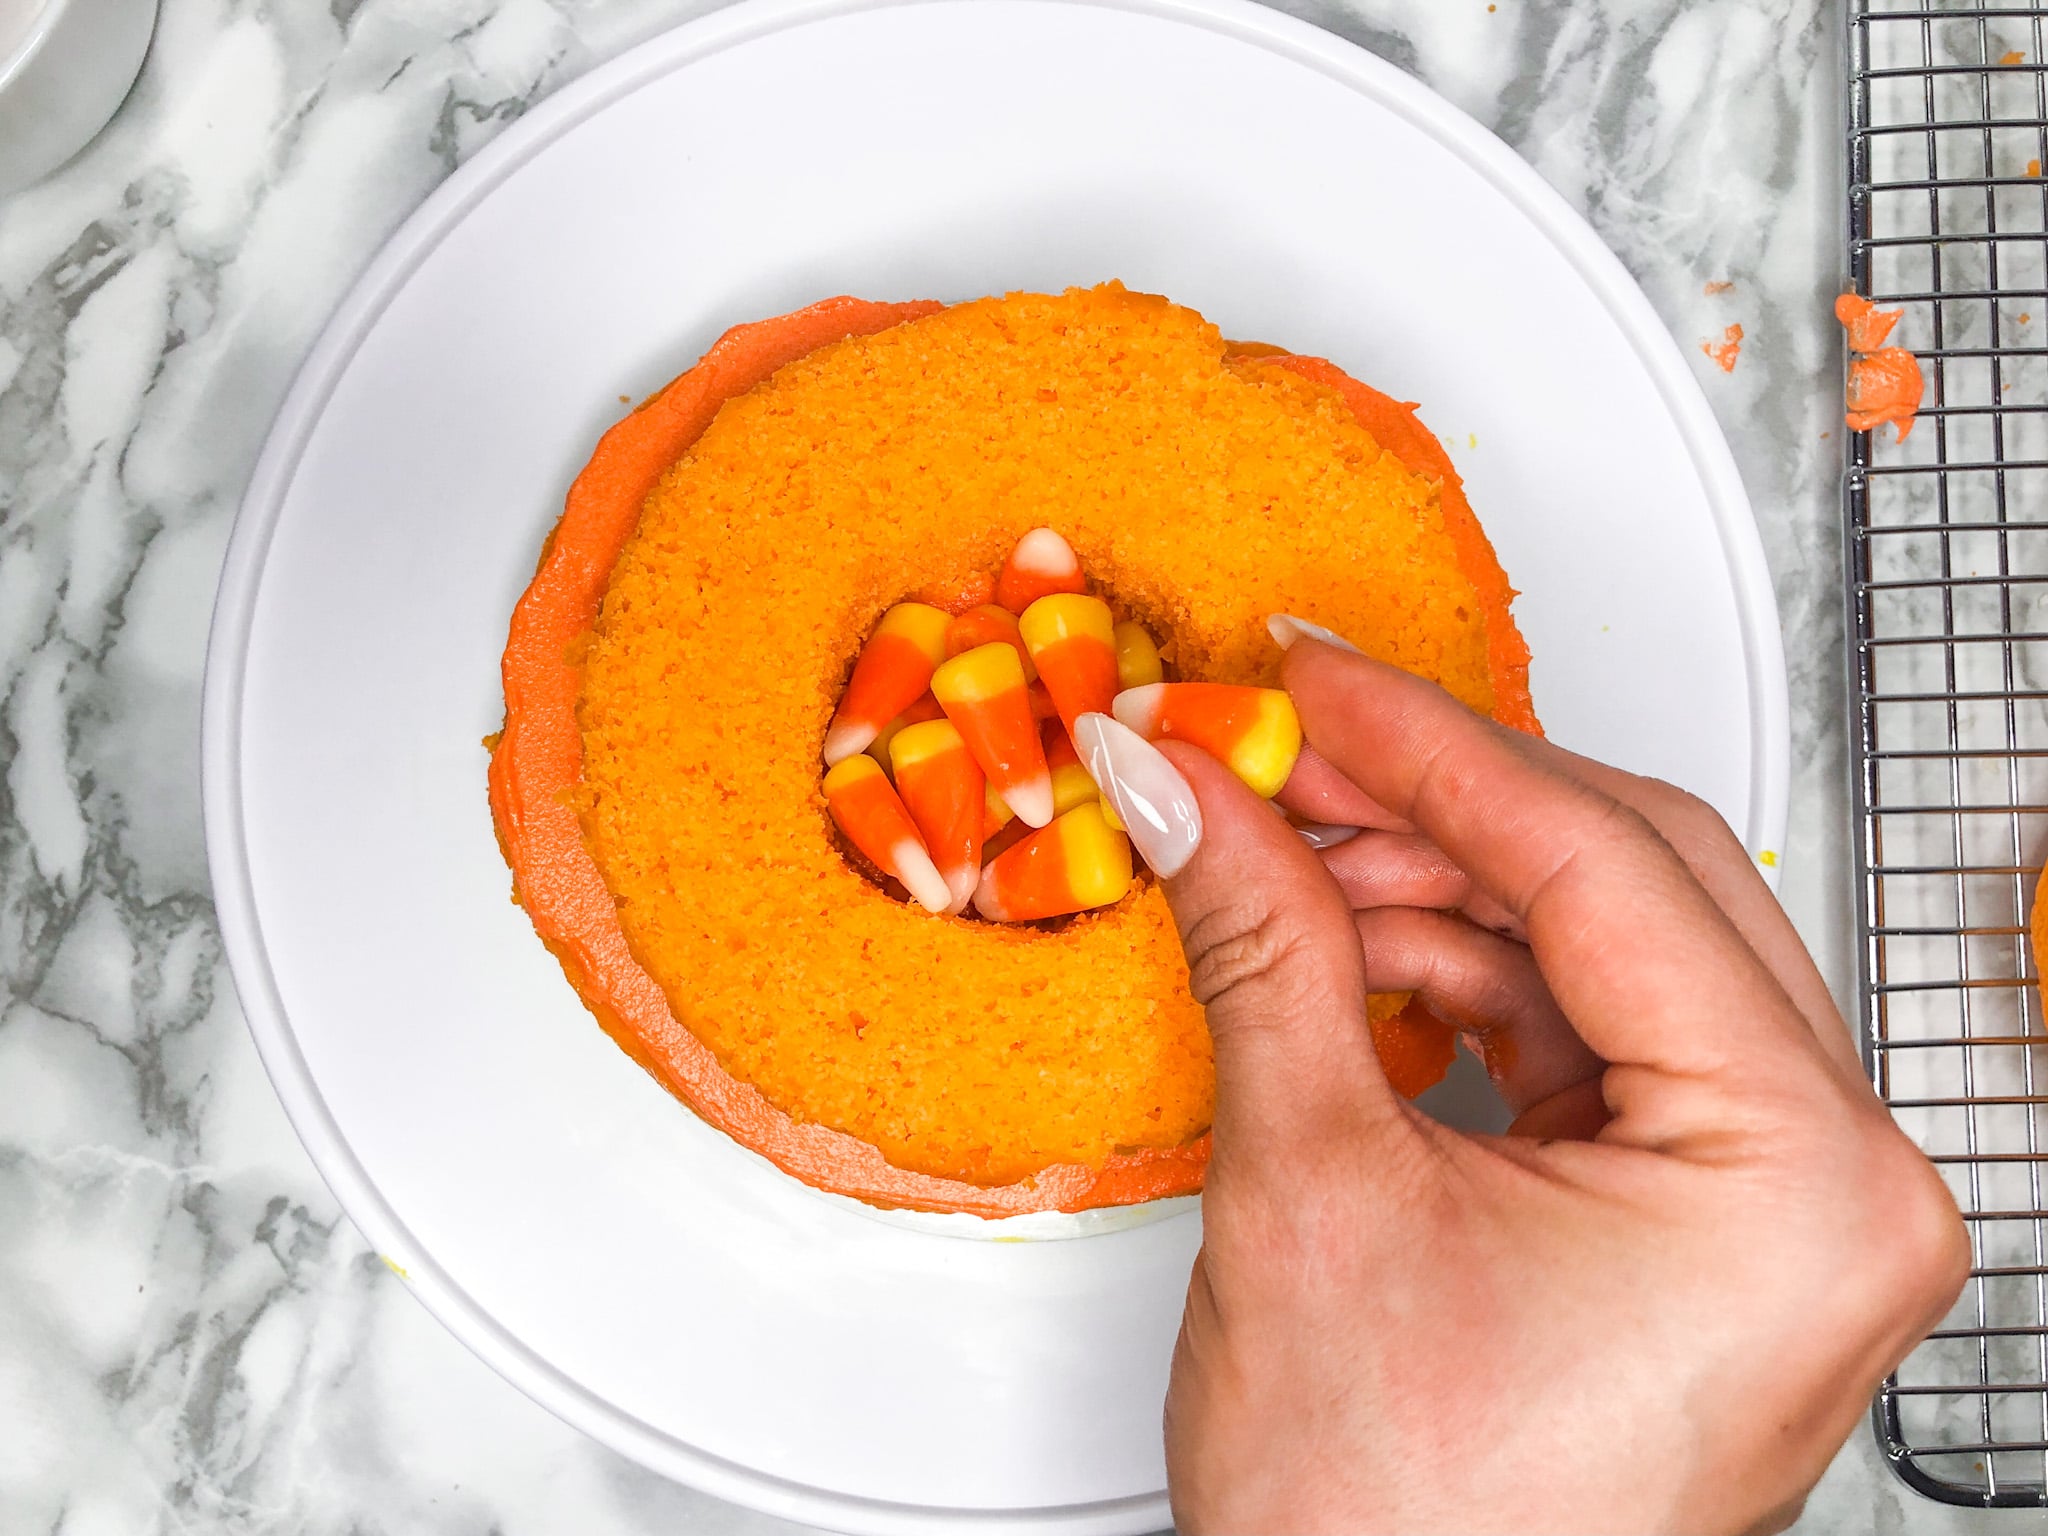
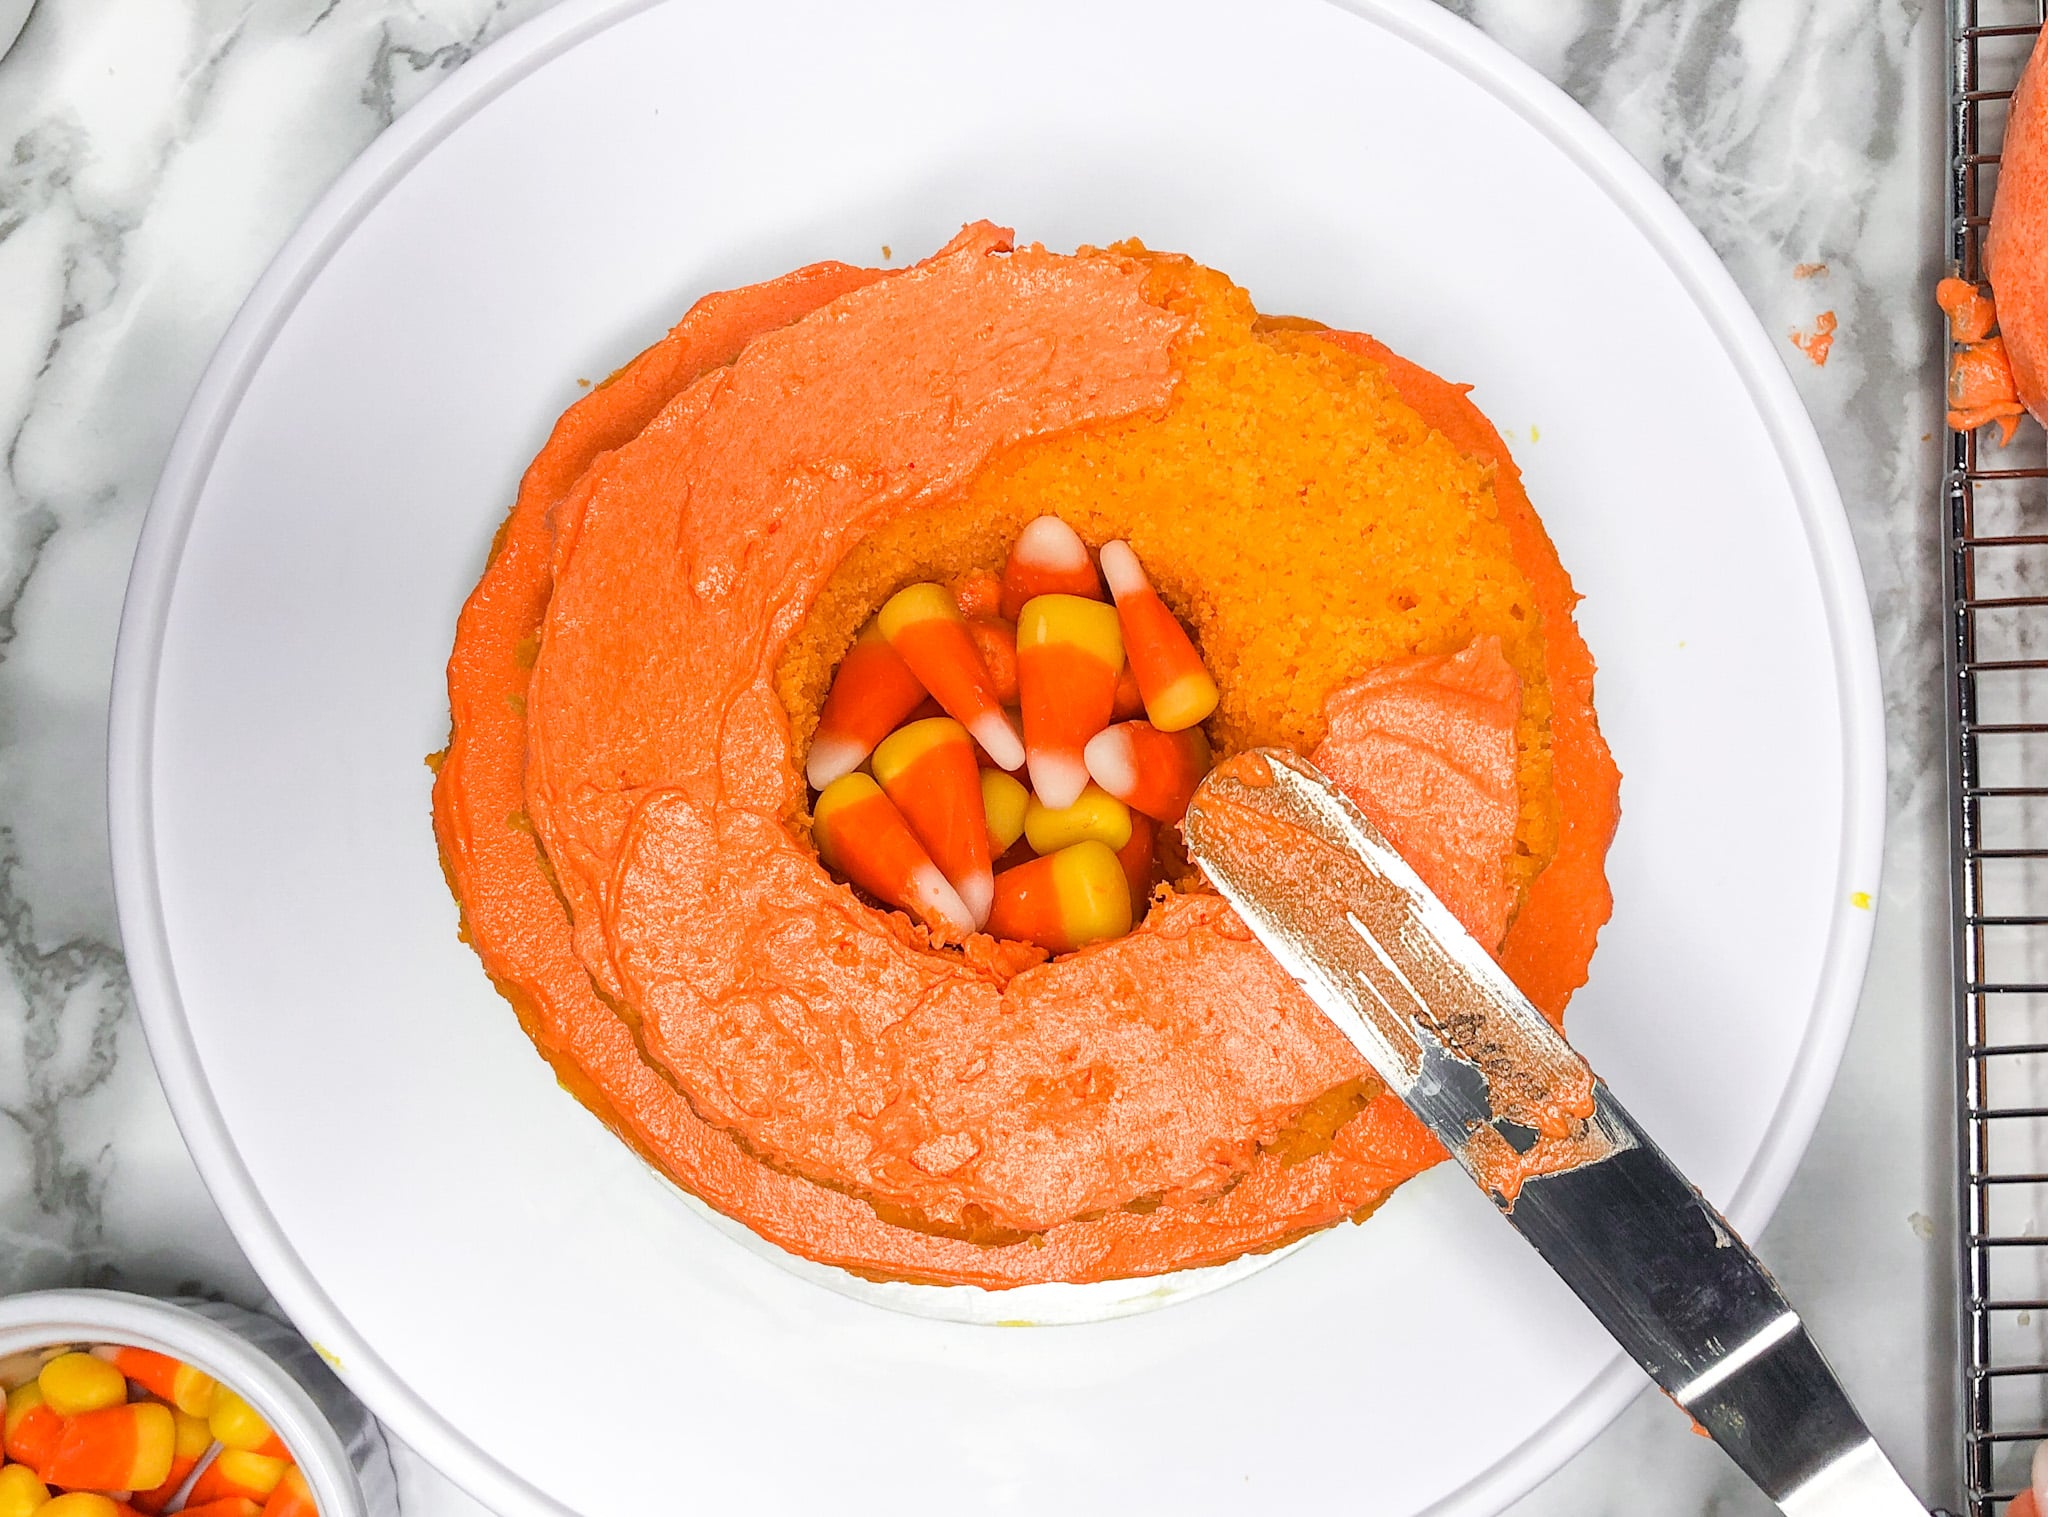
- Fill the center of the 5” cake rounds generously with candy corn.
- Top 5” cake rounds with the remaining 4” orange cakes and one white cupcake.
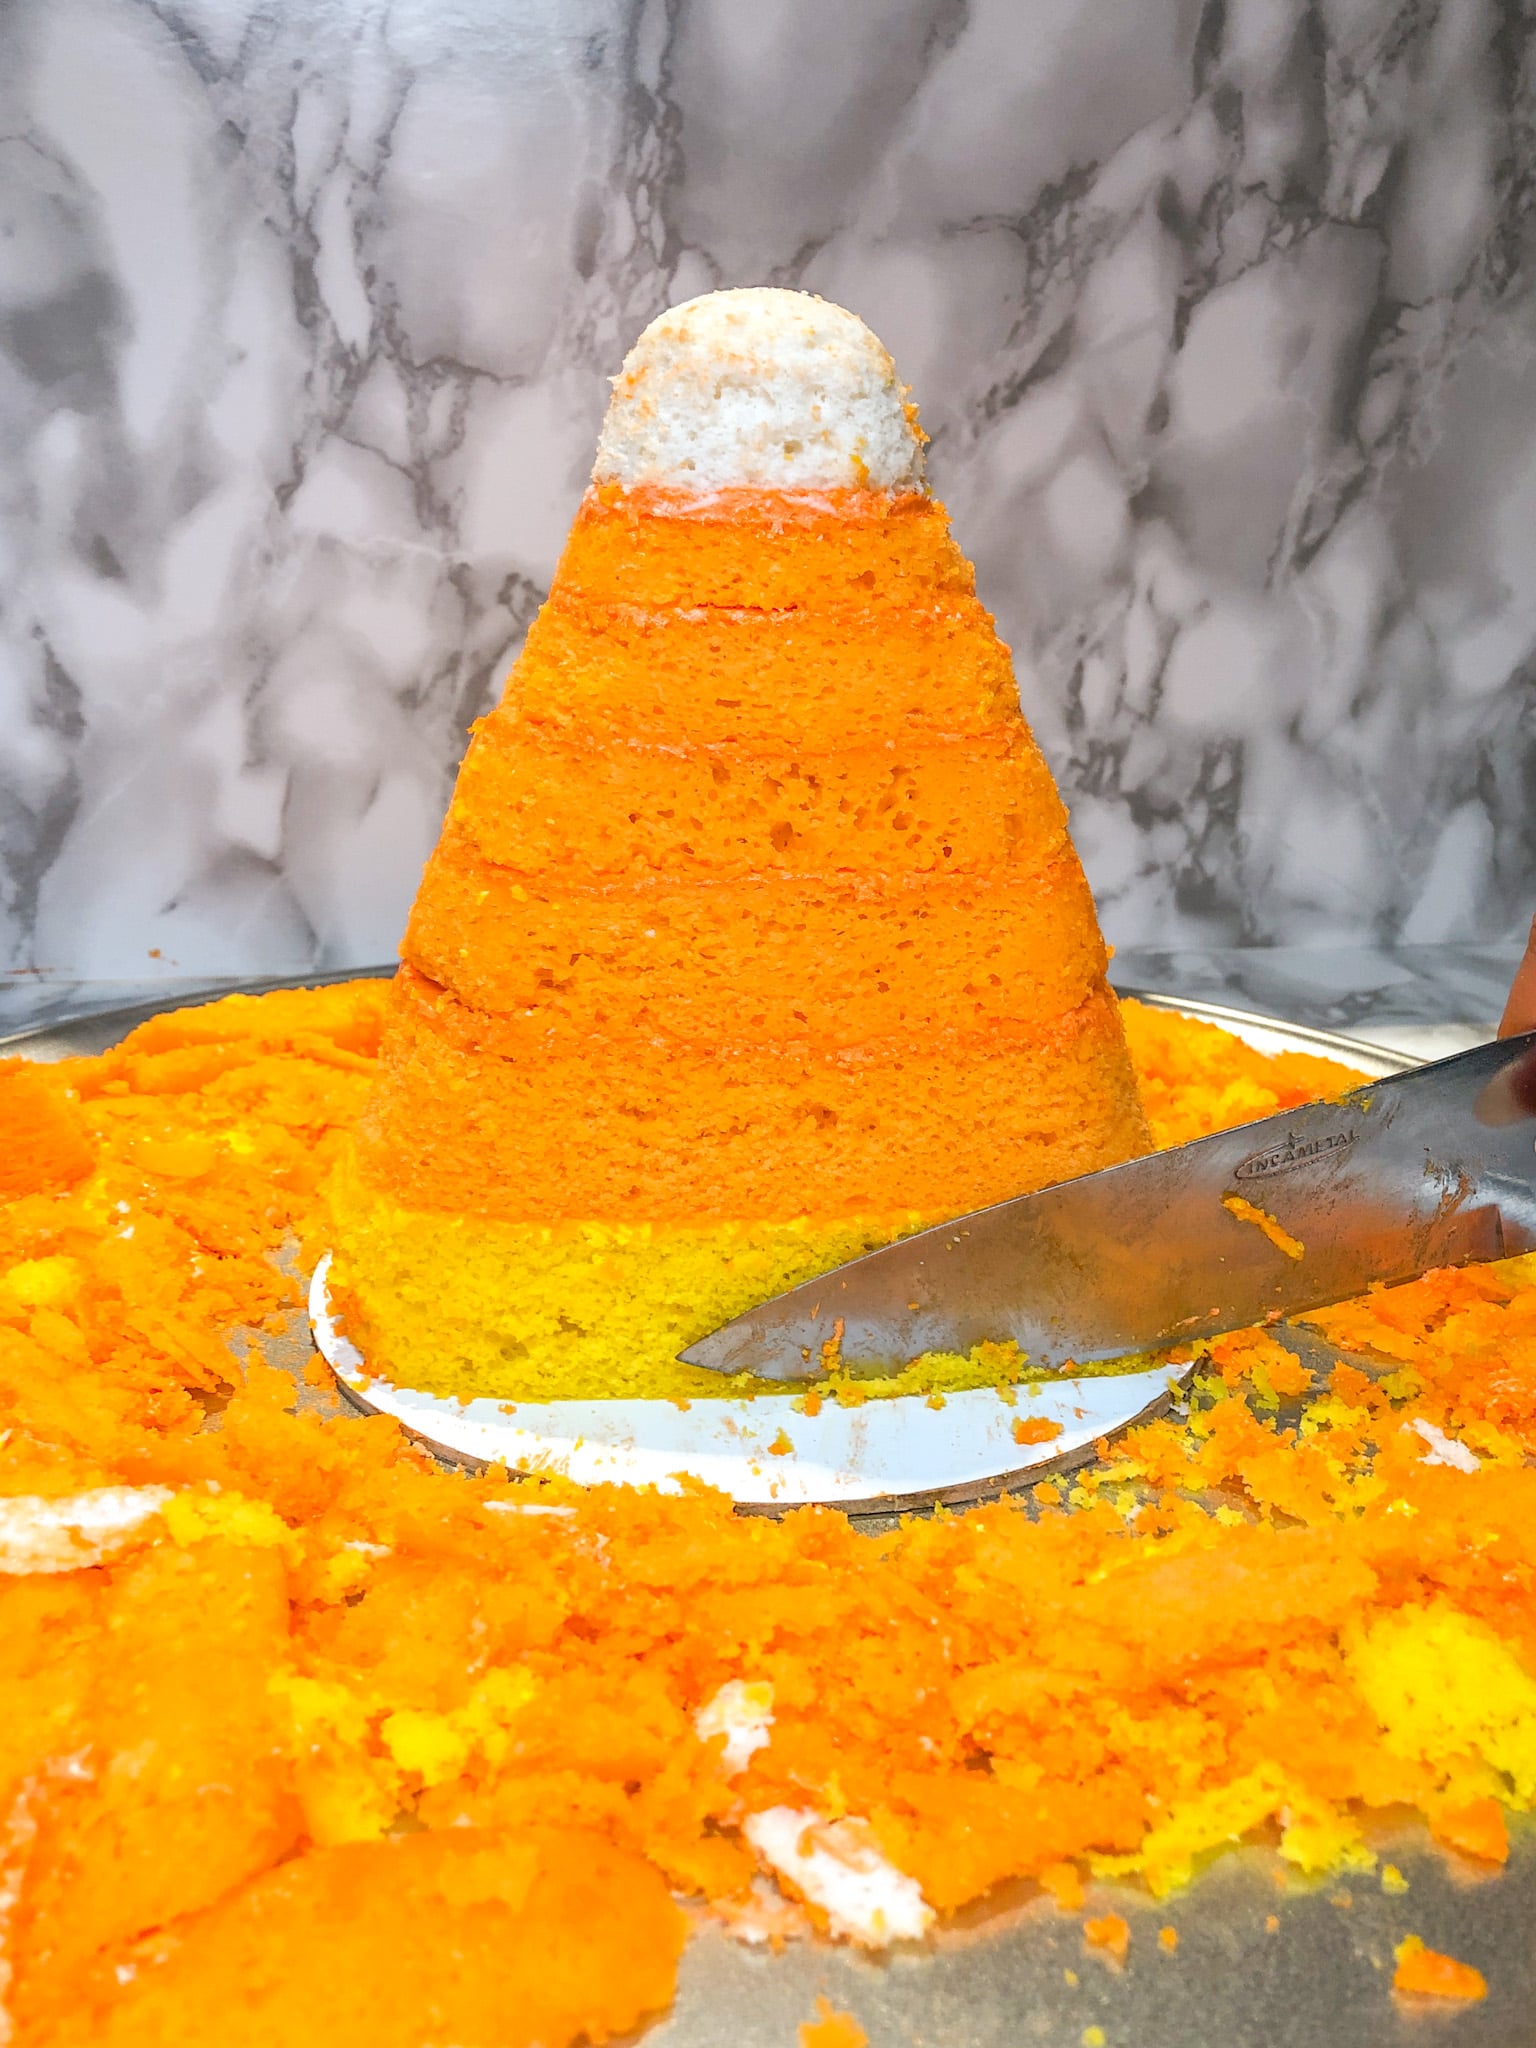
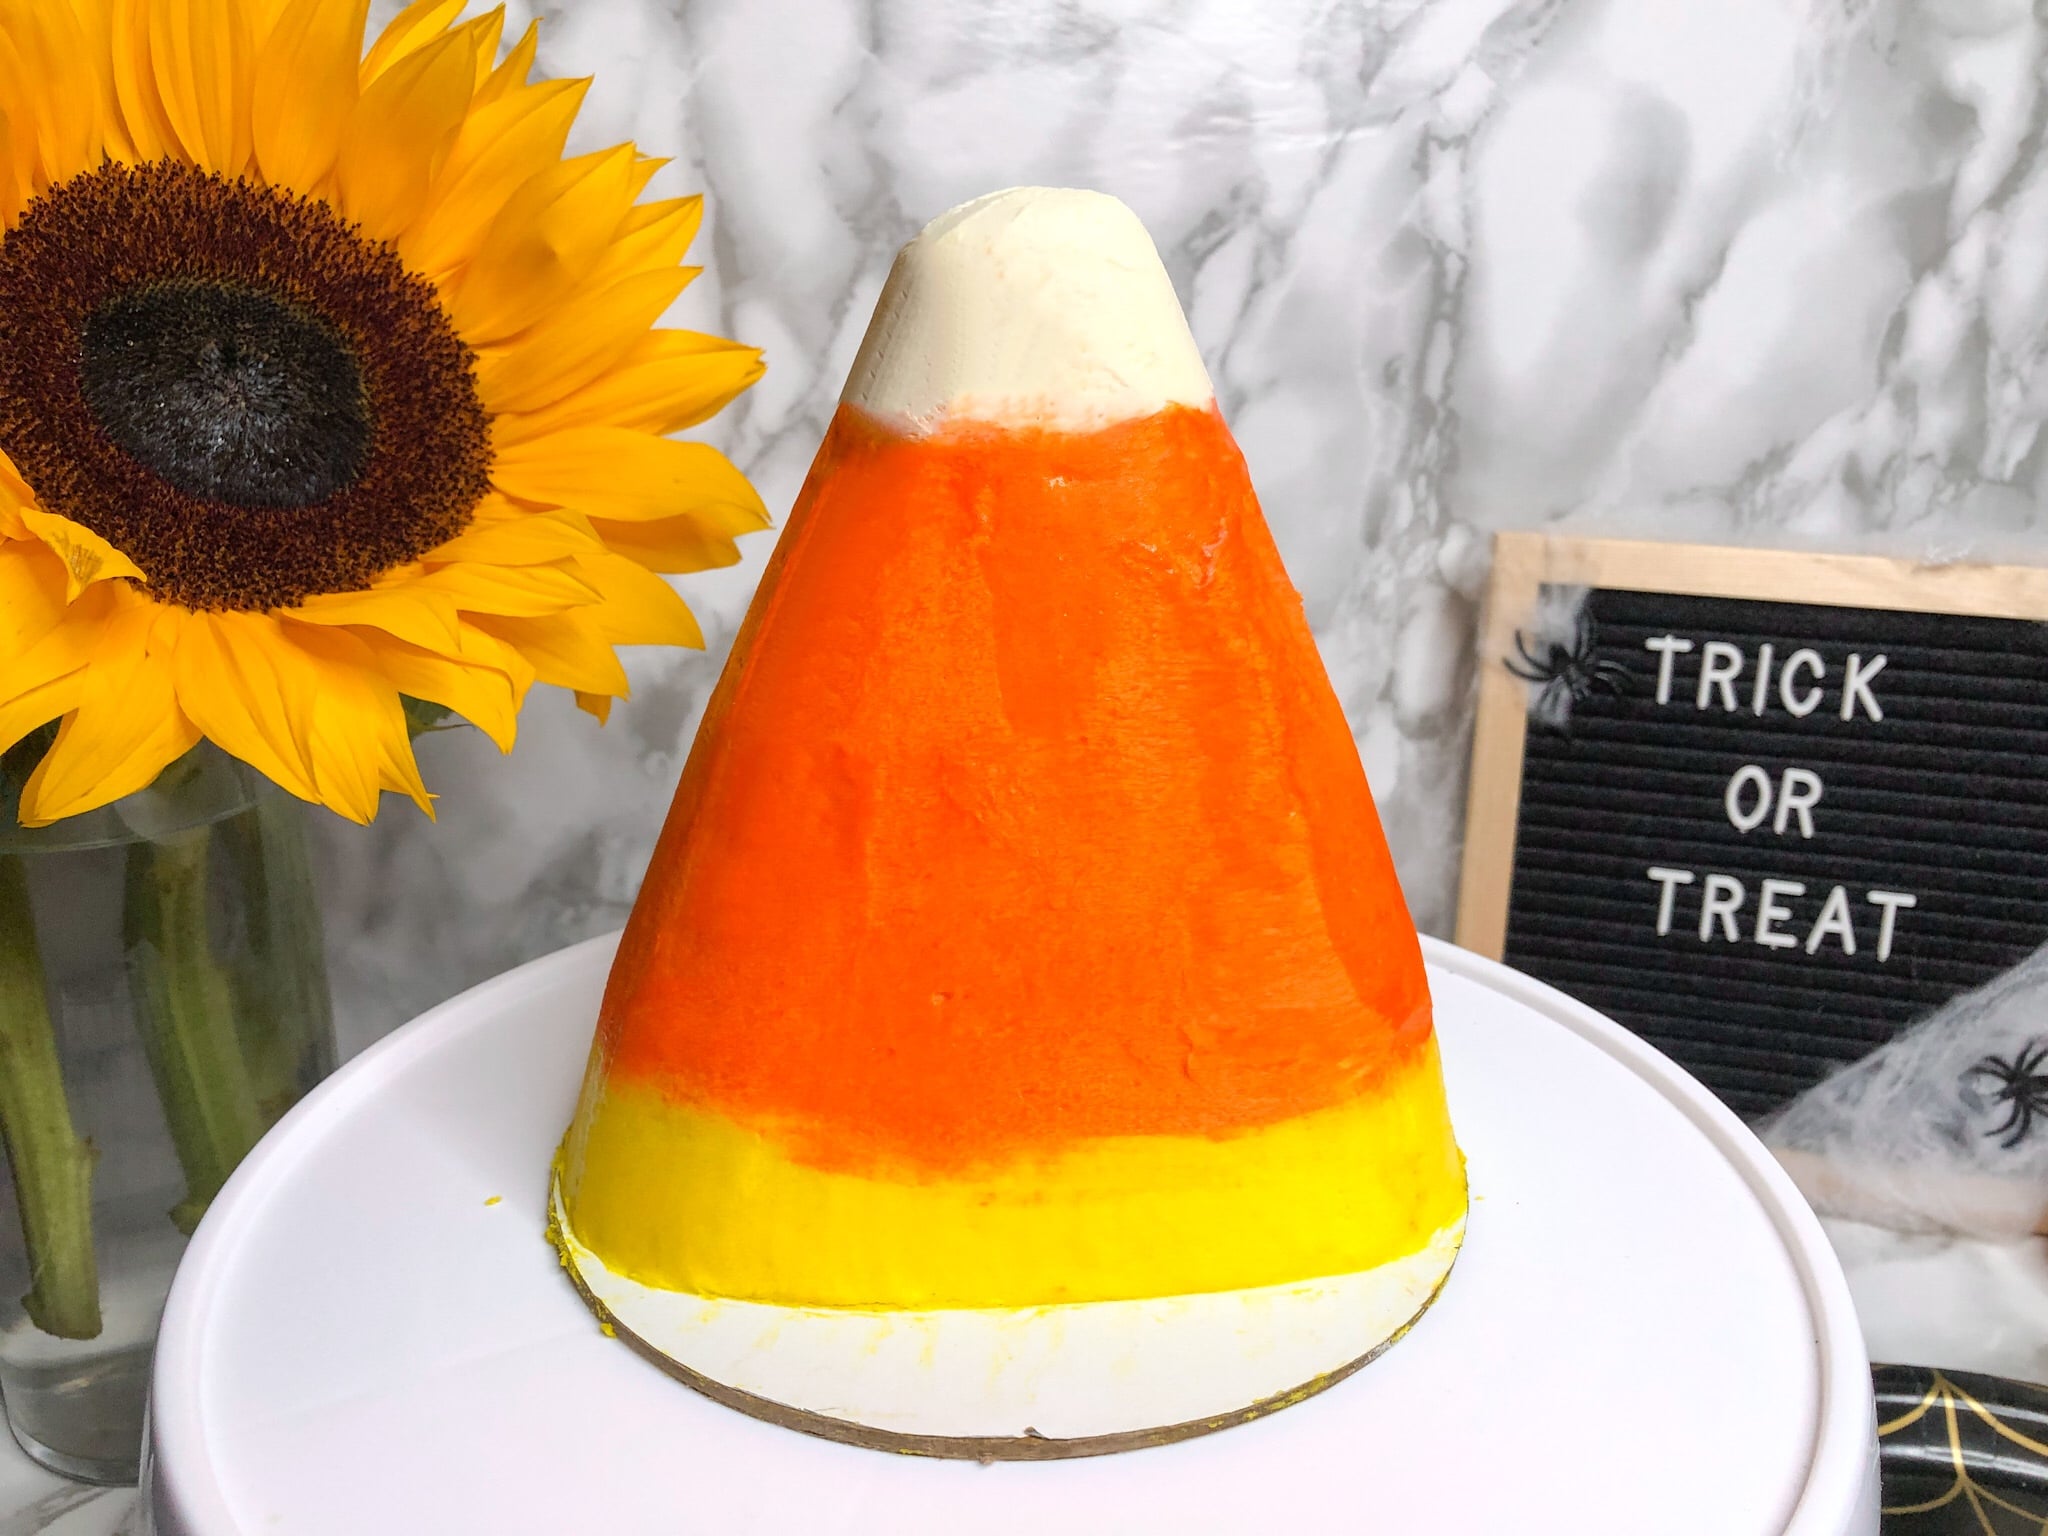
- Carve the cake into the shape of a candy corn kernel.
- Apply a thin layer of frosting around the cake following the color pattern of the tiers, then place in the fridge to cool and harden completely.
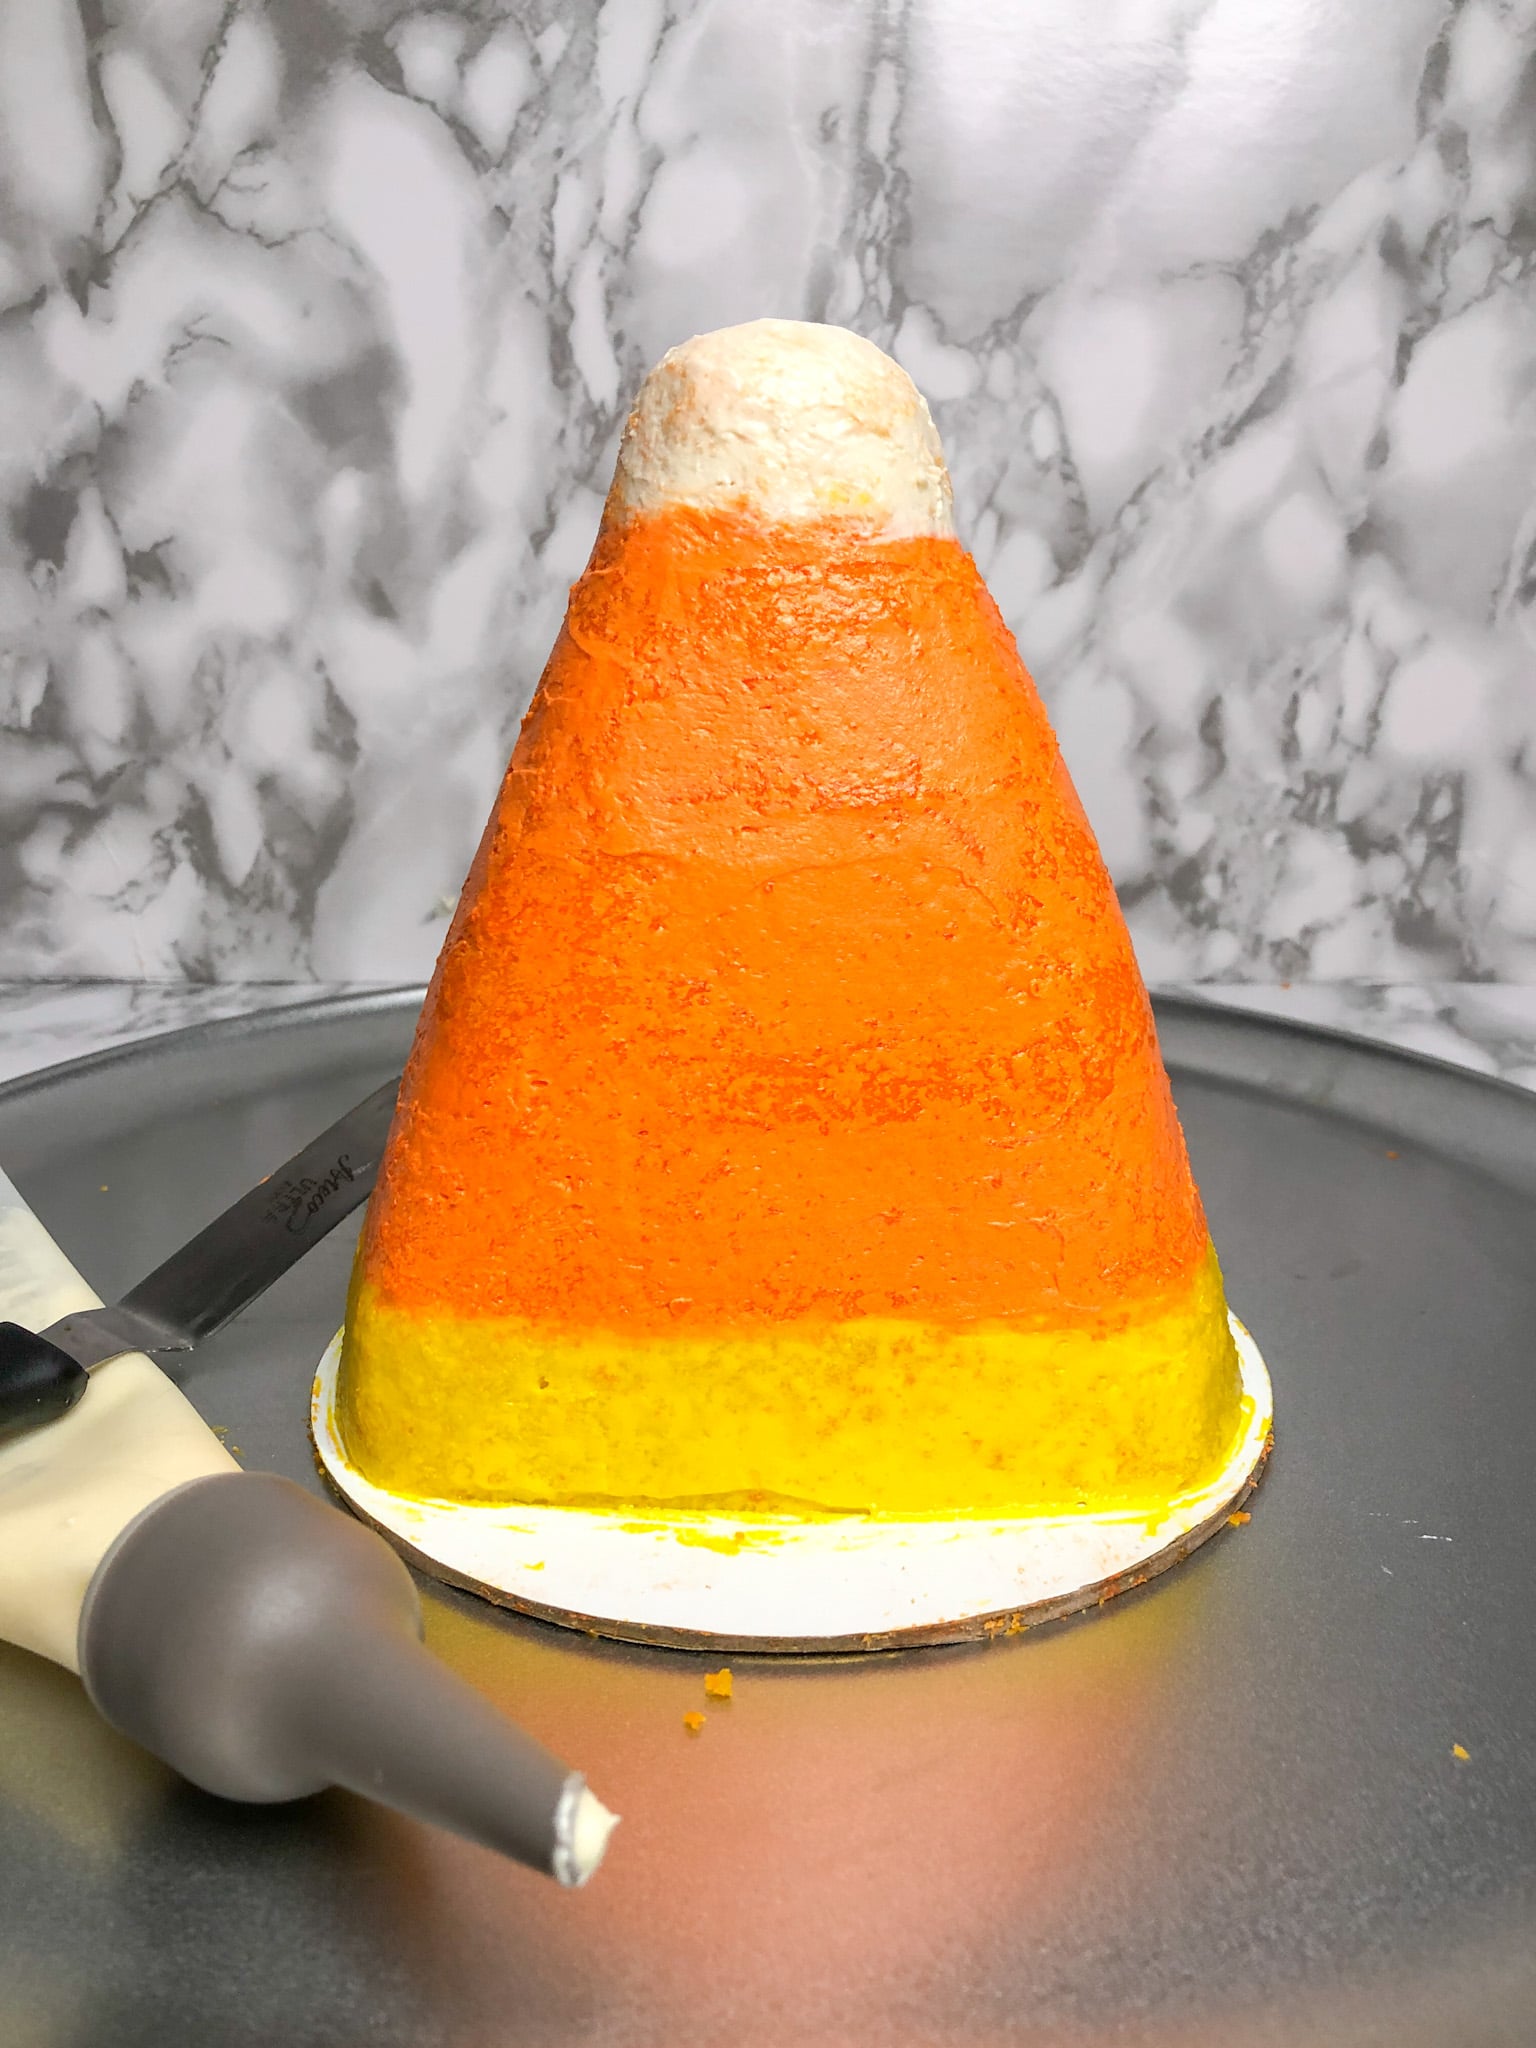
- Once the initial coat has set, apply a thicker layer of yellow and orange buttercream to the outside of the cake and smooth over using a baker’s spatula, making sure not to apply the white buttercream yet.
- Place the cake back in the fridge to harden before adding a final layer of white frosting around the tip.
- Once the tip of the cake has been frosted with white, warm your baker’s spatula in boiling water and run it over any parts of your cake that are uneven.
- Place the cake into the fridge until you're ready to slice in and enjoy!
Information
- Category
- Cake, Desserts
- Yield
- 8 Servings
- Prep Time
- 3 hours
- Cook Time
- 25 minutes
- Total Time
- 3 hours, 24 minutes, 59 seconds


