Andrew Marttila, photographer and foster pet dad, gained so much popularity after releasing his "Cats on Catnip" photo series [1] and book in 2018. Now, two years later, Andrew is back with another book, and this time, he's teaching you how to take photos of your cats that are as amazing as his.
How to Take Awesome Photos of Cats is a fun and instructional guide filled with photography concepts as they specifically pertain to capturing cats. Inside its pages you'll find Andrew's incredible photos, as well as visual examples of how to fix common photography errors and take photos that require little editing. And even though Andrew and his fianceé, Hannah Shaw — better-known as The Kitten Lady [2] — run a kitten foster rescue [3] that gives him access to tons of new cats all the time, you can practice all of these skills at home with your own furballs.
Keep reading to see some of Andrew's photos from the book, to read a few of its excerpts, and to purchase your own copy [4]! And to see more from Andrew, follow along with his Instagram account, @iamthecatphotographer [5].
The Importance of Eye Contact
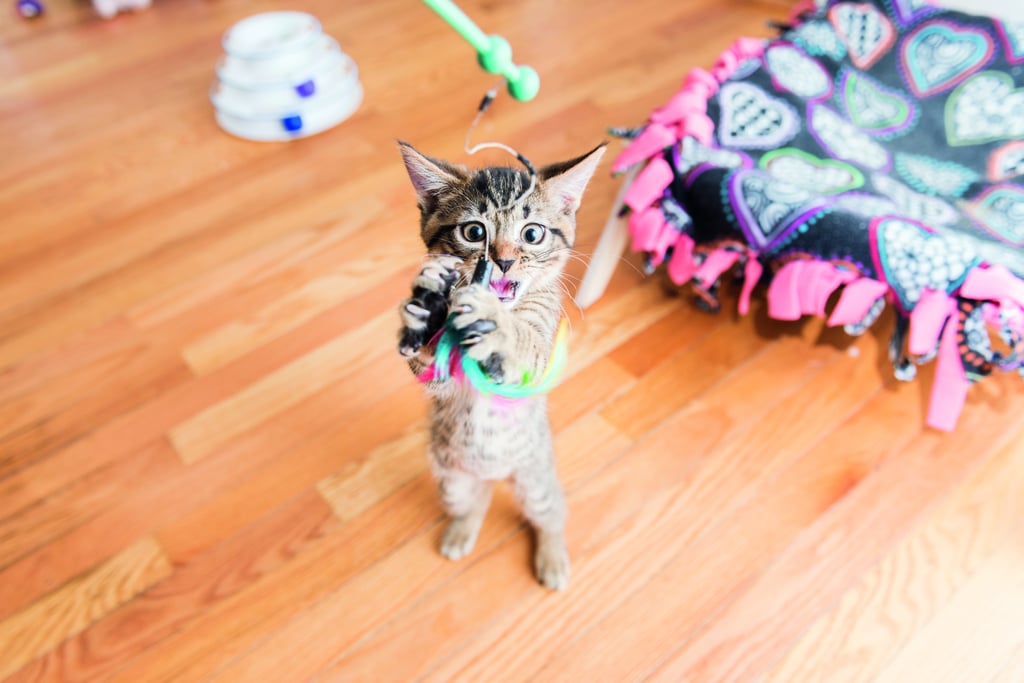
"Perfecting eye contact is incredibly important because a cat looking into the lens helps to create an instant, emotional connection with the audience. Eye contact is evocative. It's what causes butterflies in the stomach or activates the fight-or-flight response. In our case, let's hope it's the former.
With toys, achieving eye contact with the lens is so much easier than you would think. Imagine, if you will, attending a magic show where an adept sleight-of-hand magician is performing. As time goes on, you become fully engrossed by the magician. Unconsciously, your eyes go where they choose to send your attention, even if you're trying to figure out their tricks and uncover their secrets. The next thing you know, the object in their hand you had been carefully following has vanished and appears inside a glass bottle on the other side of the stage. Claps! Bravo! Job well done. That's going to be us. Cat magicians. Well, sort of. We do have a wand after all . . .
Not only are magicians fully aware of how best to grab and maintain their audience's attention, but they know how to divert it at the precise moment they're performing the trick. They possess a skill we want, which is the art of distraction."
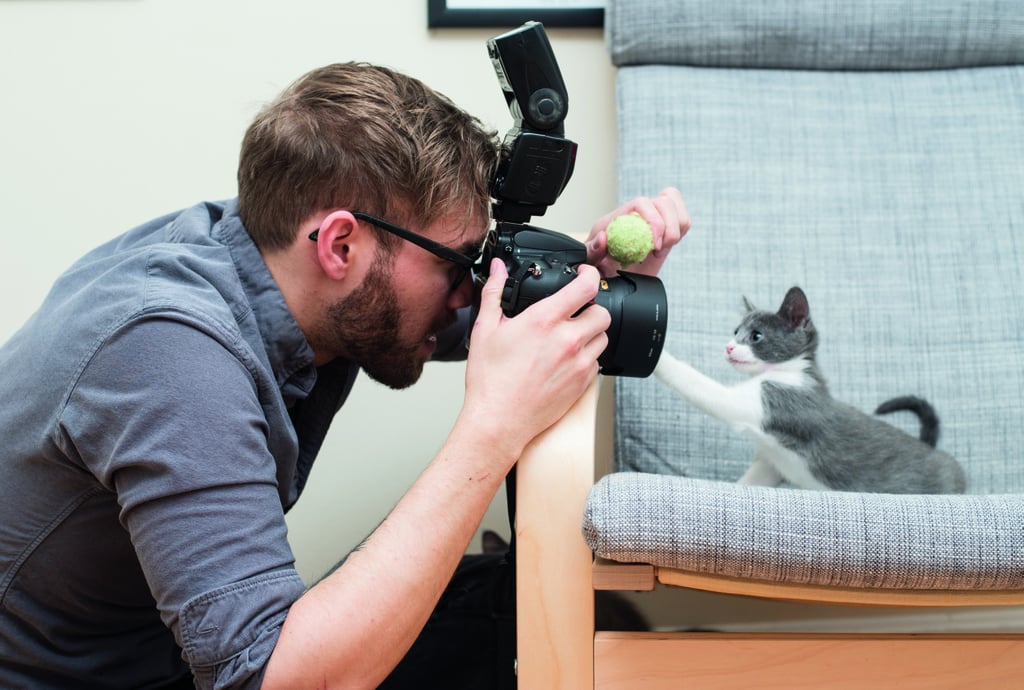
"Start off small with a crinkle ball. Toss it around, crunch it in your free hand, and wave it in front of your cat so that their eyes lock onto it. Continue to shake it around, ensuring that their focus is dialed in carefully on your hand. Now for the "trick" part—while continuing to crunch the ball, place it behind the camera, which is being held by your other hand, ready to fire. As soon as you put the ball behind your camera, you'll notice that your cat continues to look for the toy and follow its sound. They will gaze directly at your device. Now's your chance. Snap the photo!
Rinse/repeat as many times as it takes to get the shot. Much easier than you thought it would be, right? If they're not following it behind the device, you can also place the toy on top of it, as opposed to behind it. You'll get a very similar effect."
Let There Be Light
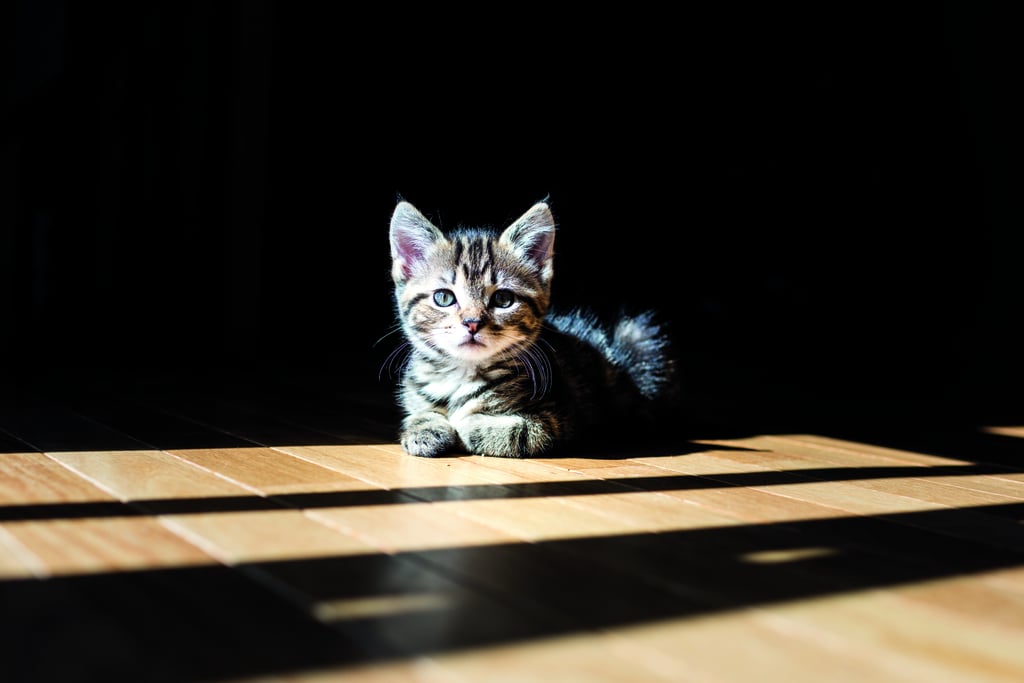
"Some of the most beautiful lighting you'll be able to attain comes from completely natural sunlight. For phones especially, this is often your best opportunity to get true-to-colour, well-illuminated photos without using some form of external lighting. The sun is going to be a surprisingly reliable light source for helping us to take pictures.
Even when I'm using a flash in my shots, I prefer to shoot during the daytime with indirect sunlight pouring through the windows. This gives my camera faster autofocus and it gives me a better opportunity to capture what I'm aiming at accurately. It's the cheapest form of light (woo, nature) and can offer the most flattering, true coloration for your cats. It's also one of the best options for those of us who have black cats.
Natural light is best utilised when it illuminates the subject indirectly, or from the side. If your angle of approach has the sun beating down directly on your subject's face, it'll be harder to balance the rest of the shot. Similarly, if your subject is eclipsing or obscuring any part of the primary light source, the exposure levels will be all over the place. This is most notable if you're shooting at a cat looking out or sunbathing in a window. I'm betting many of you have experienced this scenario before, and the resulting shot can be pretty rough. So here's how we fix it."

"Let's together imagine a typical stand-alone house. We have a couple of rooms, each with a few windows facing out in the cardinal directions. It's 11 a.m. on a clear day. The sun is overhead at a slight angle. If we recall second-grade science, the sun rises in the East and sets in the West, and, for the sake of simplicity, will reach its highest point at noon.
Here's our house. Cute, isn't it? Let's say that we have a cat sitting in the windowsill in the room on the east side, basking in the sun, enjoying herself. There's plenty of light shimmering down on her, and we feel as though it'll be easy to get some perfectly illuminated shots. We point our device at her while she's in the window and snap the shot. Here's what happens:"
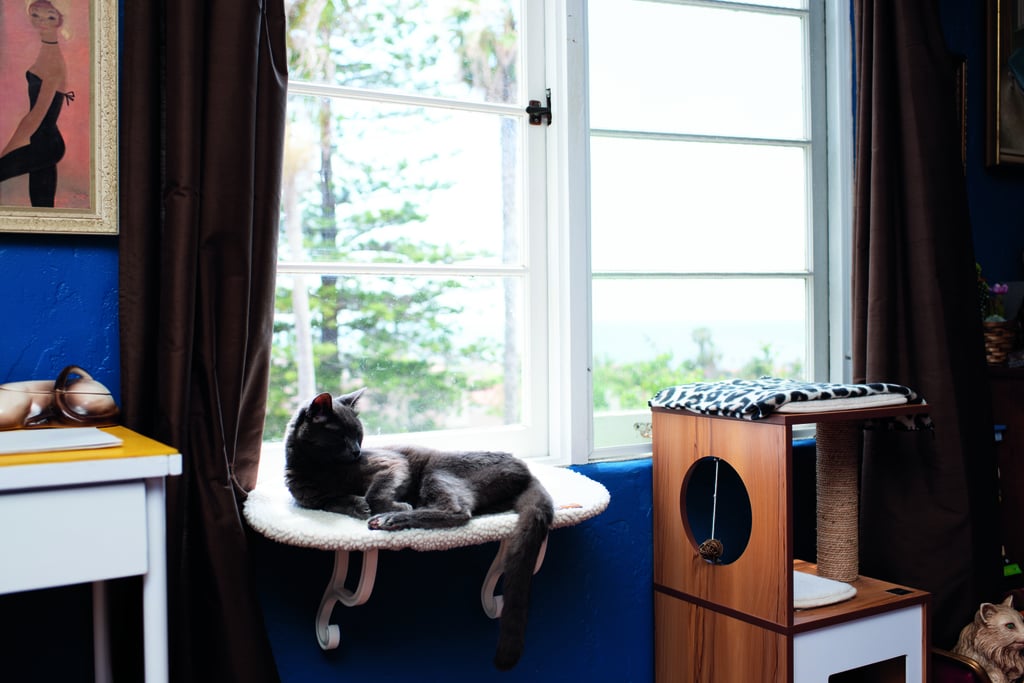
"Wait, what? I thought we were supposed to be taking photos in bright light! This is bogus! You're right, it is bogus. Your device is doing its best to balance the varying levels of exposure, but only knows how to pick one. You can properly expose your cat, leading to extreme highlights coming from the window. Or you can properly expose the outdoors, rendering your cat as a shadowy blob. The easiest thing to do in this instance is to change our angle of approach so that we're not shooting directly into the window and light source, but from the side. A good rule of thumb is never to shoot into a subject that is eclipsing your main light source."
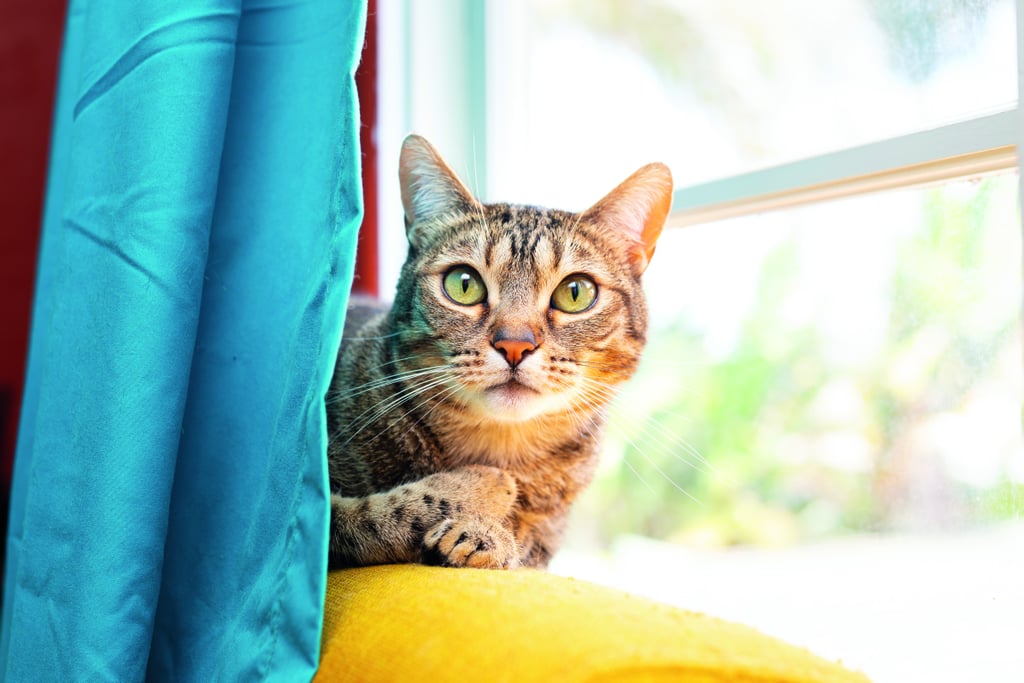
"This will allow for an even exposure throughout the scene, and you won't have to decide which area to use as the anchor point for proper exposure. Another optimal scenario, given the same setting, is if Fluffy chooses to be in a different part of the house. She hopped down from the windowsill and is currently stretching out in the middle of the floor of the eastmost room. There's some light pouring in from the east-facing window. We could take this shot a million different ways, but how we position ourselves relative to the light source will make all the difference. As long as we shoot so that the sunlight is not being blocked by our subject or ourselves, we can really harness the power of the sun!"
Balance
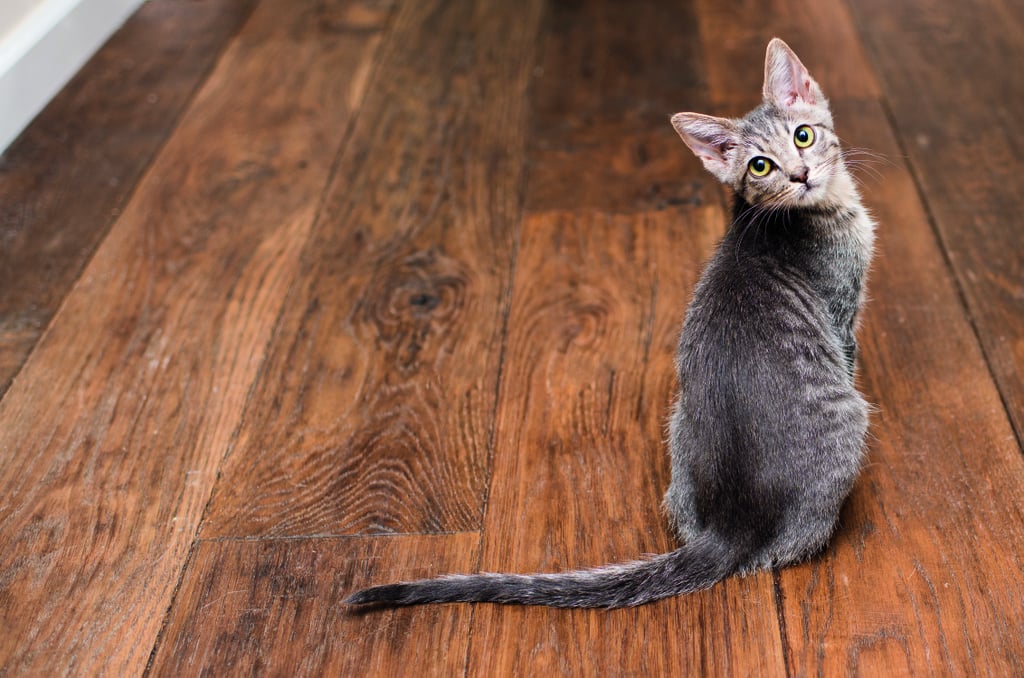
"There's a lot that could be tucked into this little concept, but, for our purposes, we're going to think about balance in terms of an image's distribution of its visual weight. Very broadly speaking, when I look at a shot, I tend to imagine the individual parts of the overall composition as having a corresponding weight. If there's something in the foreground, it has more weight than something in the background. A larger object will have more weight than a smaller object.
In most scenarios, the more space something takes up in the frame, the more weight it has attached to it. The goal, then, is twofold. Either we want to take a shot that distributes the weight evenly across the entire photo or we can choose to have equal parts of weight and absence. The absence of something in a frame, or the area without a subject, is what I referred to earlier as "negative space." For instance, here's a photo that is not equally distributed and heavily weighted on one side [see above].
If we were to cut this image diagonally, we could see that the cat is taking up almost a perfect half of the bottom right. We have a nearly equal amount of negative and positive space. I don't often go for shots like this, but they can be compelling because of their distinctive composition.
What I usually aim for is to have a much more equal distribution of elements within the photo, with a similar amount of positive and negative space. Ideally, I do my best to get the cat's main features in the centre of the frame and their bodies and subsequent negative space around them take up the rest in equal proportions. Since we're starting out as burgeoning cat photographers, I recommend keeping your subject, or whatever feature or object you're emphasising, in the centre of the frame as much as possible.
On most devices, there's a little coloured box in the middle of the screen. This is the area where your equipment will focus by default, assuming that you haven't changed something in your focus settings. This might seem like too much handholding, but we're going to walk through how to properly compose a scene step-by-step.
- Pull out your device. While holding it and looking into the viewfinder or screen, guide the device's focus box to where the ca is, and aim at their face.
- With their face still being the centre point, move toward or away from them until the rest of their body fills the frame.
- Now, centre their entire body in the grid of your viewfinder or screen. Do your best to keep an equal distance from their bodies and the negative space or surroundings on all sides.
- When you think there is roughly equal space on all four sides of them (up, down, left, right), snap the photo.
You should get something like this:"
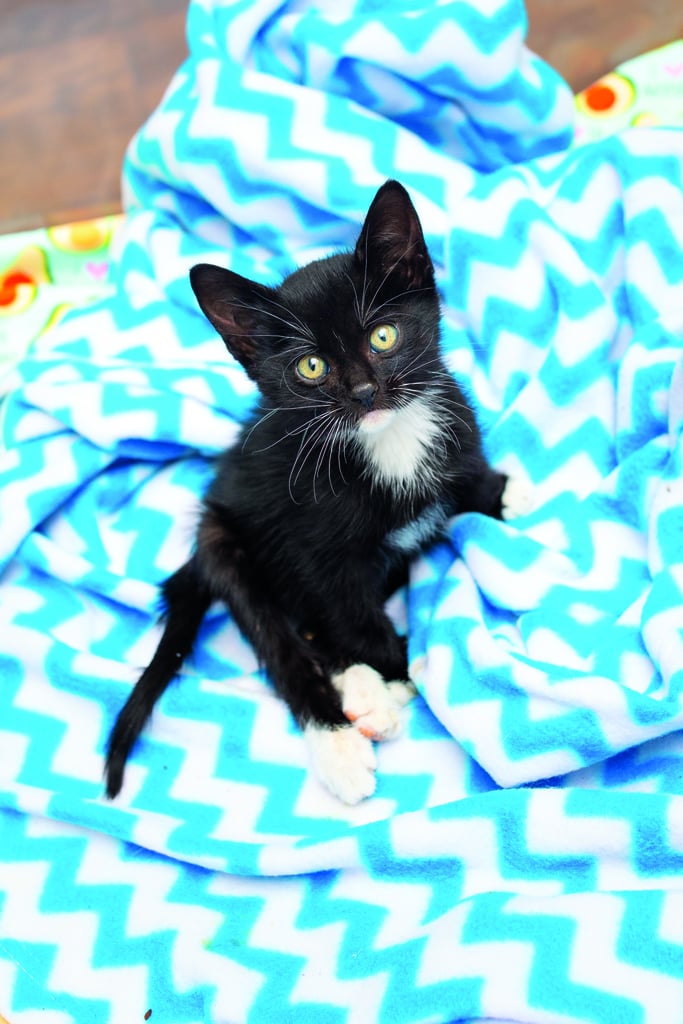
"It should go without saying, but it is much easier to reposition your device than it is to reposition your cat. Try to follow your cat around for a minute or two like this without taking any photos, just using the focus box as the anchor point and keeping them in the centre of the frame. If they're asleep or stationary, this should be a relatively easy task.
The goal of practicing continued focus on the cat is for you to become more inclined to place them as the centrepiece of the shot. As time goes on, feel free to experiment with weighting the shot with the cat in different quadrants or omitting parts of their body if you've zoomed in super close. You can get some really lovely shots by balancing a photo in unusual ways!"